Here’s a question that recently came out of the GMass Facebook community. (And hey, you should definitely join the group, we’re having some great email strategy and GMass discussions over there.)
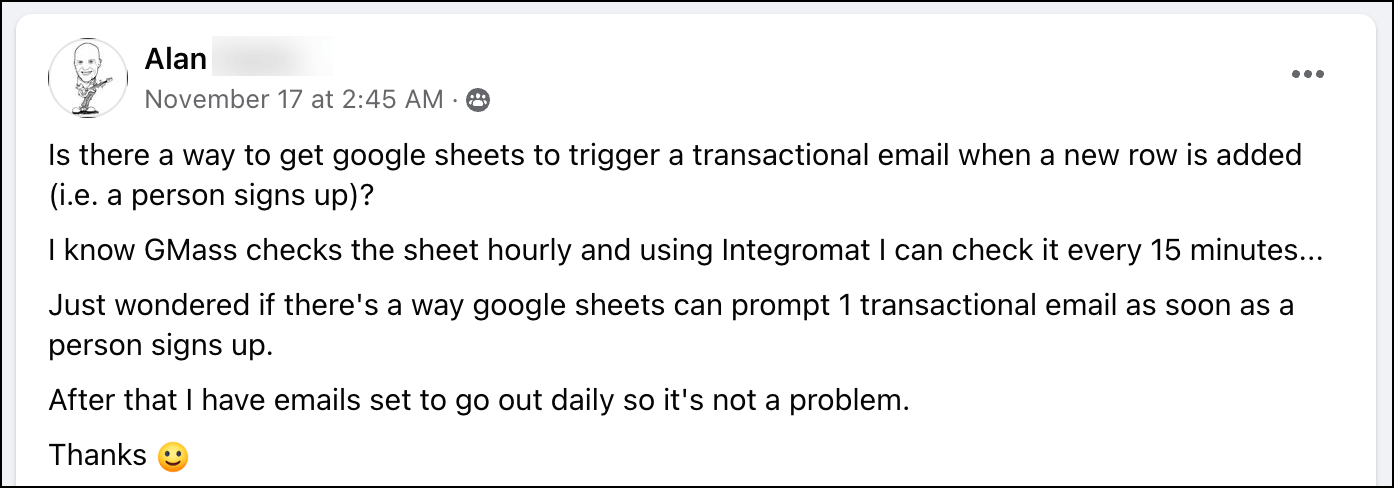
Alan asked: “Is there a way to get Google Sheets to trigger a transactional email when a new row is added (i.e. a person signs up)?”
GMass can check the sheet hourly for new rows with the recurring campaign feature. So if you want to get an email to someone the moment they sign up, odds say there will be a longer delay… in fact, they might be waiting up to 59 minutes.
You could use the GMass Zapier integration to trigger a transactional email to new rows. But even on the more expensive paid plans there’s still up to a two-minute delay. Plus, there’s a limit on how many times you can use the action per month.
So I put together a Google Apps Script that you can use to automatically fire off an instant transactional email whenever you add a new row (containing a new contact) to a Google Sheet.
(By the way, this would pair well with our methods for how to get subscriber emails from a web form into Google Sheets.)
Here’s a step-by-step guide to set up a script to send instant, automated transactional emails for your Google Sheet.
Triggered Transactional Emails: Before We Begin
A few quick notes before we begin:
- Google Apps Scripts involve JavaScript code. Fortunately, in this article, you’ll find a step-by-step walkthrough that should just involve cutting and pasting. However, if you want to modify this script in any way, that will require some comfort with coding.
- I’m a writer by trade who’s self-taught some coding over the years. I’m not a developer. So while this code works and it’s safe, I’m sure it’s not as efficient as it potentially could be. The good news? I hear rumors that writing inefficient, lengthy code is now good for your career.
Let’s get rolling.
Google Apps Script for Sending Transactional Emails to New Rows in a Google Sheet (via the GMass API)
Step 1: Create your Google Sheet
The first thing we need is a Google Sheet to collect your email addresses. (And to send these transactional emails to those addresses.)
Create a new Google Sheet.
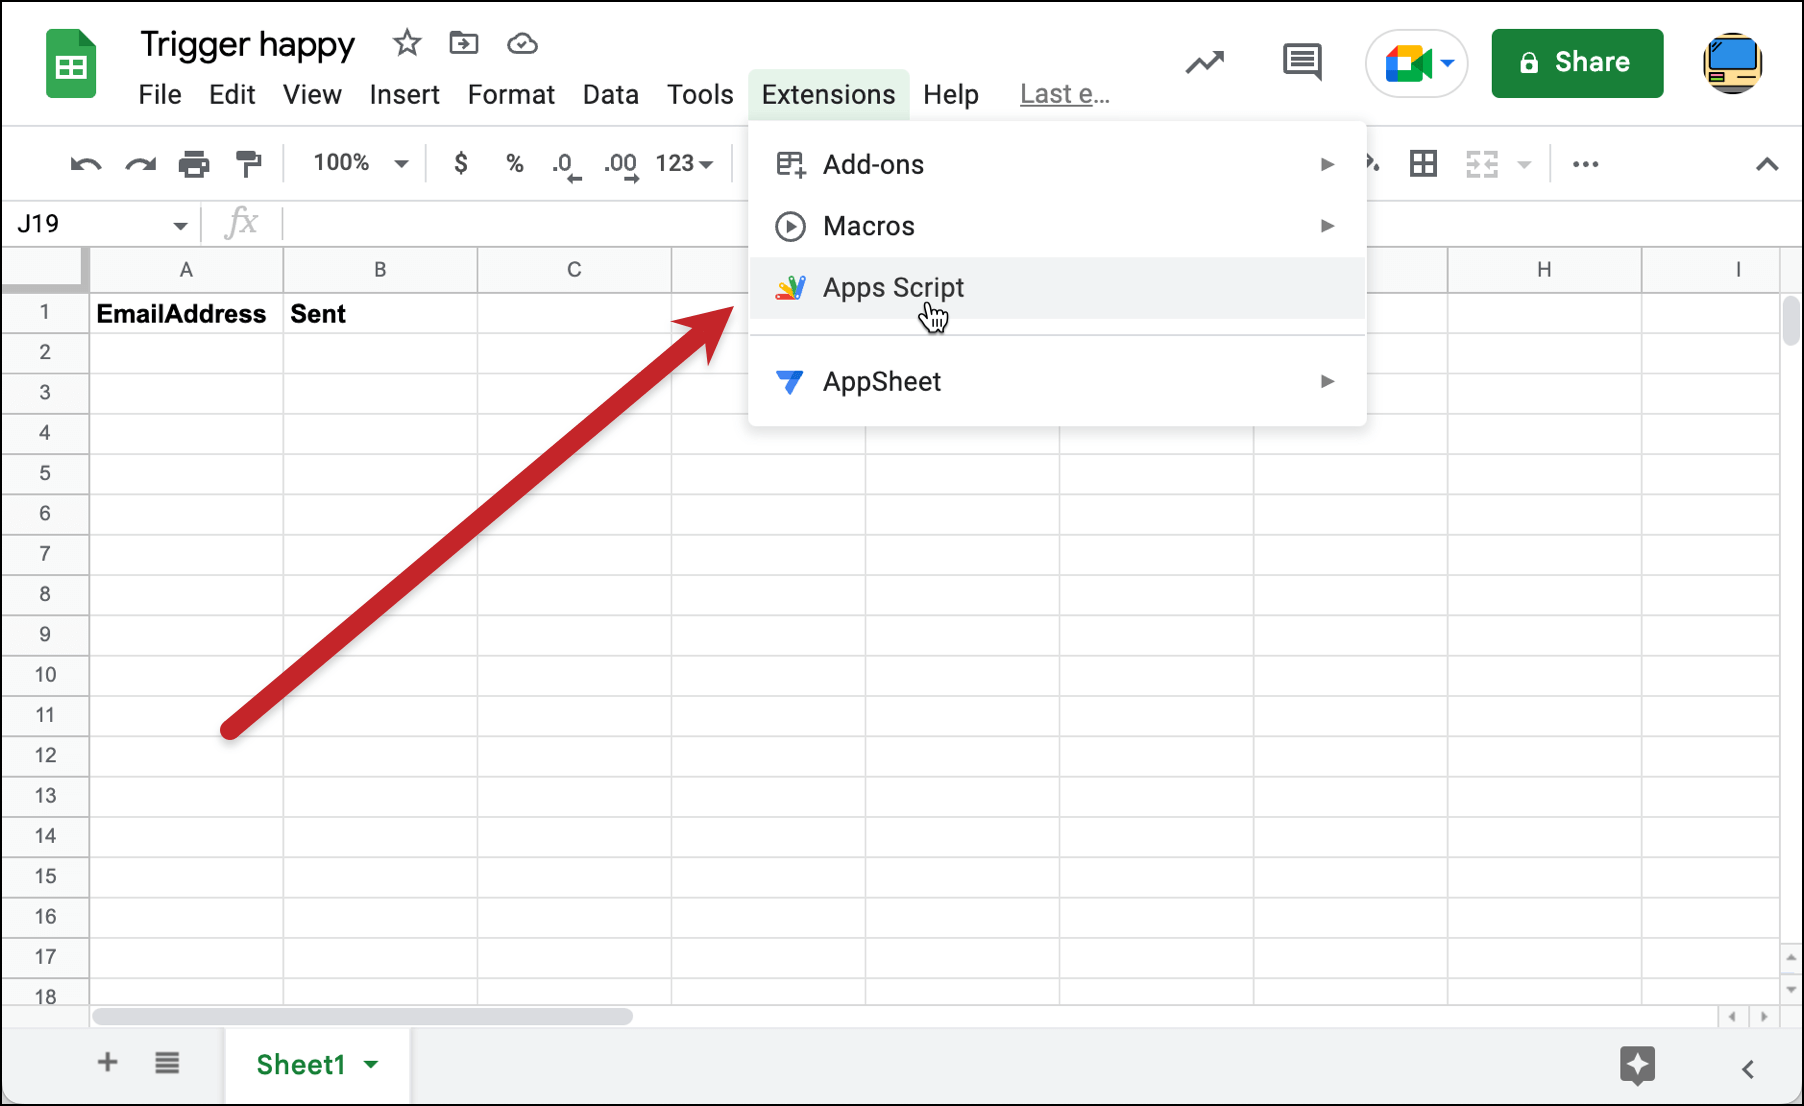
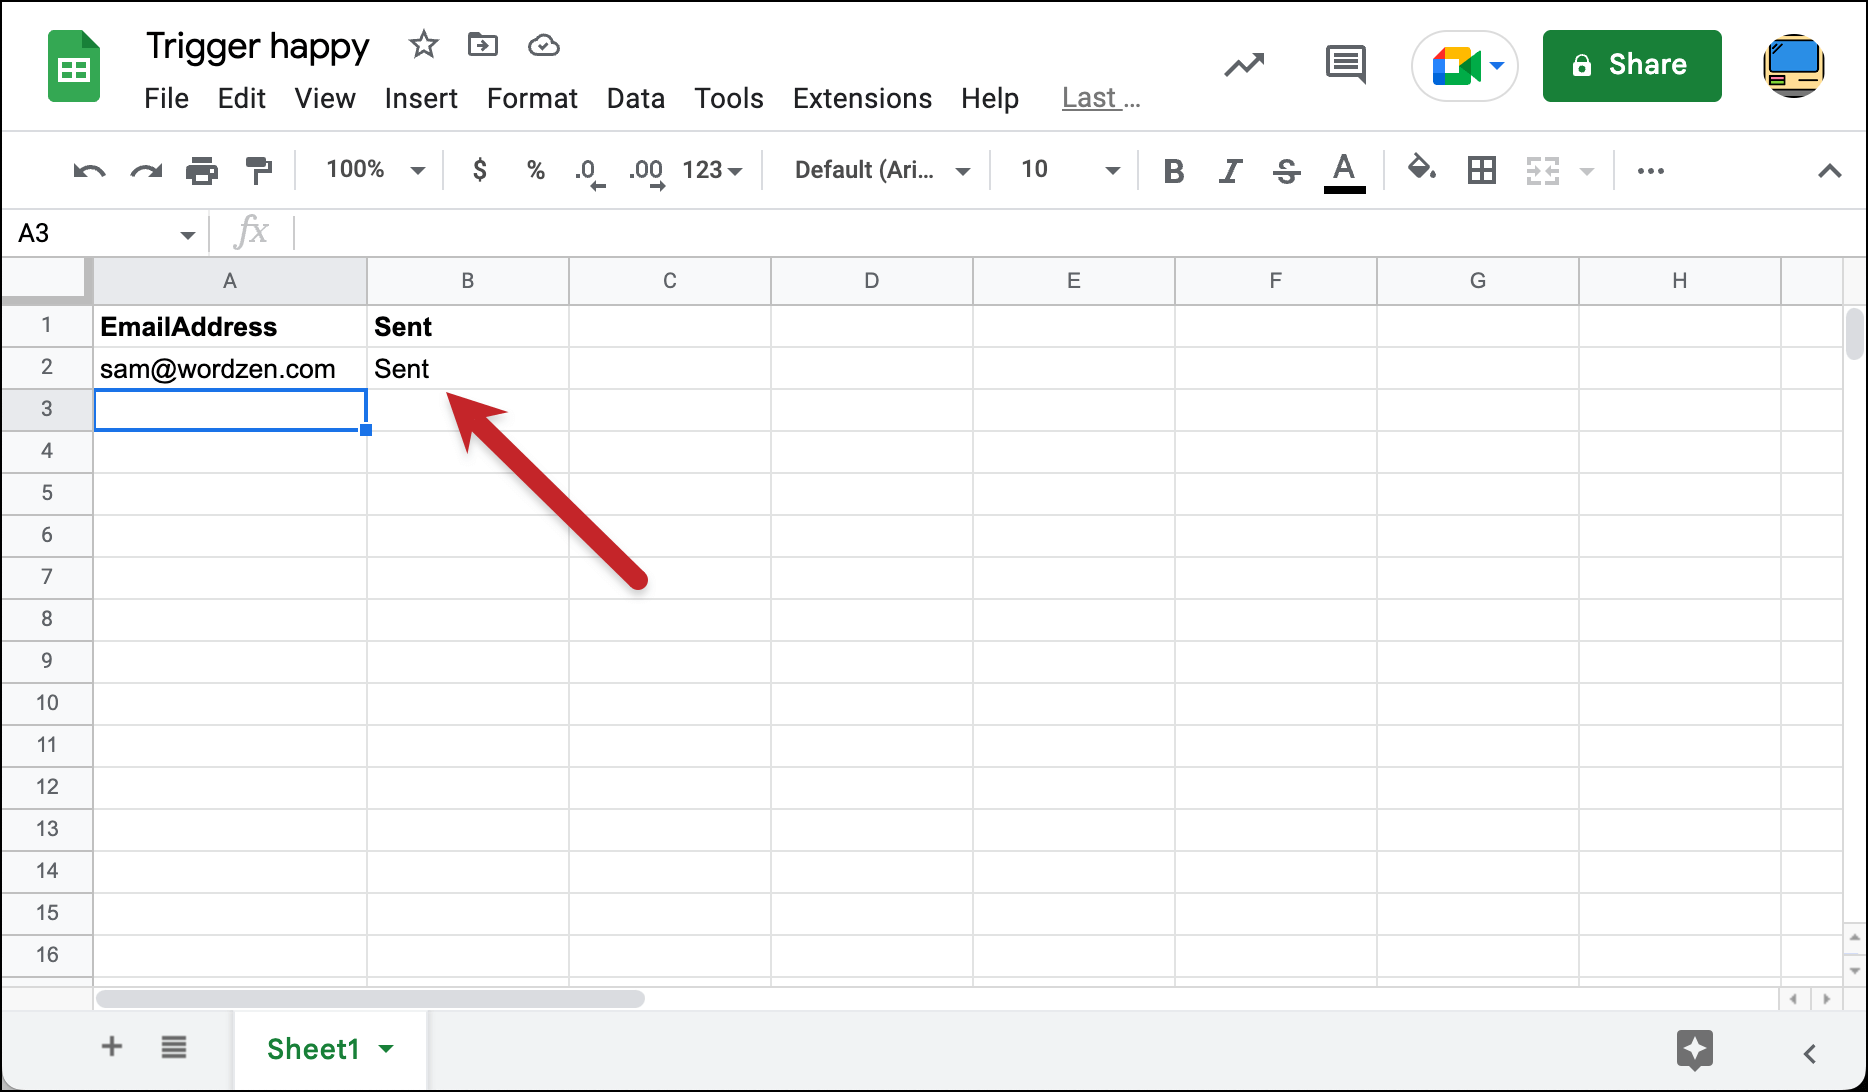
For simplicity, I’ve made the first column EmailAddresses and the last column Sent (that column will automatically update when the transactional email goes out).
You can add columns in between for any other recipient data; you’d need to alter the code if those columns are anywhere but first and last. You’ll also need to alter the code if you want to incorporate the data from those columns (like names and so on) in your transactional email.
Step 2: Create a trigger action
The first part of our Google Apps Script journey involves creating a custom trigger so Google Sheets knows when to send a transactional email. I find the custom triggers give us a bit more control than Google’s built-in triggers, so I’m using one here.
Go to the Extensions menu in your Google Sheet. Select Apps Script.
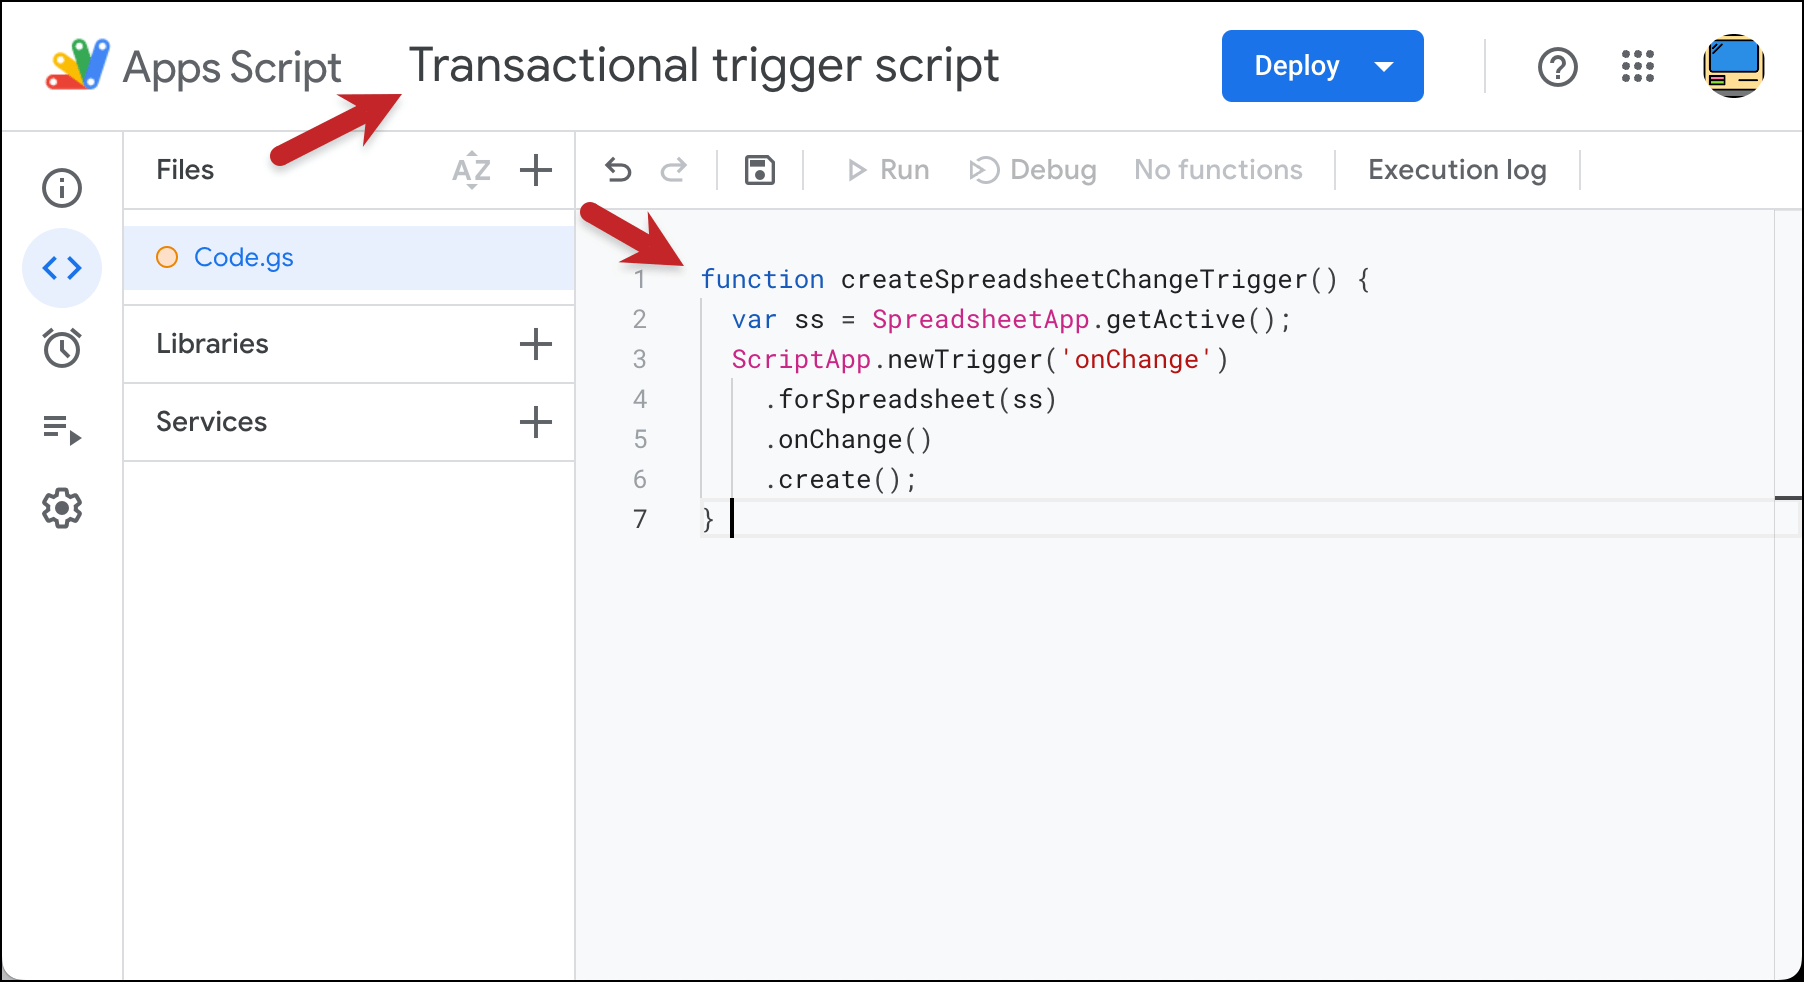
Give your project a name up top.
Then delete all the default code in the window.
And paste in the following code.
Here’s how it should look inside the Google Apps Script window.
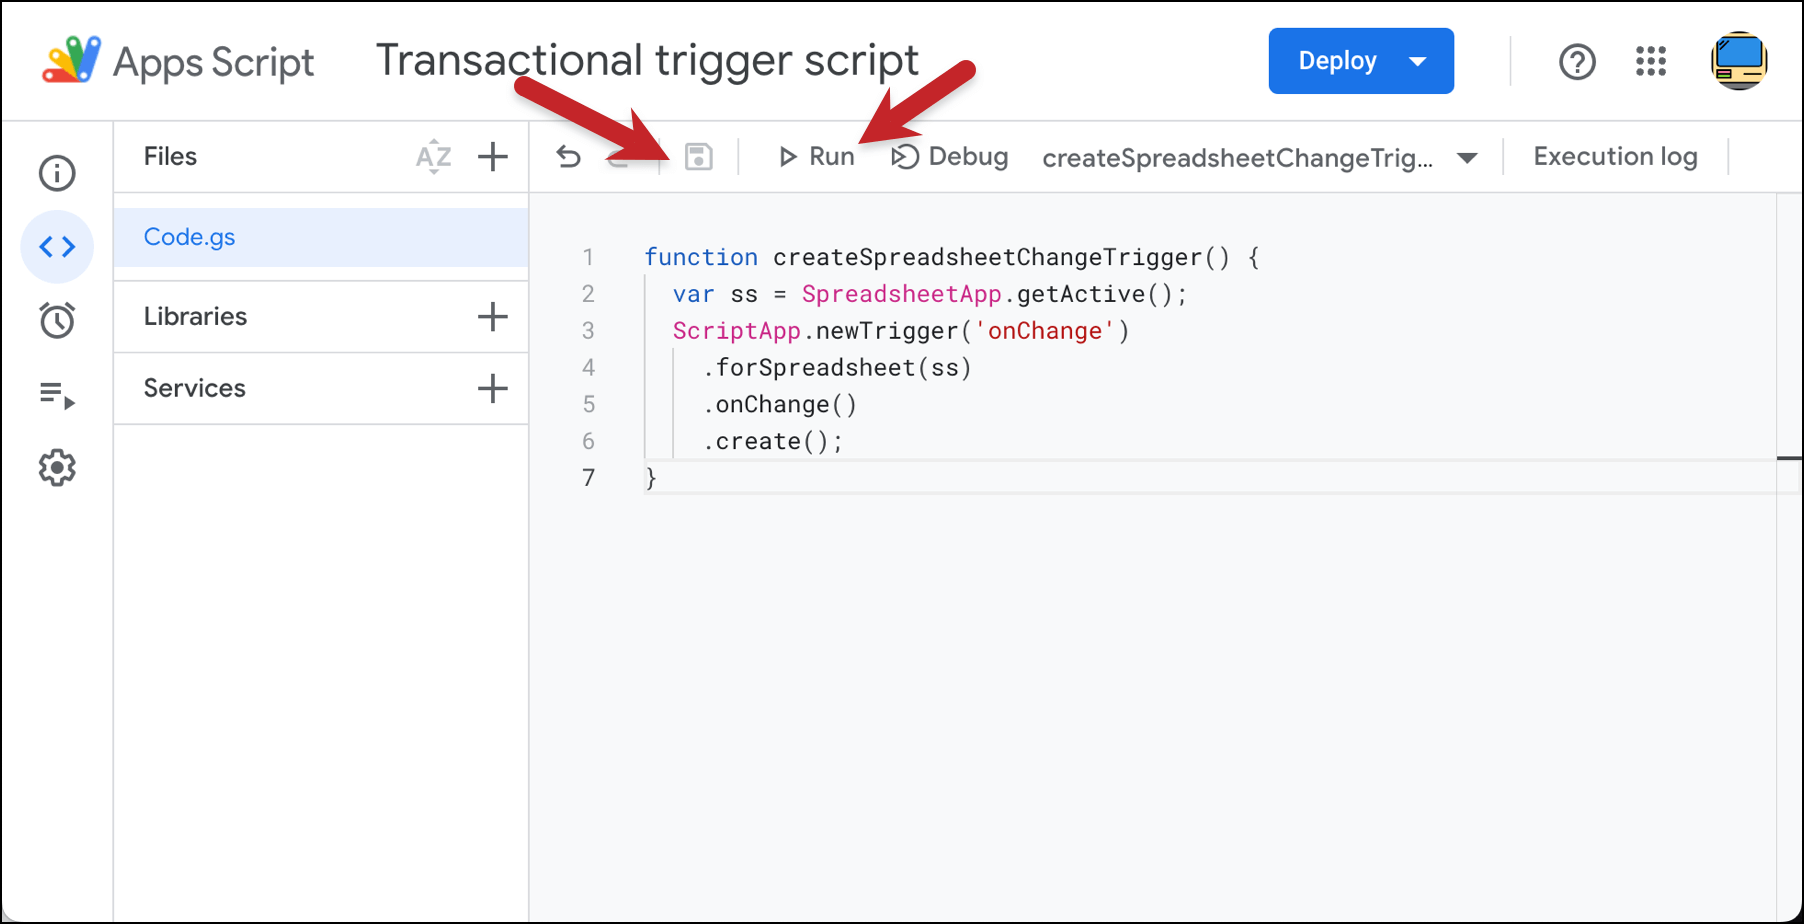
Now click the floppy disk icon to save, then click the Run button.
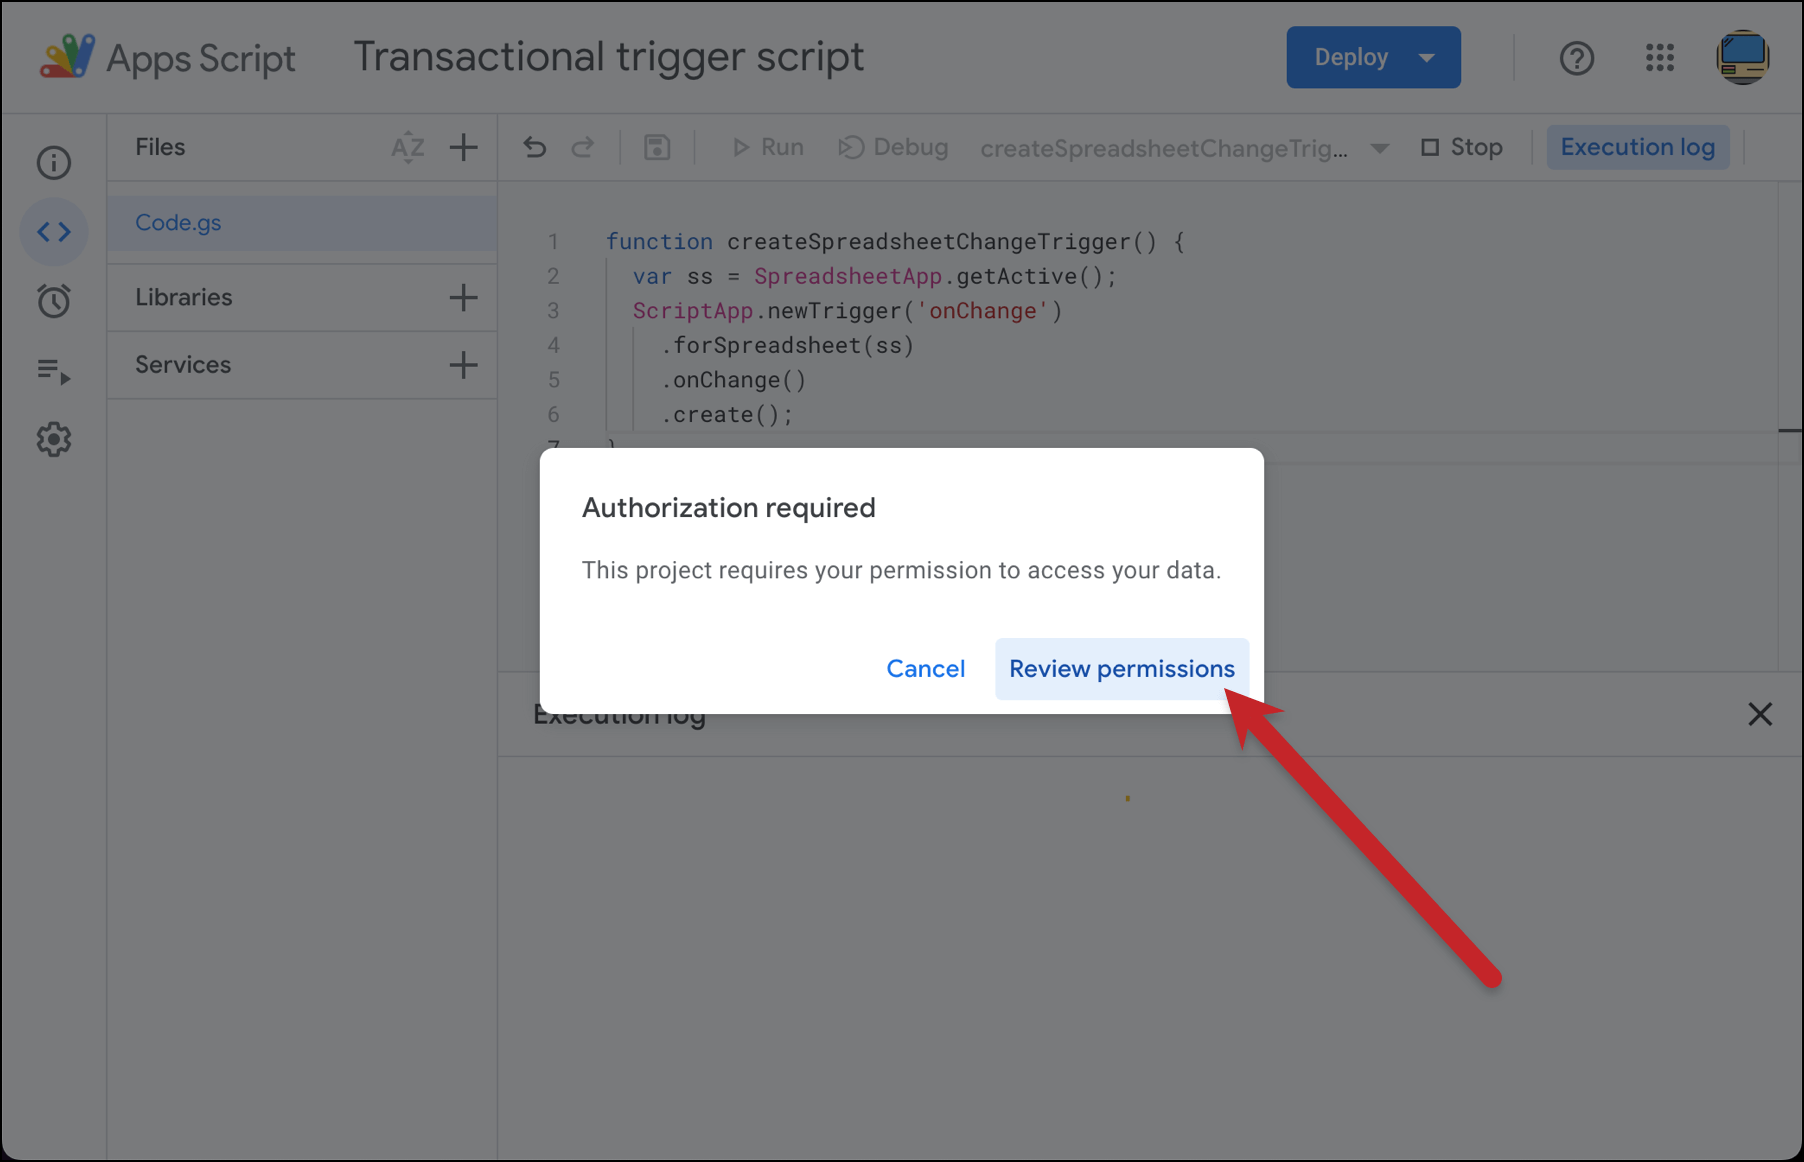
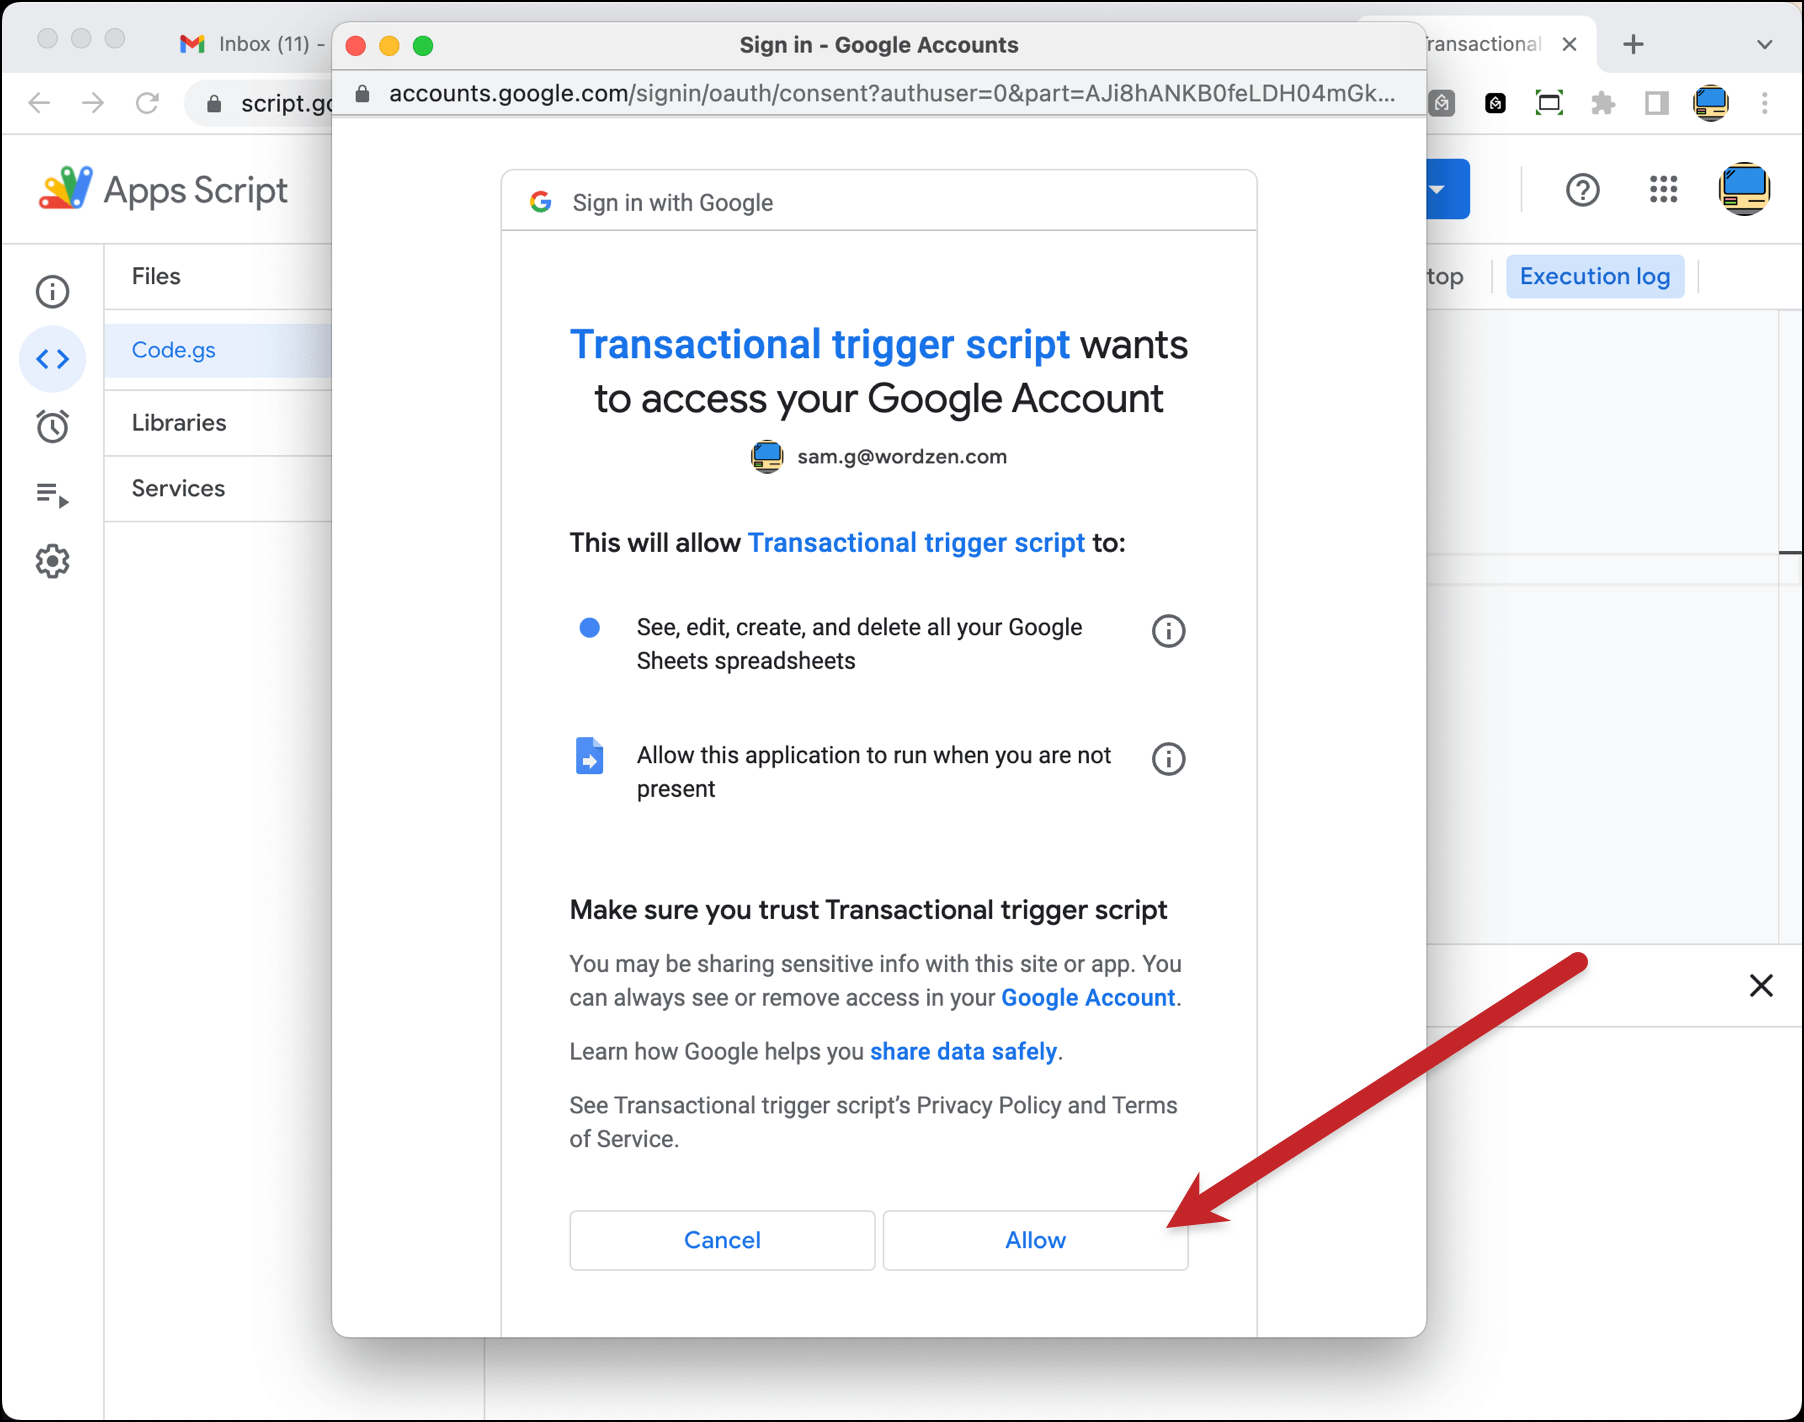
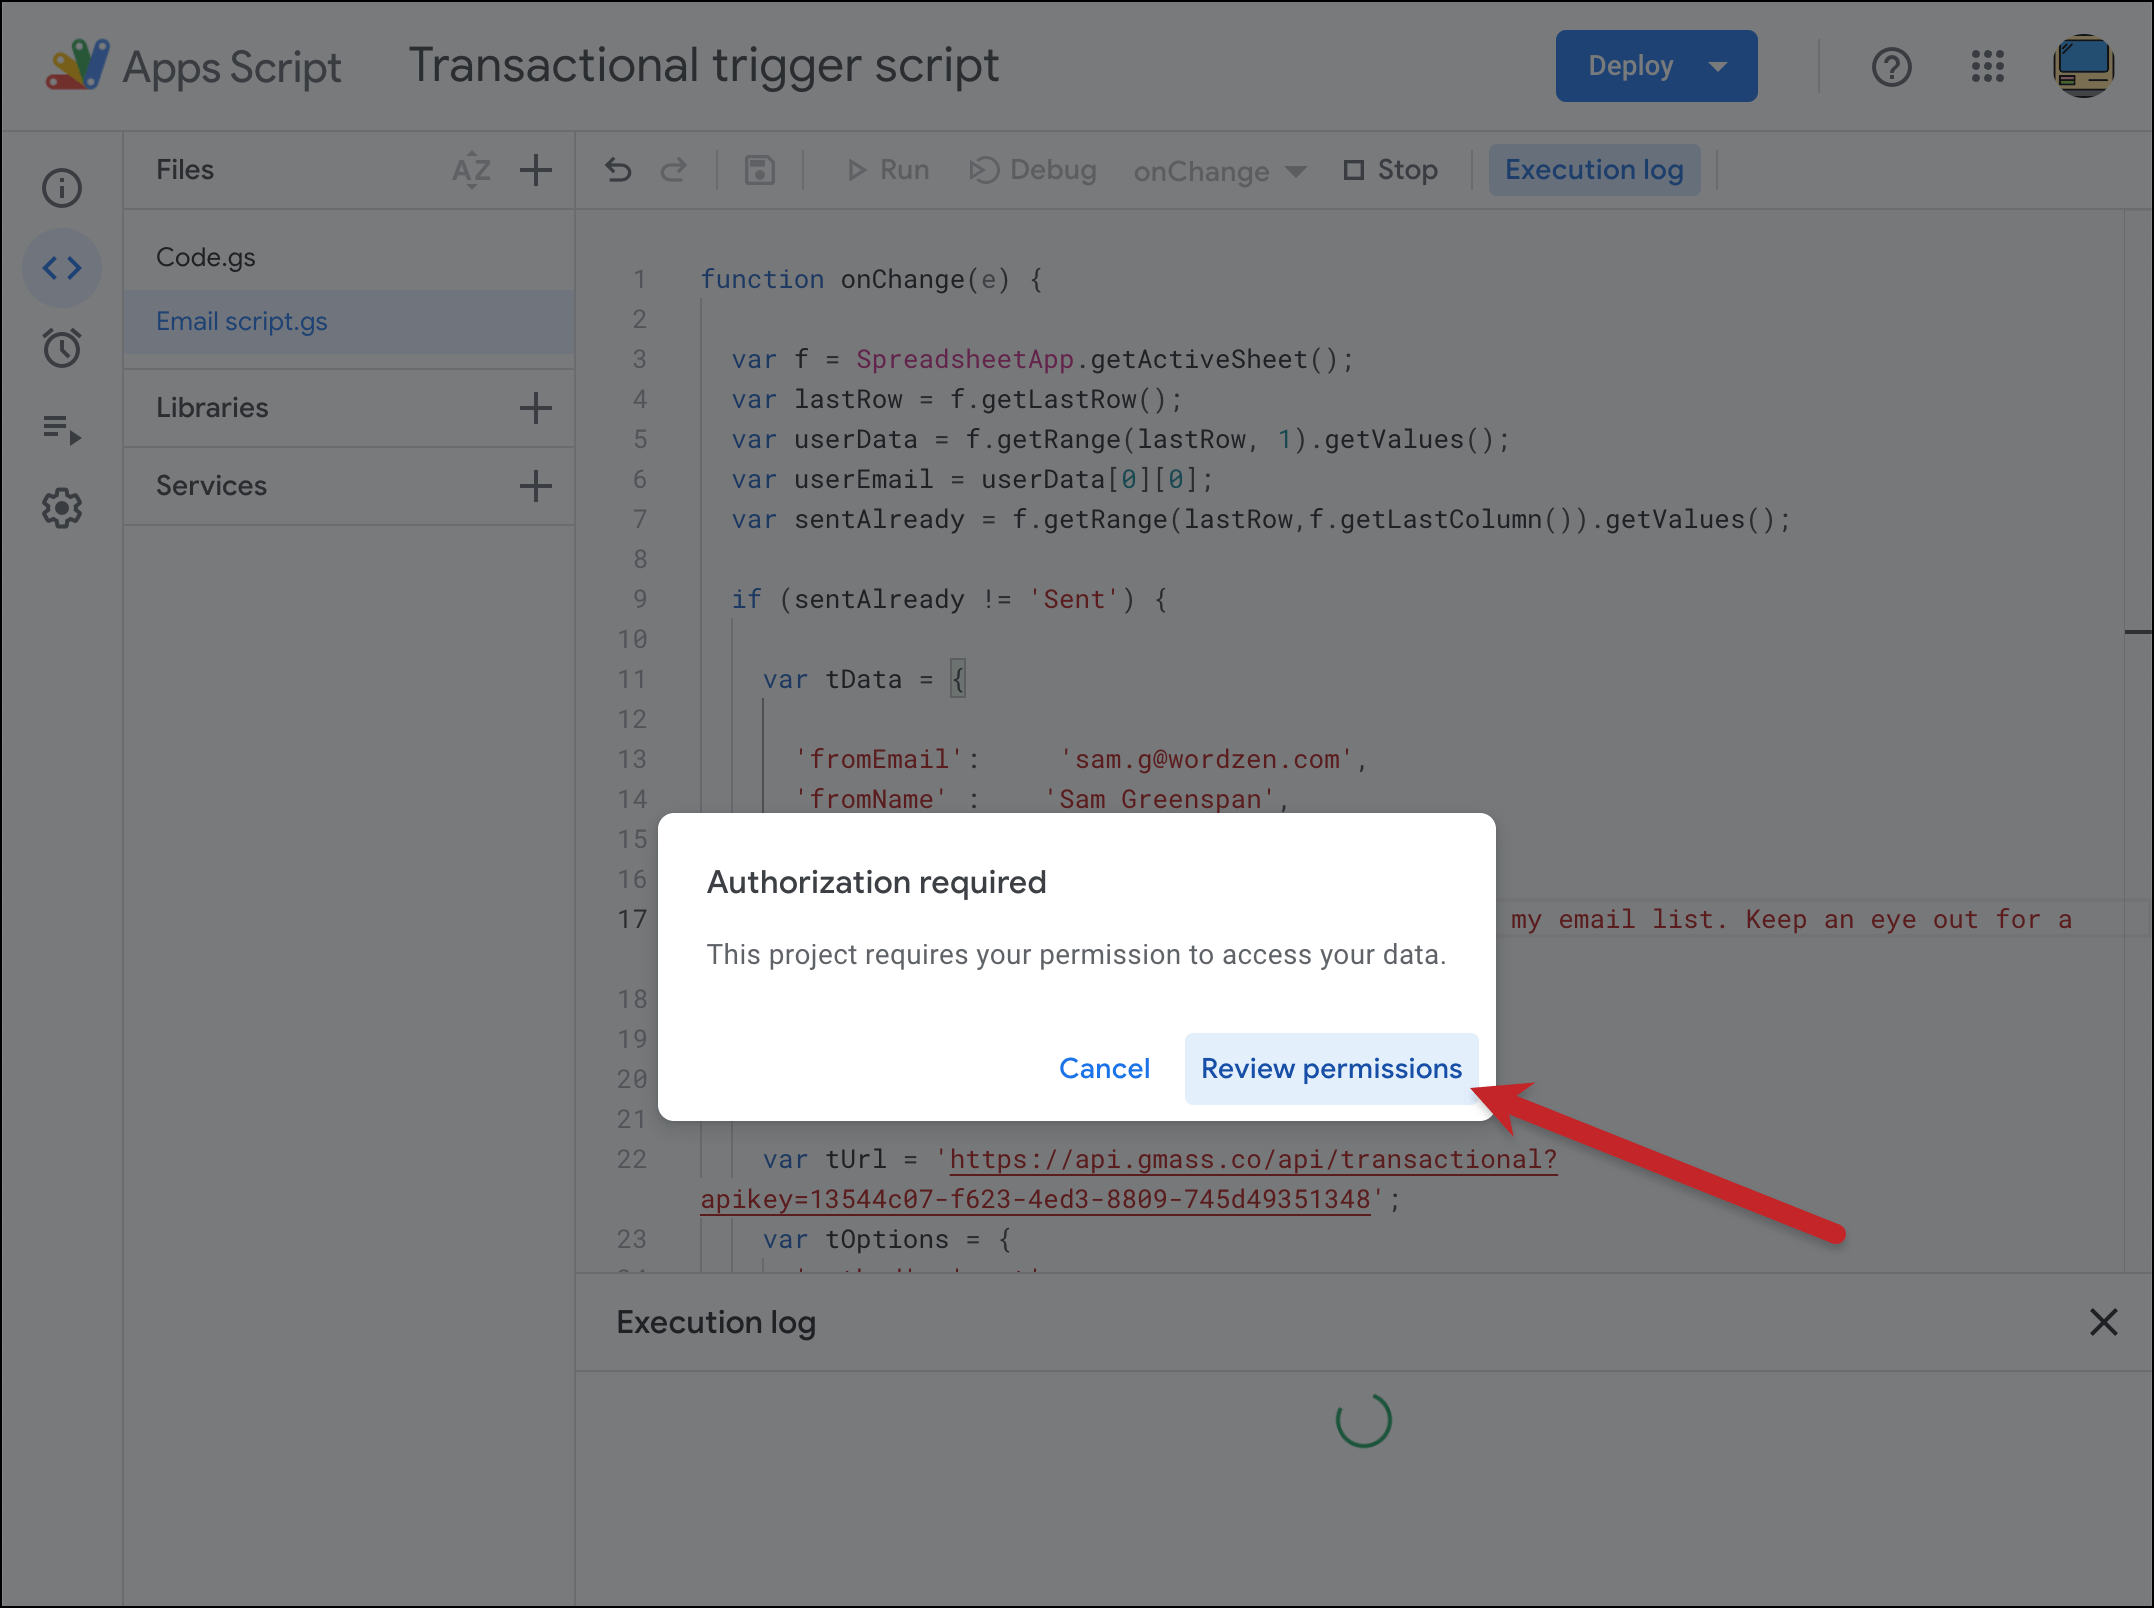
Google will think about it for a moment, then ask you to give the script permissions to run. Give it all the permissions for which it asks.
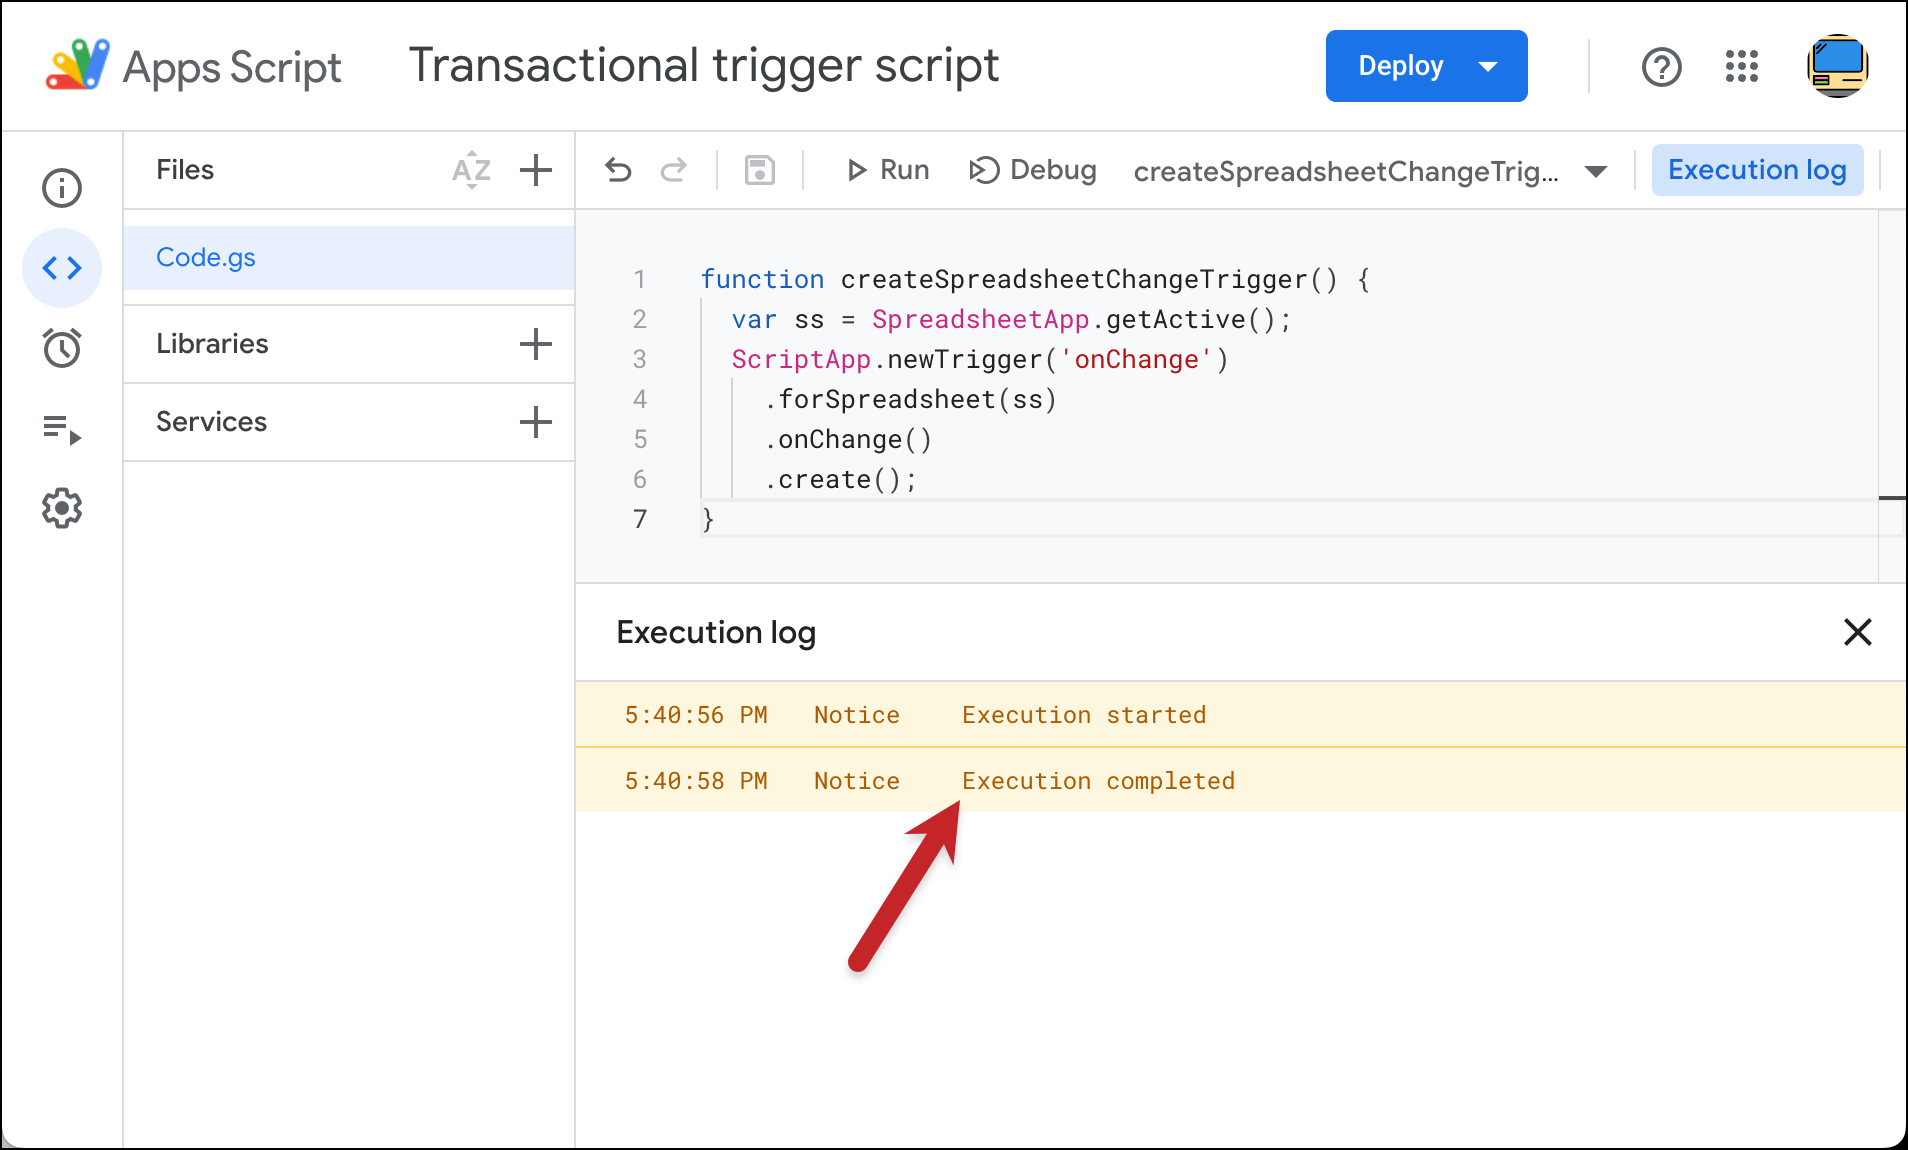
Assuming nothing went weird, you should get a message in your Execution log saying… “Execution completed.” Love that enthusiastic, triumphant phrasing there by Google.
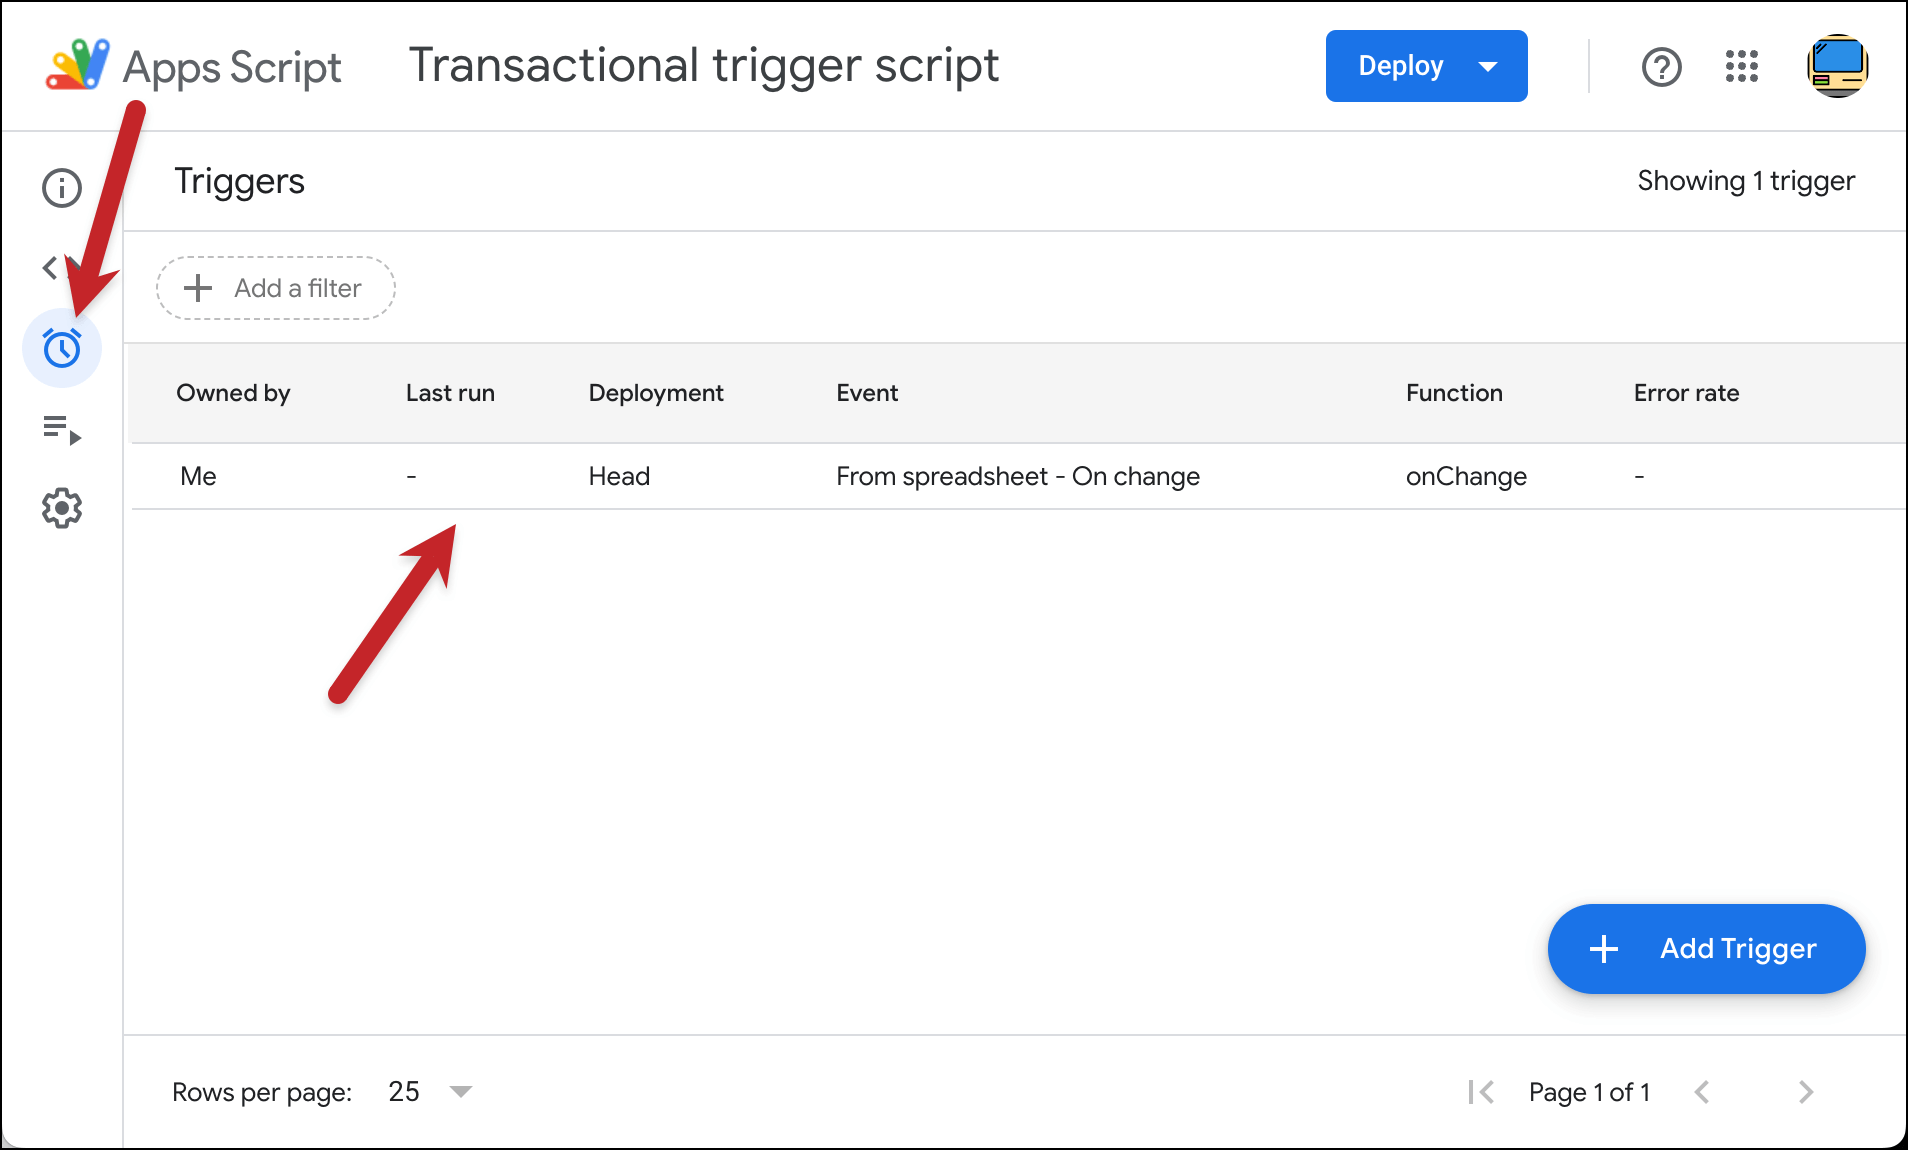
And if you click the stopwatch icon on the left (which is your list of triggers) you’ll see your new trigger is live.
Leave this browser tab open and go to the next step.
Step 3: Grab your GMass API key
You’ll need a GMass API key to make this work; that key is required to send a transactional email through GMass.
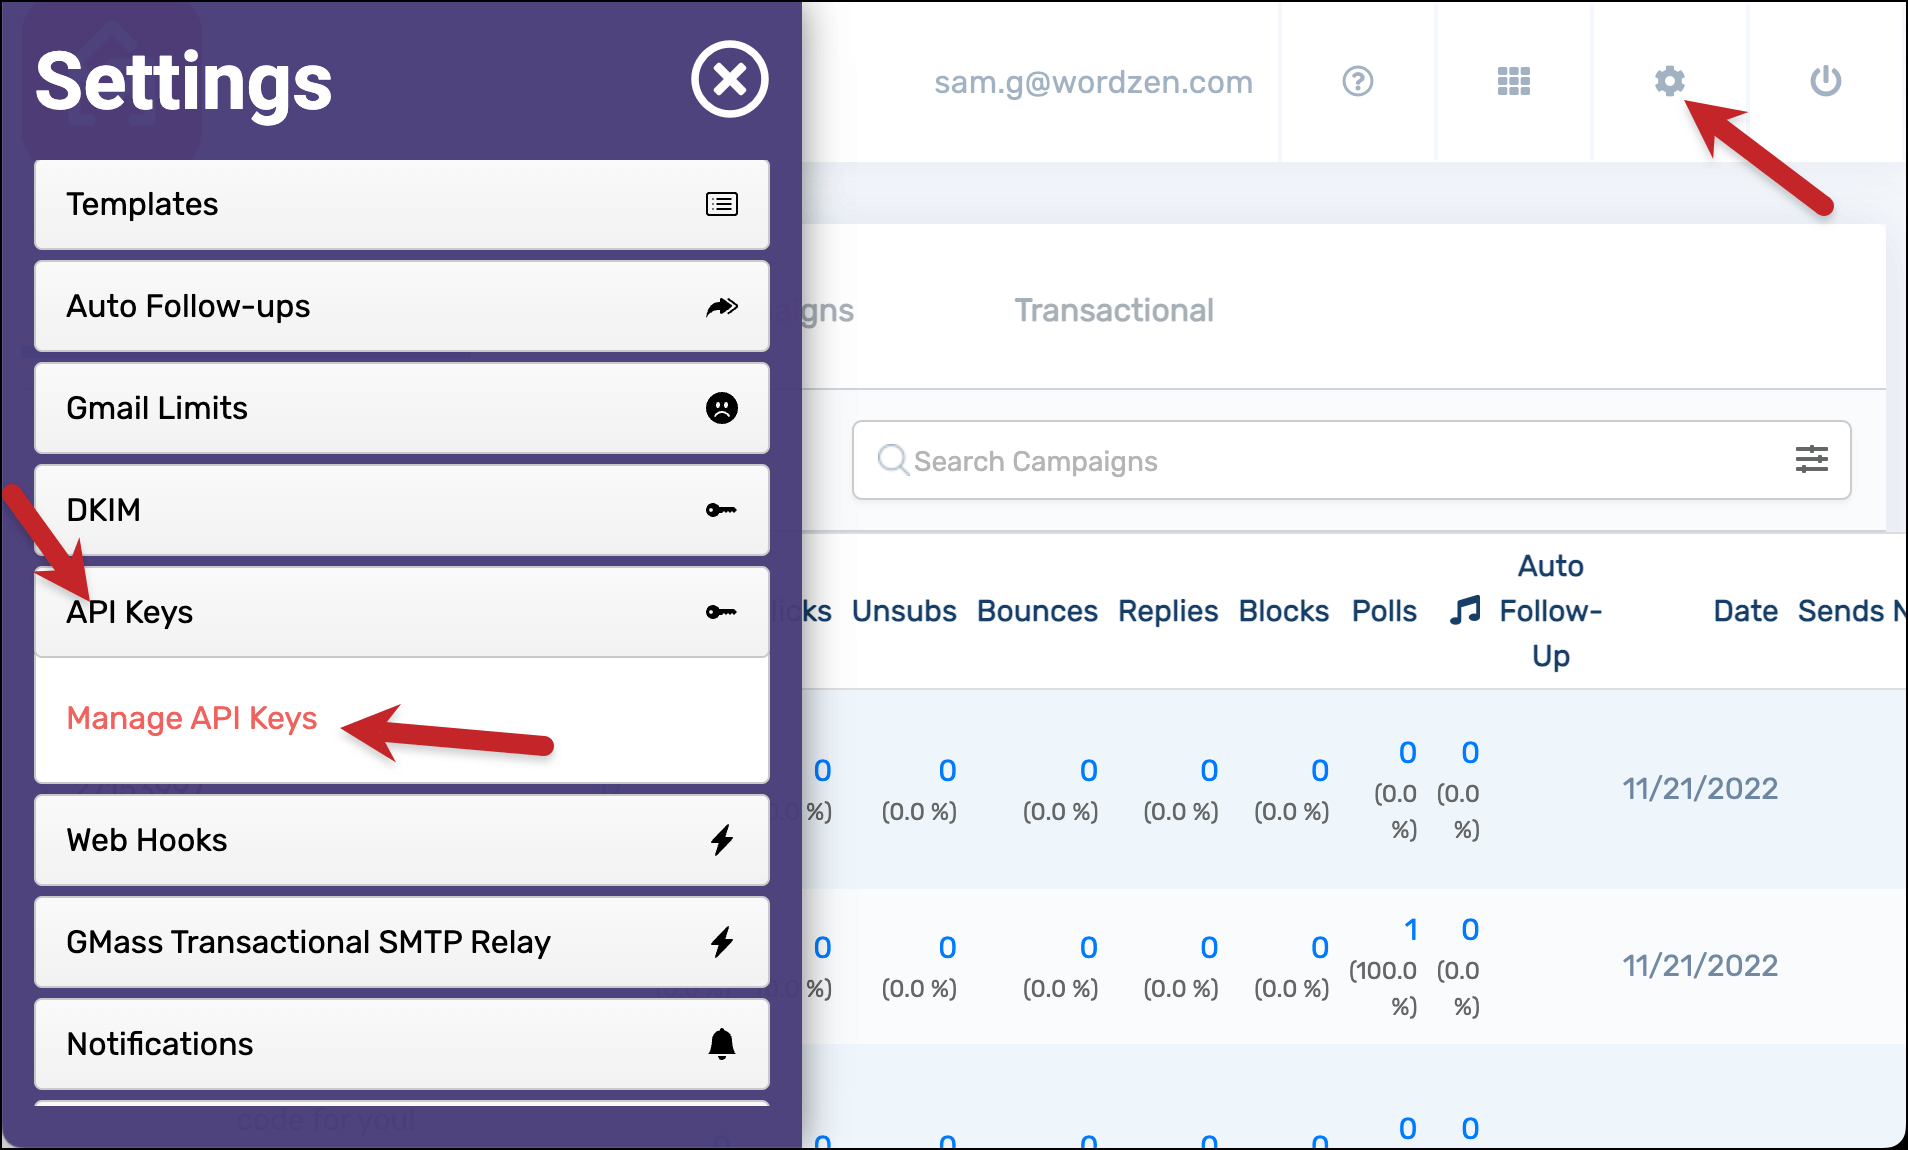
Head into your GMass dashboard. Open the Settings by clicking the gear icon on the top right, then click into the API Keys section. Click Manage API Keys.
If you’ve never created an API key before, make a new one with the red button. Then click the clipboard icon to copy your API key. (Or leave this window open, since we’ll do more copying and pasting in between now and when it’s time to use this key.)
Step 4: Create the script to send your transactional email
We’ll now need to create a second script. The first script created the trigger; this second and final script will actually send the email.
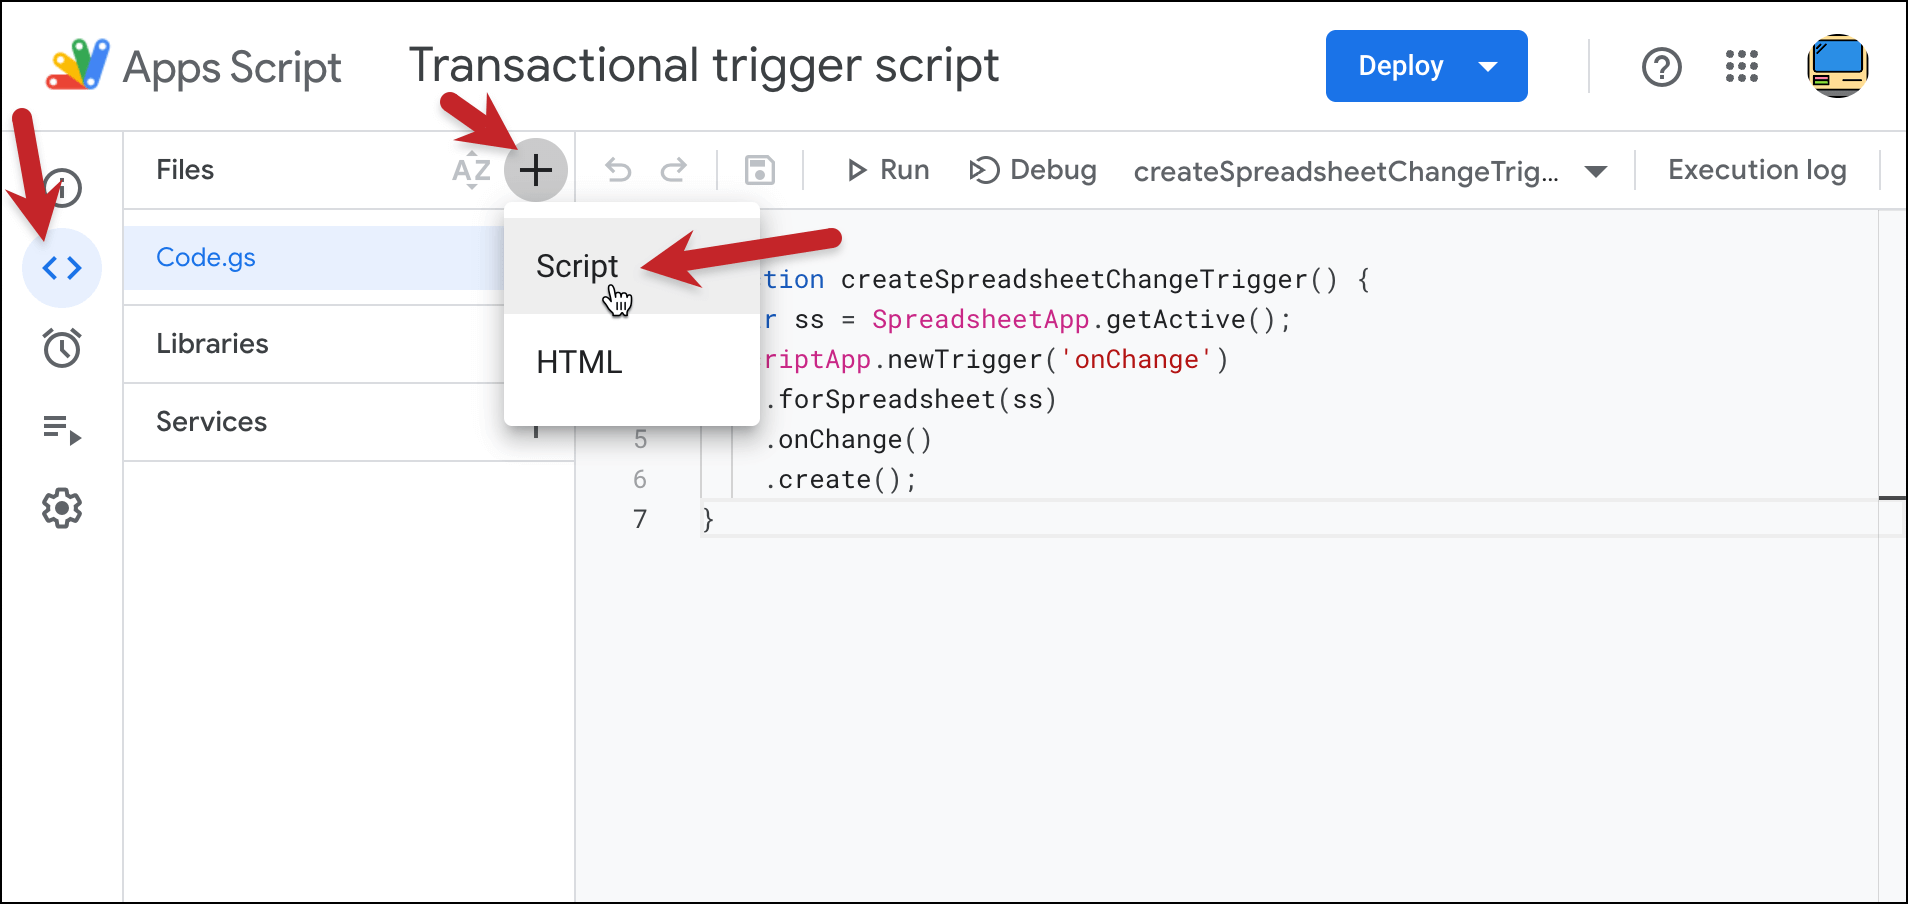
Return to the tab with the Apps Script editor. Go back into the code editor in Google Apps Script (the symbol is the left and right carats). Then click the plus sign next to Files to add a new script.
Then paste in the following code:
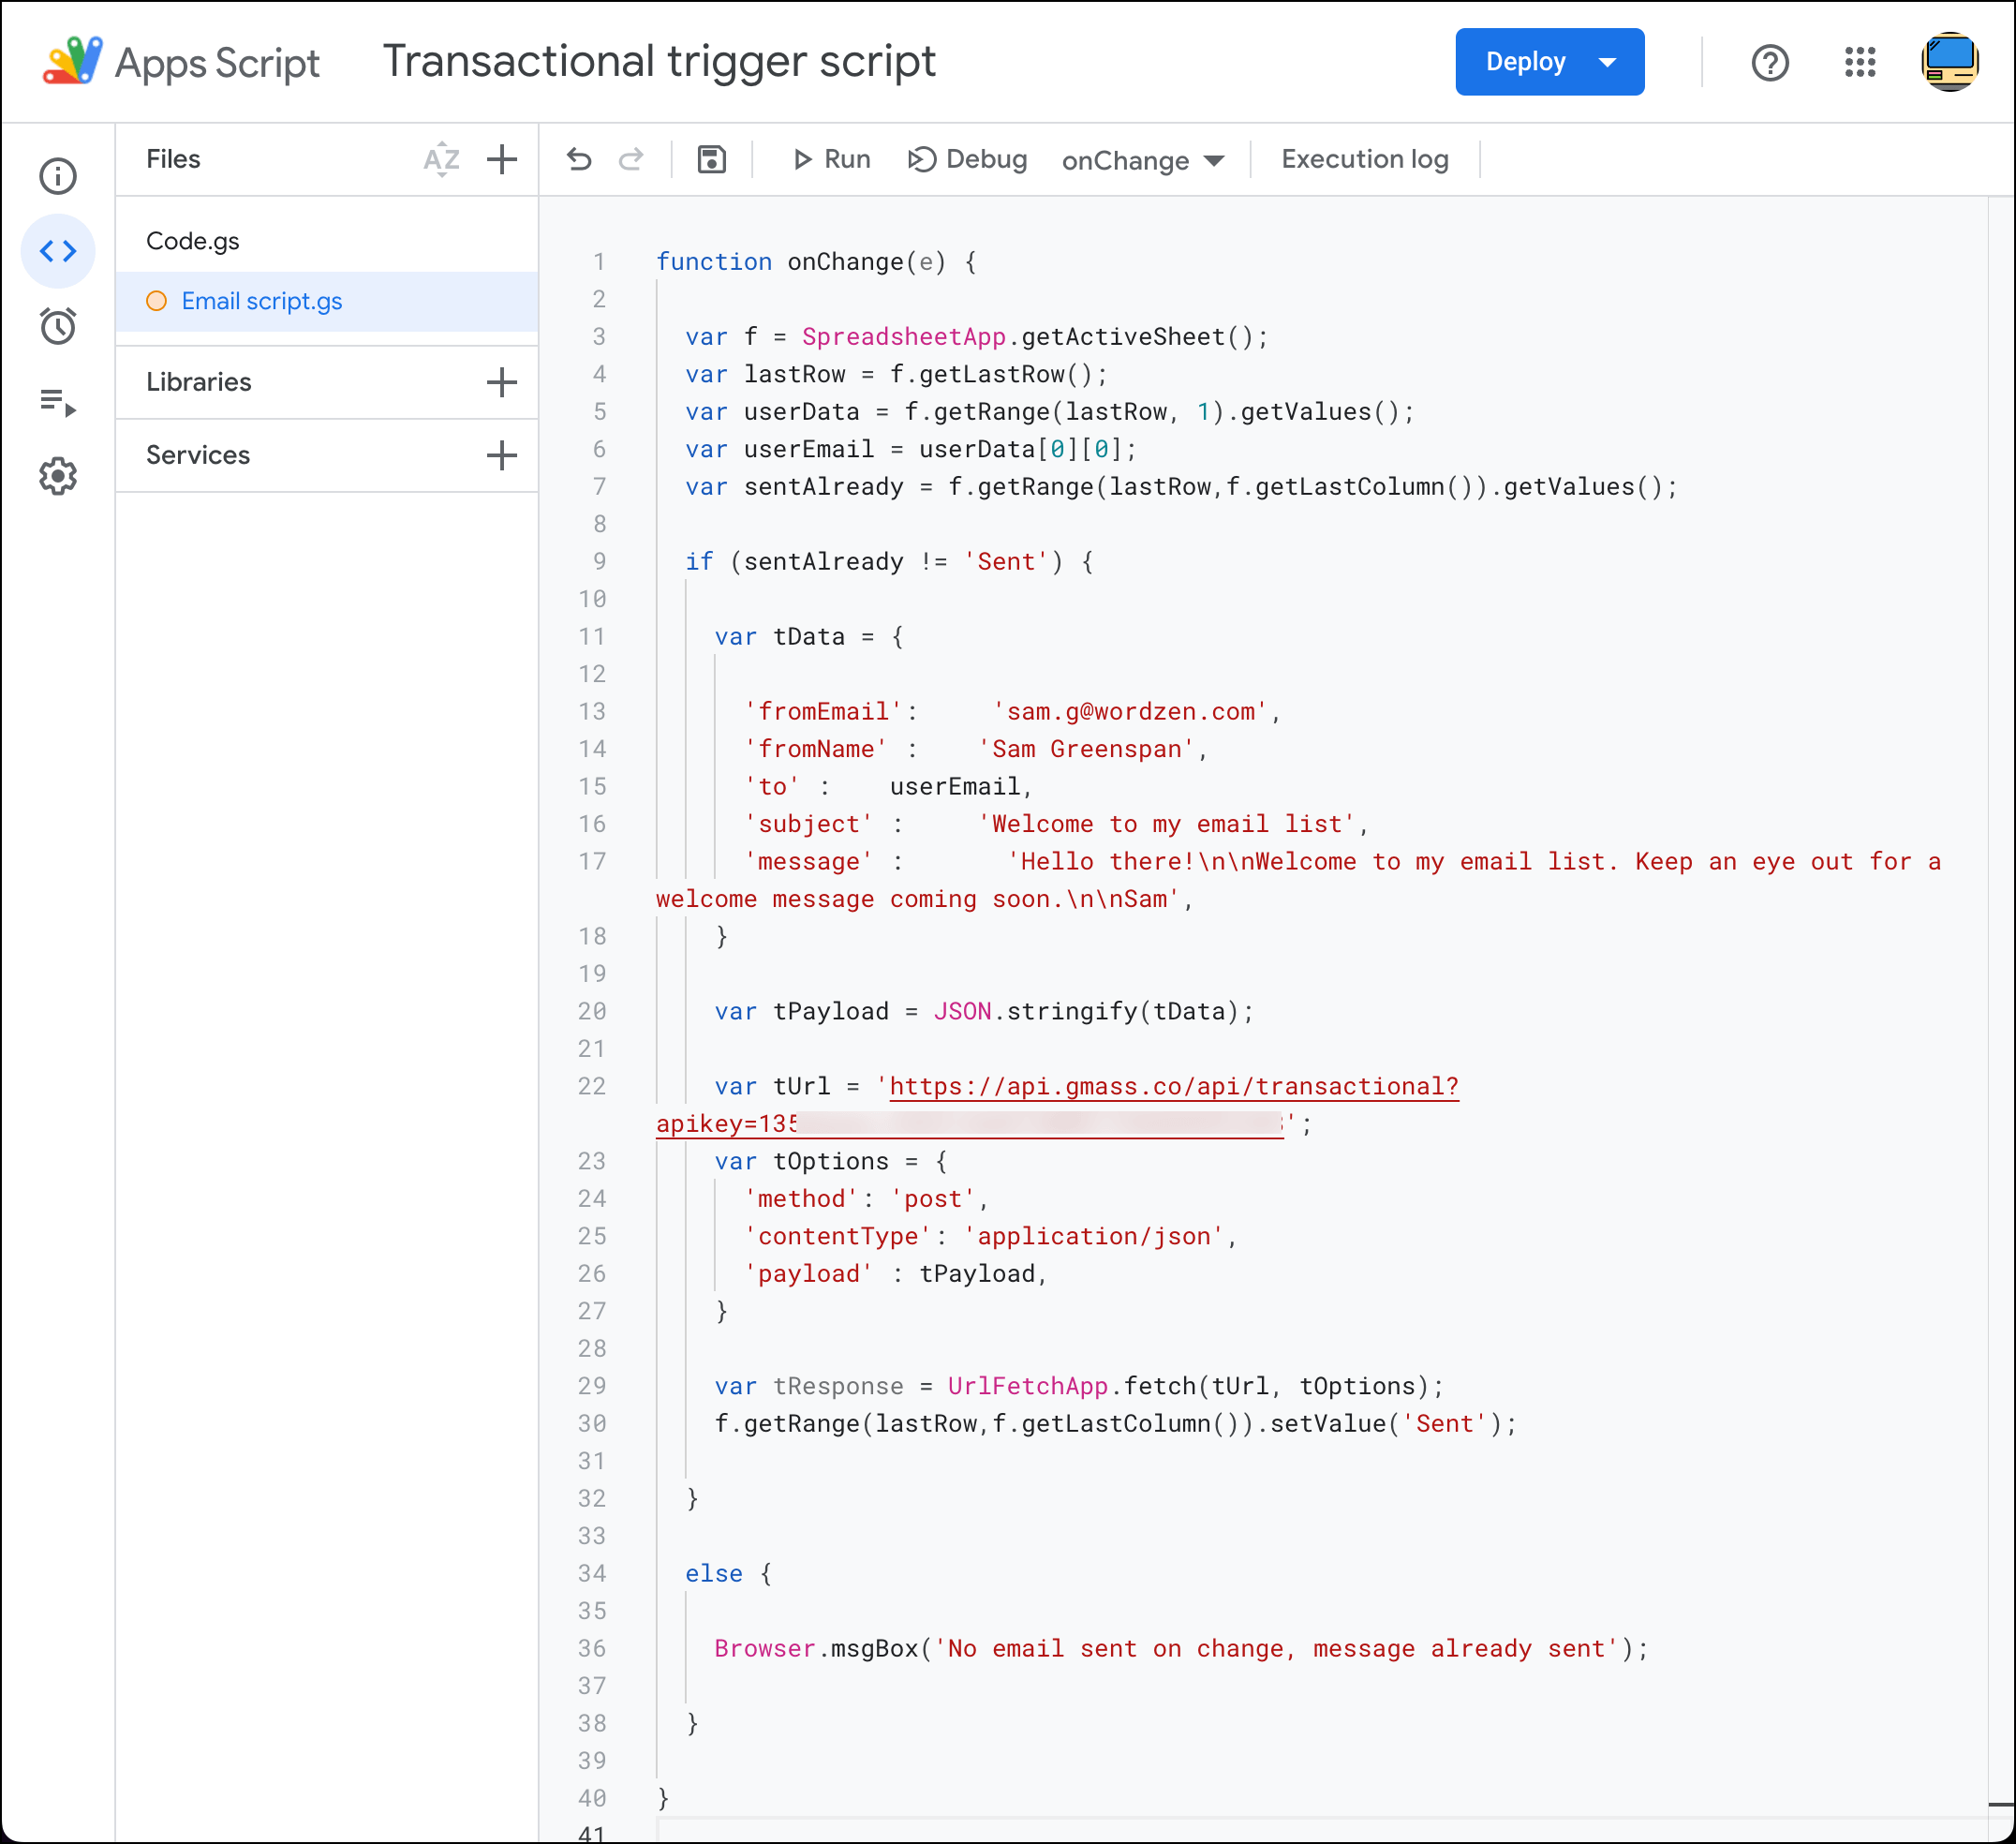
You’ll need to replace all the ALL CAPS in there with your info.
- Your email address (the “from” address for the transactional email)
- Your name (who the email will show it’s from)
- Your subject line for the transactional email
- Your message for the transactional email
- Your API Key
You can also add other options from the API like CC, BCC, open tracking, and click tracking.
Here’s how it looks for me:
Now click the floppy icon to save it, then click Run. Yeah, you’ll have to give this script permissions all over again.
Once you’ve given the permissions, the script should execute… but no email will go out because you don’t have any email addresses in the spreadsheet yet. (We needed to preemptively run it here, though, for the sake of giving it permissions.)
Head into your spreadsheet and enter one of your email addresses into the EmailAddress column, then hit Return/Enter or Tab.
The script will take a moment to process. Give it up to 30 seconds (usually a lot less) and the word “Sent” will appear in the Sent column.
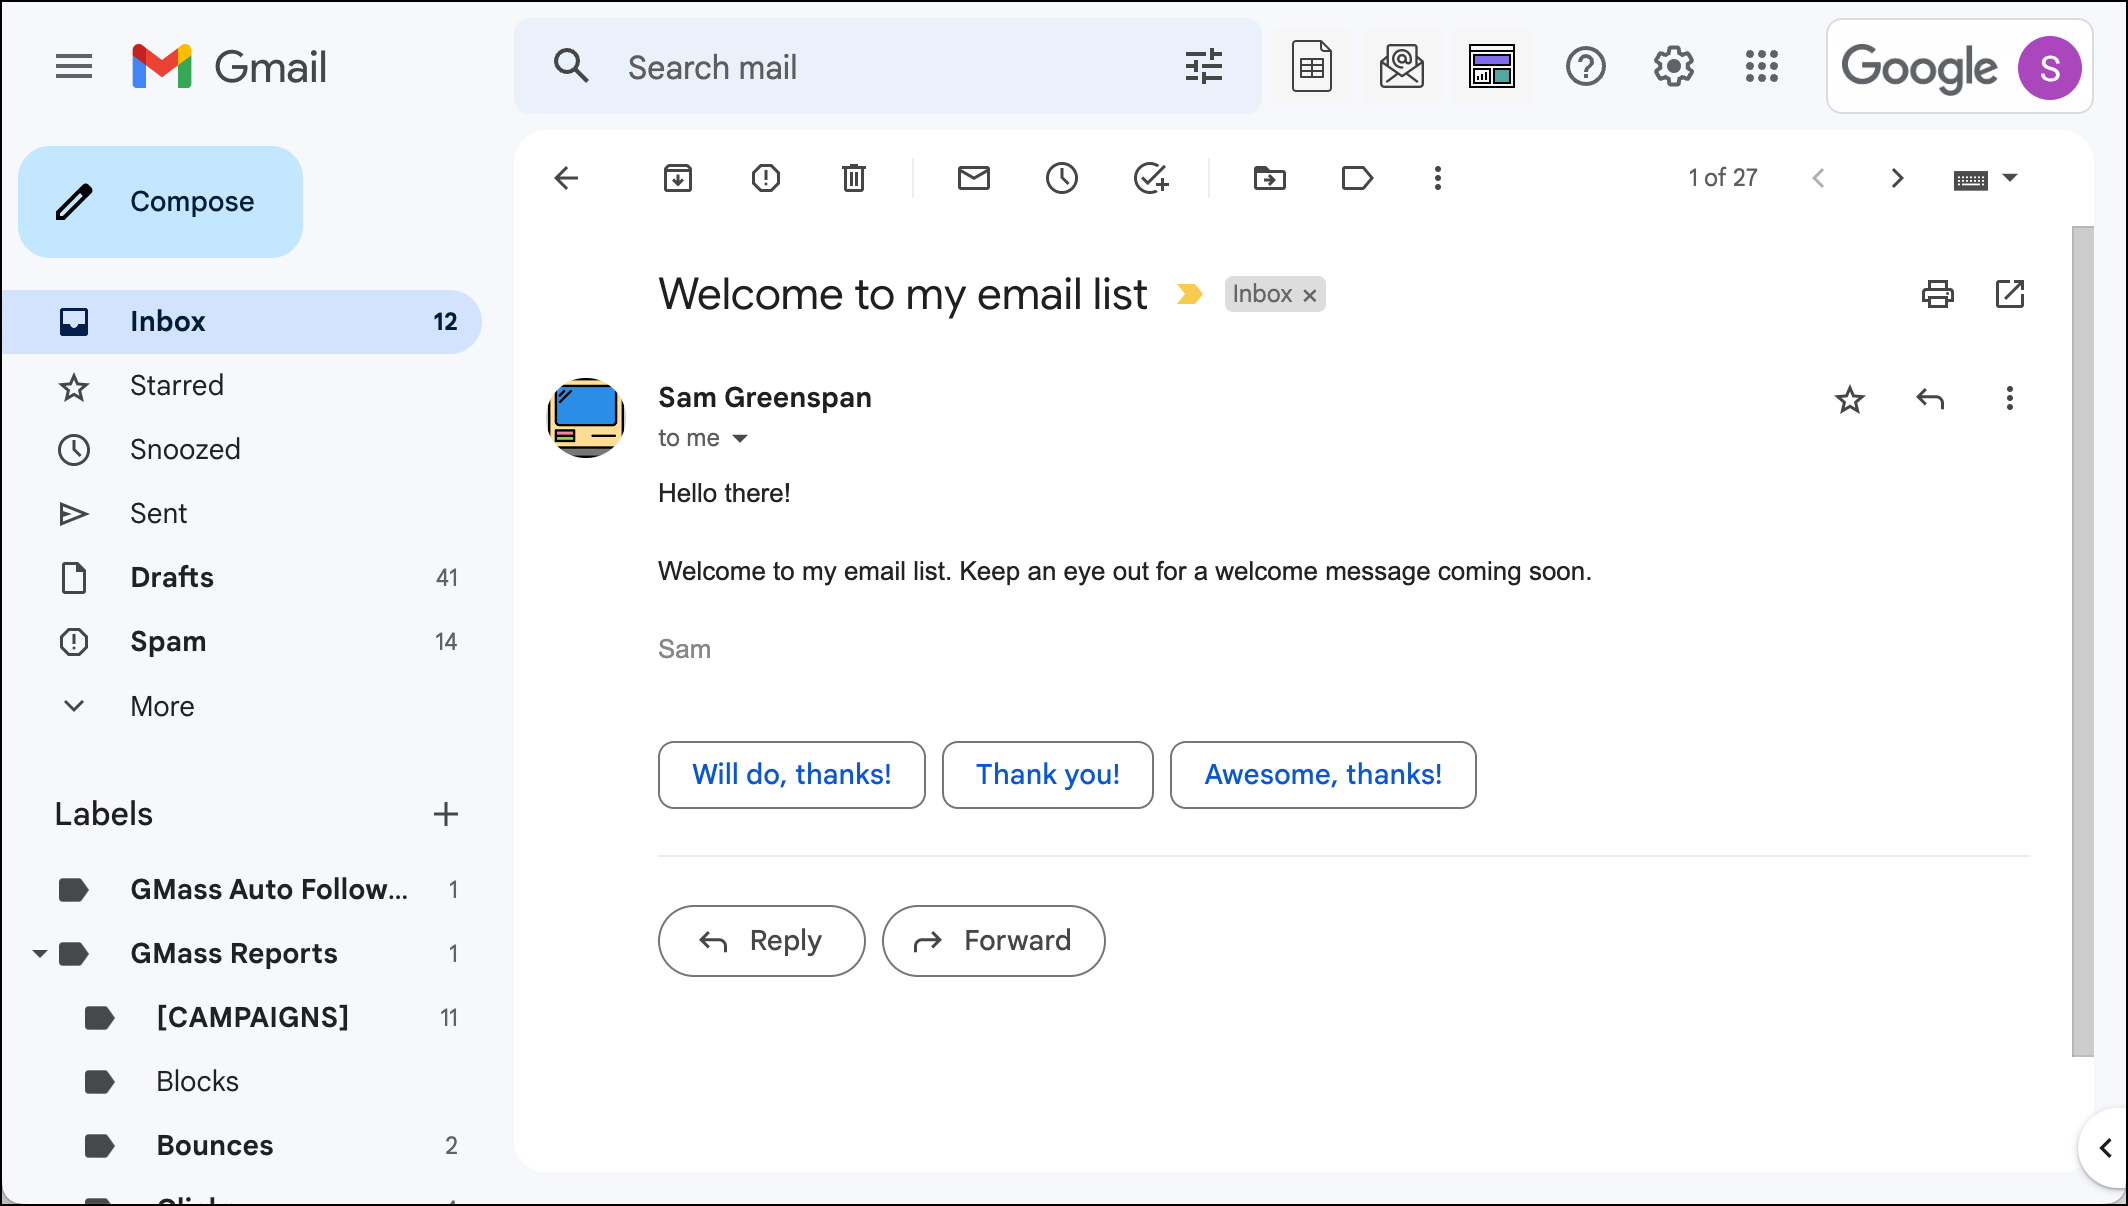
And when you head over to your email account, the transactional email should be there waiting for you.
What if you want to edit info in the spreadsheet — will it send another email to that address?
Google doesn’t have an “onNewRow” function; we have to use its onChange function for this script. That means every time you change any info in the spreadsheet, this transactional email script will run. And your recipients could start getting transactional emails over and over.
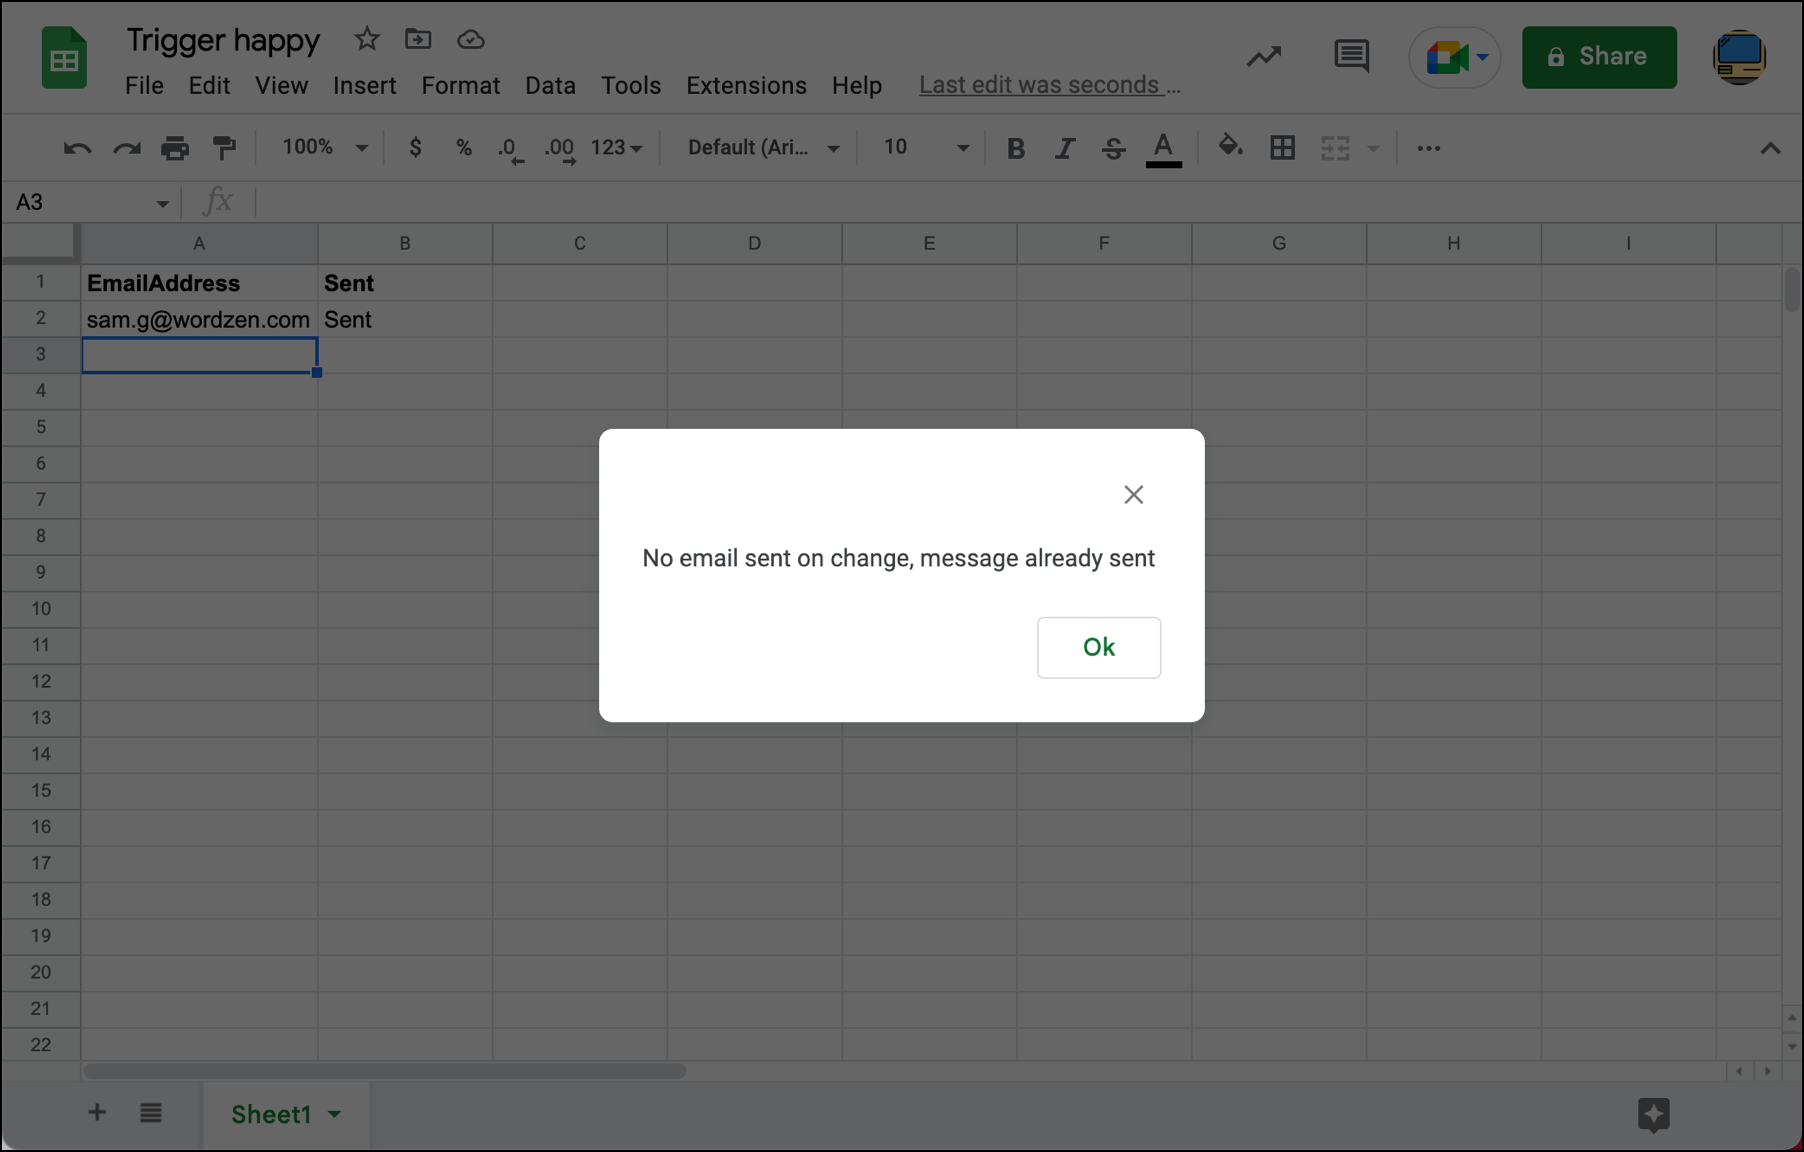
We don’t want that. So I built a failsafe into the script so if you’re editing any of your contacts in the Google Sheet, they won’t get repeated emails.
Before the script sends an email, it checks the Sent column. If an email has been sent, no new email will go out — and an alert will pop up to confirm no email was sent.
You’re All Set!
We’re now good to go — whenever you add a new row to this spreadsheet, a transactional email will go out to the address in that row.
As I mentioned earlier, this script would go great with the methods we detailed for getting emails from a web form into a Google Sheet. That way, people could subscribe to your list on your website, those addresses would go into your Google Sheet, and they’d automatically receive a transactional email instantly.
From there, you could use GMass’s recurring feature to automatically send a more proper, robust welcome email (or the first email in a welcome series) to that recipient sometime within the next hour.
If you’re not a GMass user, give GMass a try — you’ll have full access to all the features in this article, including the GMass API, during your free trial.
You can download the Chrome extension and get started on your free trial — no credit card required. Here’s our quickstart guide to get you up and running in minutes.
And if you have any questions (or want to assign me more coding challenges), join the GMass Facebook group. We’re building a great community of cold email and email marketing pros to share ideas, strategies, trends, and more and we’d love to have you take part.
Send incredible emails & automations and avoid the spam folder — all in one powerful but easy-to-learn tool
TRY GMASS FOR FREE
Download Chrome extension - 30 second install!
No credit card required

