GMass is now available as an official Gmail Add-on. This extends the functionality of GMass to Android devices (iPhone coming soon), and adds some important new features.
How is this GMass Add-on different from the GMass Chrome extension?
First, let’s be clear on what is meant by a “Gmail Add-on” and how that differs from the GMass Chrome extension, which is what users have been using on the desktop.
Gmail Add-ons are a new way to enhance Gmail, bringing functionality into your Gmail experience wherever you log in. They are attached to your Gmail account and the code that runs them lives at Google. They are created by third party companies, but must be thoroughly reviewed by the Gmail team at Google for inclusion into the Gmail Add-on Store.
Chrome extensions, on the other hand, have similar features, but are associated with your Chrome installation on each desktop machine. The code that runs them lives on each device along with that installation of the Chrome browser.
It’s important to be clear that you can–and should–have both the GMass Chrome extension and the GMass Gmail Add-on installed at the same time; it’s not one or the other. By having both, you get the best experience with GMass, on both desktop and mobile.
Want to learn more about GMass on mobile? Check out our complete guide.
The benefits of the Add-on
First, the GMass Add-on greatly enhances portability. Unlike with the Chrome extension which only works on desktops, with the GMass Add-on, as soon as you install it it’s immediately available on all devices with which you login to Gmail.
So, for example, you can be logged into your Gmail account on your home desktop computer, install the Add-on…and now you will be able to use the functionality on your computer at your office, your laptop computer–and your Android device! It will even be available from the computer at the public library or a friend’s house.
Note: The GMass Add-ons is not currently available for iOS devices, but will be as soon as Google adds support for it.
The GMass Gmail Add-on also brings an entirely new feature to Gmail: a recipient’s campaign history window and unsubscribe/bounce status.
How to install it (it’s easy!)
It’s easy to install this Add-on. For experienced users, you can just follow this link and the typical steps. But for more detailed instructions in four easy steps, see the bottom of this post.
Where the GMass Add-on is found in your Gmail screen: Desktop vs. Android
The GMass for Gmail Add-on is found at a different location depending on whether you are using Gmail on a computer vs. an Android mobile device.
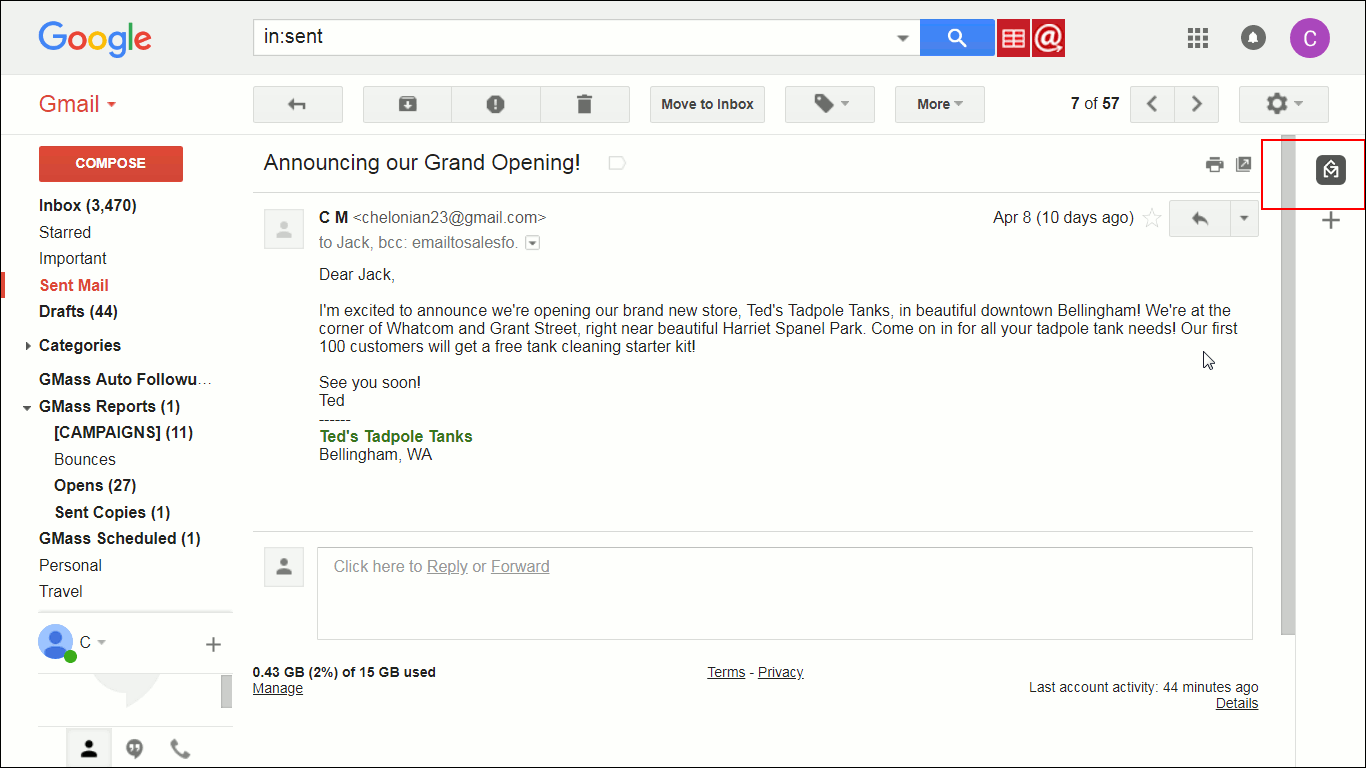
On a computer, it’s to the right of your Gmail window, as shown here and outlined (for this tutorial) in red:
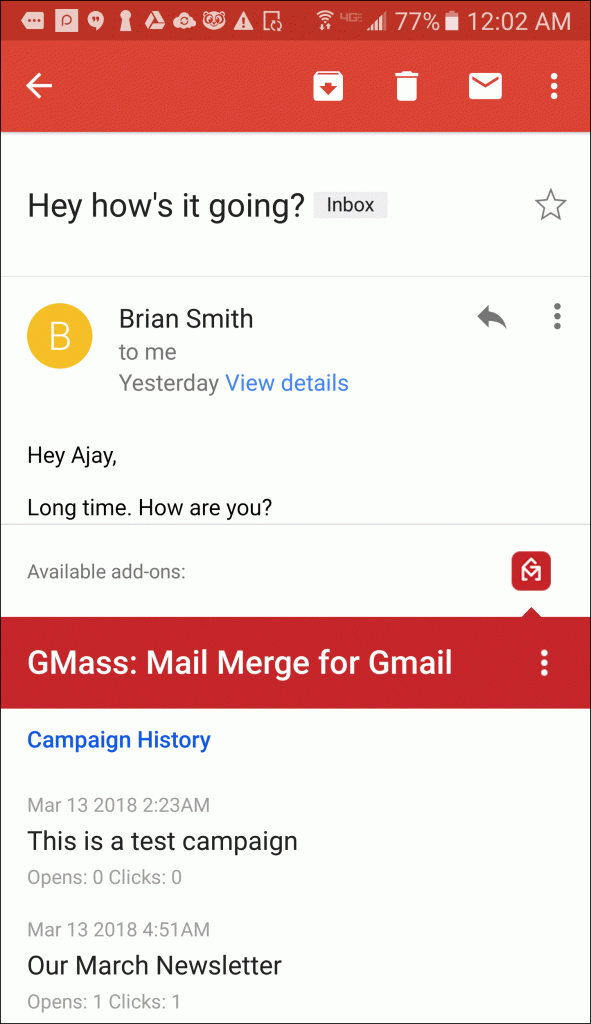
On an Android device, it’s found at the bottom.
New Features: inline campaign histories and unsubscribe/bounce lists
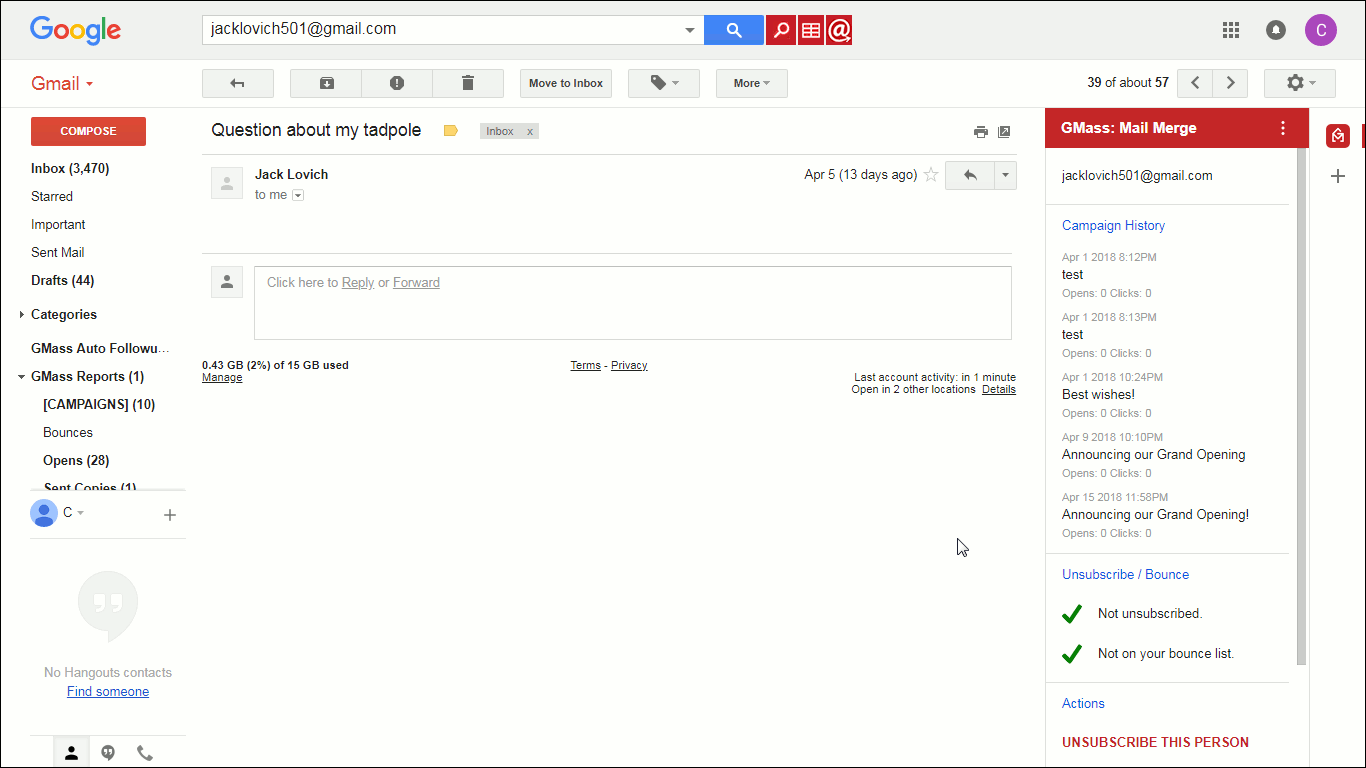
One new feature that’s only available with this Add-On is that any time you open an email in your Gmail account, you can see a campaign history that includes the last five campaigns sent to that person.
For example, let’s open on an email sent to me from my imaginary customer, Jack Lovich. The email will open as usual, but now click the grey (inactivated) GMass symbol button:
![]() It will turn red (activated) and you’ll notice that a new section has opened, providing information about your GMass campaigns that this person was part of. Here that is shown on desktop:
It will turn red (activated) and you’ll notice that a new section has opened, providing information about your GMass campaigns that this person was part of. Here that is shown on desktop:
Scrolling down to the bottom reveals two more options: LAUNCH MAIL MERGE and HELP.
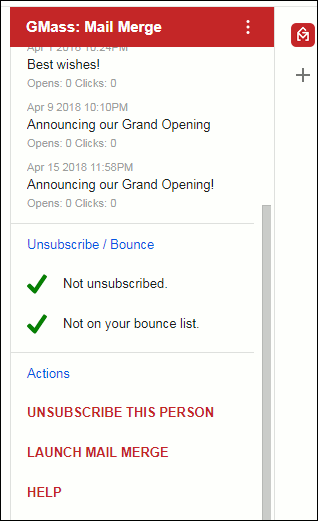
Using those green check marks, the GMass Add-on will also show you whether that person is on your unsubscribe or bounce list. If they are, you can remove them–if they’re not, you can add them.
In this case, this person is shown “Not unsubscribed”. If you click UNSUBSCRIBE THIS PERSON, it will immediately unsubscribe them.
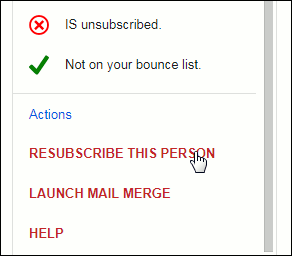
Don’t worry, if you want, you can restore them right away: after unsubscribing, the screen will change as shown below, and you can click RESUBSCRIBE THIS PERSON to restore the person’s subscription.
Taking GMass to the next level
I’m excited about the GMass Gmail Add-on, since it brings GMass to mobile and adds powerful capabilities for getting a quick look into every recipient’s GMass history at the click of a button or tap of a finger. It takes 30 seconds to install and is available wherever you can access Gmail on a computer or Android device. Give it a try today!
How to Install (detailed version)
- Visit this link and click the blue “INSTALL” button, shown below.

About to install the GMass official Gmail Add-on - Gmail will then launch a small pop-up window asking for your permission to install this (or any) Add-on, so click Continue at that point. It will then ask you to choose which Gmail account to associate this Add-on with. Choose the Gmail account you want. [Note: You can have the same Gmail Add-ons installed to different Gmail accounts; you just have to install them one at a time.]
- Gmail will then ask again for your permission, specifically allowing this Add-on to be able to access your Gmail account. That window looks like this:

Gmail asking to allow GMass access to your Gmail account. Click the ALLOW button to allow this access. GMass will need this access to work with your Gmail account.
- It will process for a moment, and then you will see this window:

Success! You’ve install the GMass Gmail Add-on!
That’s it! You’ve installed the Add-on. Now, every time you’re logged into Gmail on any desktop computer, laptop, or Android device, you will have the new features this Add-on provides. To get started using it, just go to Gmail as you normally would, and follow along with the “New Features” section above.
Only GMass packs every email app into one tool — and brings it all into Gmail for you. Better emails. Tons of power. Easy to use.
TRY GMASS FOR FREE
Download Chrome extension - 30 second install!
No credit card required


Hello,
I’m sure you get a ton of spammy submissions so I’ll get straight to the point – I’d love to submit a guest post or sponsored post for publishing on your site.
The article is related to your website’s content, and of course, it’s useful and informative, I think your audience would positively love.
If you accept sponsored or guest post on your site, please let me know price for publishing a post on your website.
Thanks for your time!
Regards,
Futing
Congratulations – keep up the GREAT work!
Thank you Laith!
I’m trying out your service now. Hope that it works for my purposes.
Hi Haroun,
Thank you and if you have any questions or inquiries, please don’t hesitate to contact us by emailing our support team at support@gmass.zendesk.com
I installed gmass on my desktop but I can’t get it to work on my Android phone. I’ve followed EVERY instruction and I can’t find it. I assume it doesn’t work, right?
The icon does not display.
Hi Pamela,
Please see https://gmass.co/blog/troubleshoot-missing-gmass-button/ to troubleshoot the missing icons.
If you’re still having issues please email our support team at support@gmass.zendesk.com
No icon for gmass down where it says additional add on: in my Gmail app on Android.
Also already went through troubleshooting
We need iPhone app for gmass
Hi Lewis,
At this time we’re still looking into it and may be included in the roadmap ahead.
Will this work with ipad OS??
Hi Camrin,
Unfortunately, not to schedule or send your email campaigns as this would need to be done in Gmail using Chrome on either a PC or Mac.
GMass,
I installed GMass Gmail Add-on to my Gmail so how can I know it’s working when I don’t see any GMass buttons in my Gmail (Android) app??? Can you tell me if I installed it correctly???
Also is it possible to install the GMass Chrome Extension on Chrome app on Android??? And can you have GMass Gmail Add-on and GMass Chrome Extension both installed at the same time on Android???
Thank you
Hi Jim,
Please note that the GMass’s functions on sending campaigns are limited to Chrome on a PC or Mac with the GMass Chrome extension installed.
How do I remove the add on for iOS ?
Why gmass is not showing in my Gmail account after installing it what be the problem
Hi John,
You may have another extension causing a conflict. Please follow our troubleshooting steps found here: https://www.gmass.co/blog/troubleshoot-missing-gmass-button/