<img height="1" width="1" style="display:none" src="https://www.facebook.com/tr?id=1822615684631785&amp;ev=PageView&amp;noscript=1"/>

Curious about what the average cold email response rate is?

Most cold emails have one simple objective: To get the recipient interested enough to engage with you.

And tracking your response rate, which is the number of replies you receive, is one of the easiest and most informative ways to evaluate how well your campaigns are doing.

In this blog post, I’m going to cover what the average cold email response rate is, what influences it, and five simple tips to boost it easily.

Cold Email Response Rate: Table of Contents

(Click on the links to jump to a section.)

Let’s begin!

What Is Your Cold Email Response Rate?

Before I break down some stats showing what the averages are, first I want to cover what your cold email response rate actually is. After all, the more you know about what you’re tracking, the easier it is to make sense of it!

However, if you’re already familiar with the term, feel free to skip ahead to the “average response rate” section.

Your email response rate is the number of replies you’ve received against the total number of emails you’ve sent, expressed as a percentage.

For example, if you sent 100 emails and received 5 replies, your response rate would be: 5/100 = .05, also expressed as 5%.

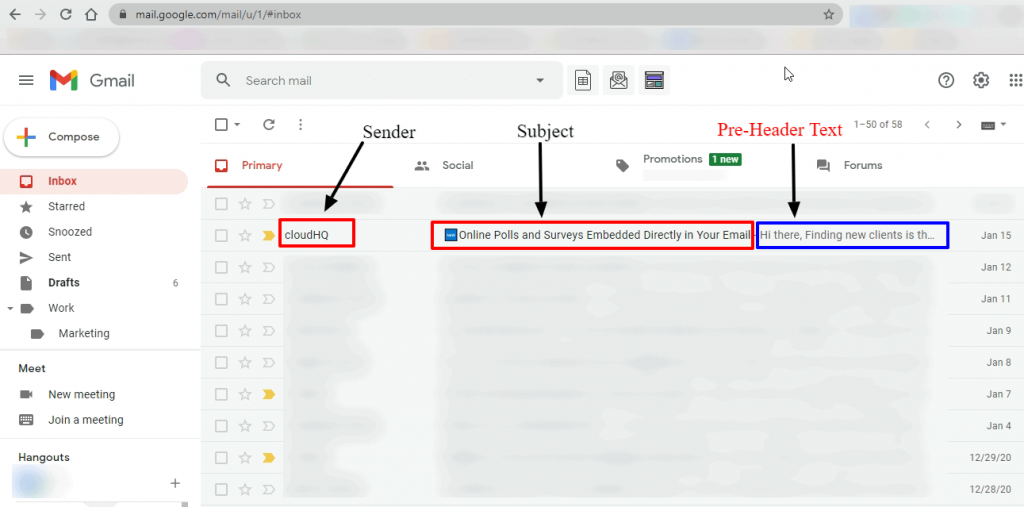
What is your cold email open rate?

If you were interested in learning about email response rates, chances are, you’ve come across the term email open rate, too.

And for good reason.

Both your response and open rates are key campaign metrics that you should track.

Your open rate is simply the number of unique people who opened your emails. For example, if you sent the same email to 100 different recipients and 50 of them opened it, your open rate would be 50%.

The key word here is “unique” because it counts the number of individuals who opened your email, not the number of times your email was opened — as including the number of times the same recipient re-opened your emails would skew your results.

Note: Some email marketing tools track total email opens (including re-opens) instead of unique opens. That’s why it’s always important to verify what your email tool is tracking before analyzing the data.

How to connect your open and reply rates

Ideally, you don’t want too big a discrepancy between your open and reply rates when cold emailing.

Why?
While your average open rate will always be higher than your reply rate, there shouldn’t be too big a discrepancy. If you’re barely getting any replies, despite a large number of opens, it’s usually a sign that your outreach isn’t engaging enough.

Think of it this way:
If you owned a store, your open rate would signify how well you were able to attract a potential customer to visit the store. Your reply rate would reflect how well you engaged them while they were inside your store.

If you have tons of customers simply visiting but not engaging or buying anything, something’s wrong — right?

What Is the Average Cold Email Response Rate?

The widely accepted average across all cold emails is approximately 1% to 5%.

The long (and more accurate) answer?

The average response rate varies. Considerably.

I analyzed thousands of email campaigns sent via GMass to determine the average cold email response rate.

From the cold outreach data that I analyzed from email campaigns sent via GMass, I saw campaigns with response rates under 1% and campaigns that had reply rates over 25%!

So, where did I get the 1-5% average response rate figure?

While that’s a generally accepted figure online, I’d take it with a grain of salt because your response rate is influenced by a ton of different factors.

Let me walk you through each one:

What Influences Your Cold Email Response Rate?

Here are the different factors that play a significant role in what your response rate could be:

1. Personalization

Here’s something on which every sales and marketing professional can agree:
More personalization = more engagement.

It’s simple, really.

If your cold emails are personalized and look like they’ve been tailor-made for your recipient (instead of looking mass-produced), you’ll increase your chances of getting a reply.

Over time, I’ve found personalized emails receive more than twice as many replies as non-personalized ones! (It’s why we’ve put so much focus into the personalization tools with GMass.)

What do I mean by personalized?
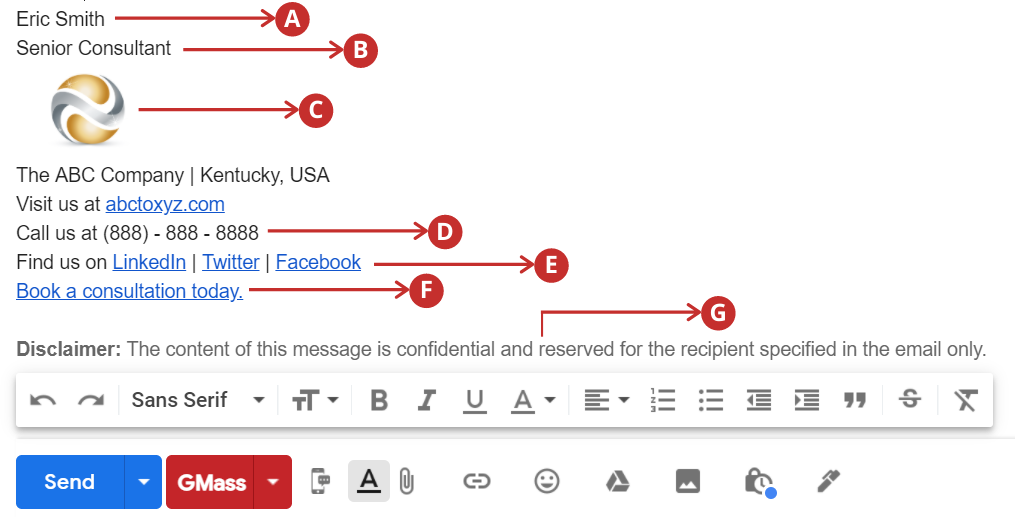
Personalizing your outreach refers to creating a personalized subject line that includes their name and an email body that references something they do or where they work. Essentially, it is about adding anything to show your recipient that the email you’ve sent was made for them and nobody else.

In fact, it’d be great if your cold email was so personalized the recipient believed it was a one-on-one email you sent to them directly.

Why does this cold emailing technique work?
With personalized emails, you’re showing your recipients that you actually took the time and effort to tailor this outreach email to their needs and wants. And as a result, you’ll be able to better connect with them, increasing your chances of getting a reply.

2. Your industry and offering

One of the mistakes most digital marketing professionals make when looking at cold outreach data is ignoring the context of that data, as certain industries have higher response rates than others.

What causes this?
A variety of unique factors influence the reasons that certain industries have higher averages than others. For example, factors like the nature of the industry, the level of competition, and the nature of your product/service, etc., can play a massive role.

What’s important to understand is that using a standard reply rate benchmark for all industries can be very misleading. That’s why you should always tailor your cold emailing expectations and goals to align with the field in which you’re marketing.

3. The intended call-to-action

This is one of the most impactful factors in determining your response rates.

Before analyzing your reply rates, ask yourself this question:
“What did I want my cold emails to achieve?”

  • Generating a sign-up?
  • Scheduling a meeting?
  • Alerting them to a social media campaign they should check out?

Answering this is very important, as sometimes, getting a response isn’t a part of your cold email’s goal in the first place.

For example, if your lead generation emails included a sign-up link or a link to schedule a meeting on Calendly, you weren’t looking for a reply. You just wanted them to click on the link and be redirected.

However, if you were sending out outreach emails and wanted to carry on a discussion about how you could build on this relationship, you’re definitely expecting a reply.

As a result, these two types of emails are going to have very different average reply rates.

4. The “warmth” of your leads

There’s a difference between emailing cold leads and emailing warm or hot leads. The process with cold leads will have lower response rates and often a longer sales cycle. A warm lead might move faster — and a hot lead might move immediately.

Set your open rate and reply rate expectations accordingly. And if you are working with warm leads — make sure you remind they why they’re warm to boost your chances of getting a reply.

5 Simple Tips to Boost your Average Cold Email Response Rates

You now know what response rates are and what influences them.
But how do you go about ensuring that your reply rate remains high?

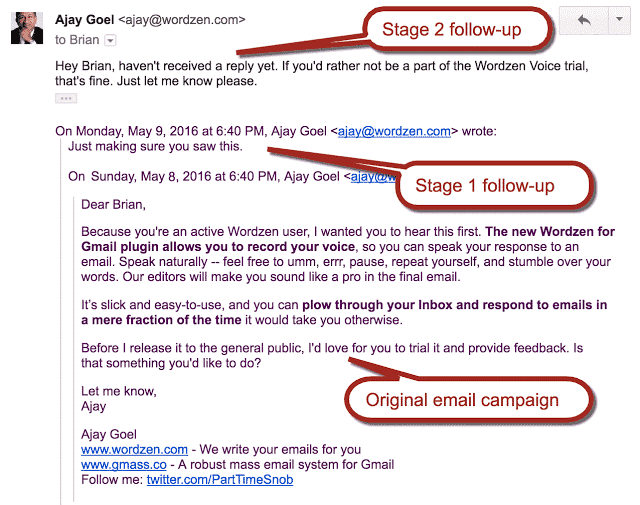
1. Personalize them…a lot

As I mentioned before, mail merge personalization is a key factor in determining your reply rate.

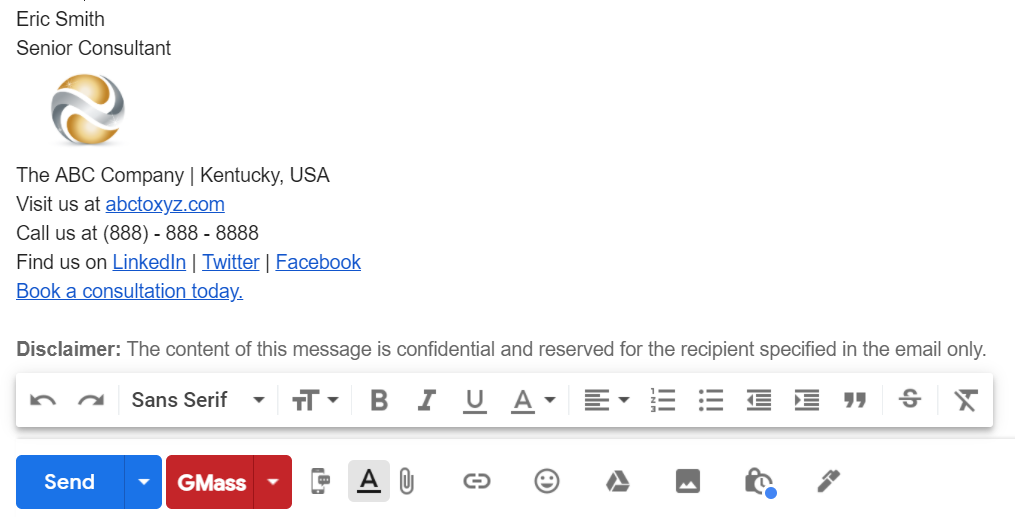
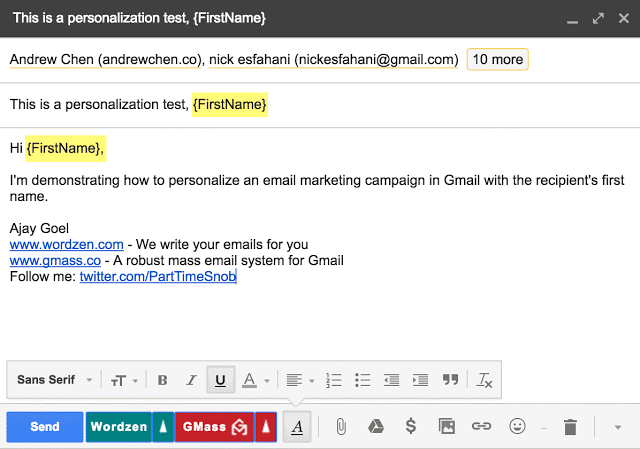
Always try to include your recipient’s name in your email’s subject line and greeting. You could also reference their company, their job title, or something they’ve accomplished recently to show them that this email was really made for them.

Just make sure your personalization rings true. If you include a link to one of their articles and say how much you liked it — make sure you’re linking to an actual article, not a category page or other database-driven page. Disingenuous personalization is rarely going to impress anyone.

Research has shown simply including a recipient’s name or the name of their company in the email can boost the average response rate to over 9%.

Interestingly, research has found that while it doesn’t have a large effect on open rates, personalized cold email subject lines result in twice as many replies as unpersonalized ones.

However, most of all, always ensure that your promotional email is tailored to their specific needs and wants. Remember, as you compare a cold email vs. cold call, in both cases your recipients never asked to be contacted, so you need to show them why your marketing and sales emails are something they should bother with (and answer).

Concerned that creating personalized emails will take forever?
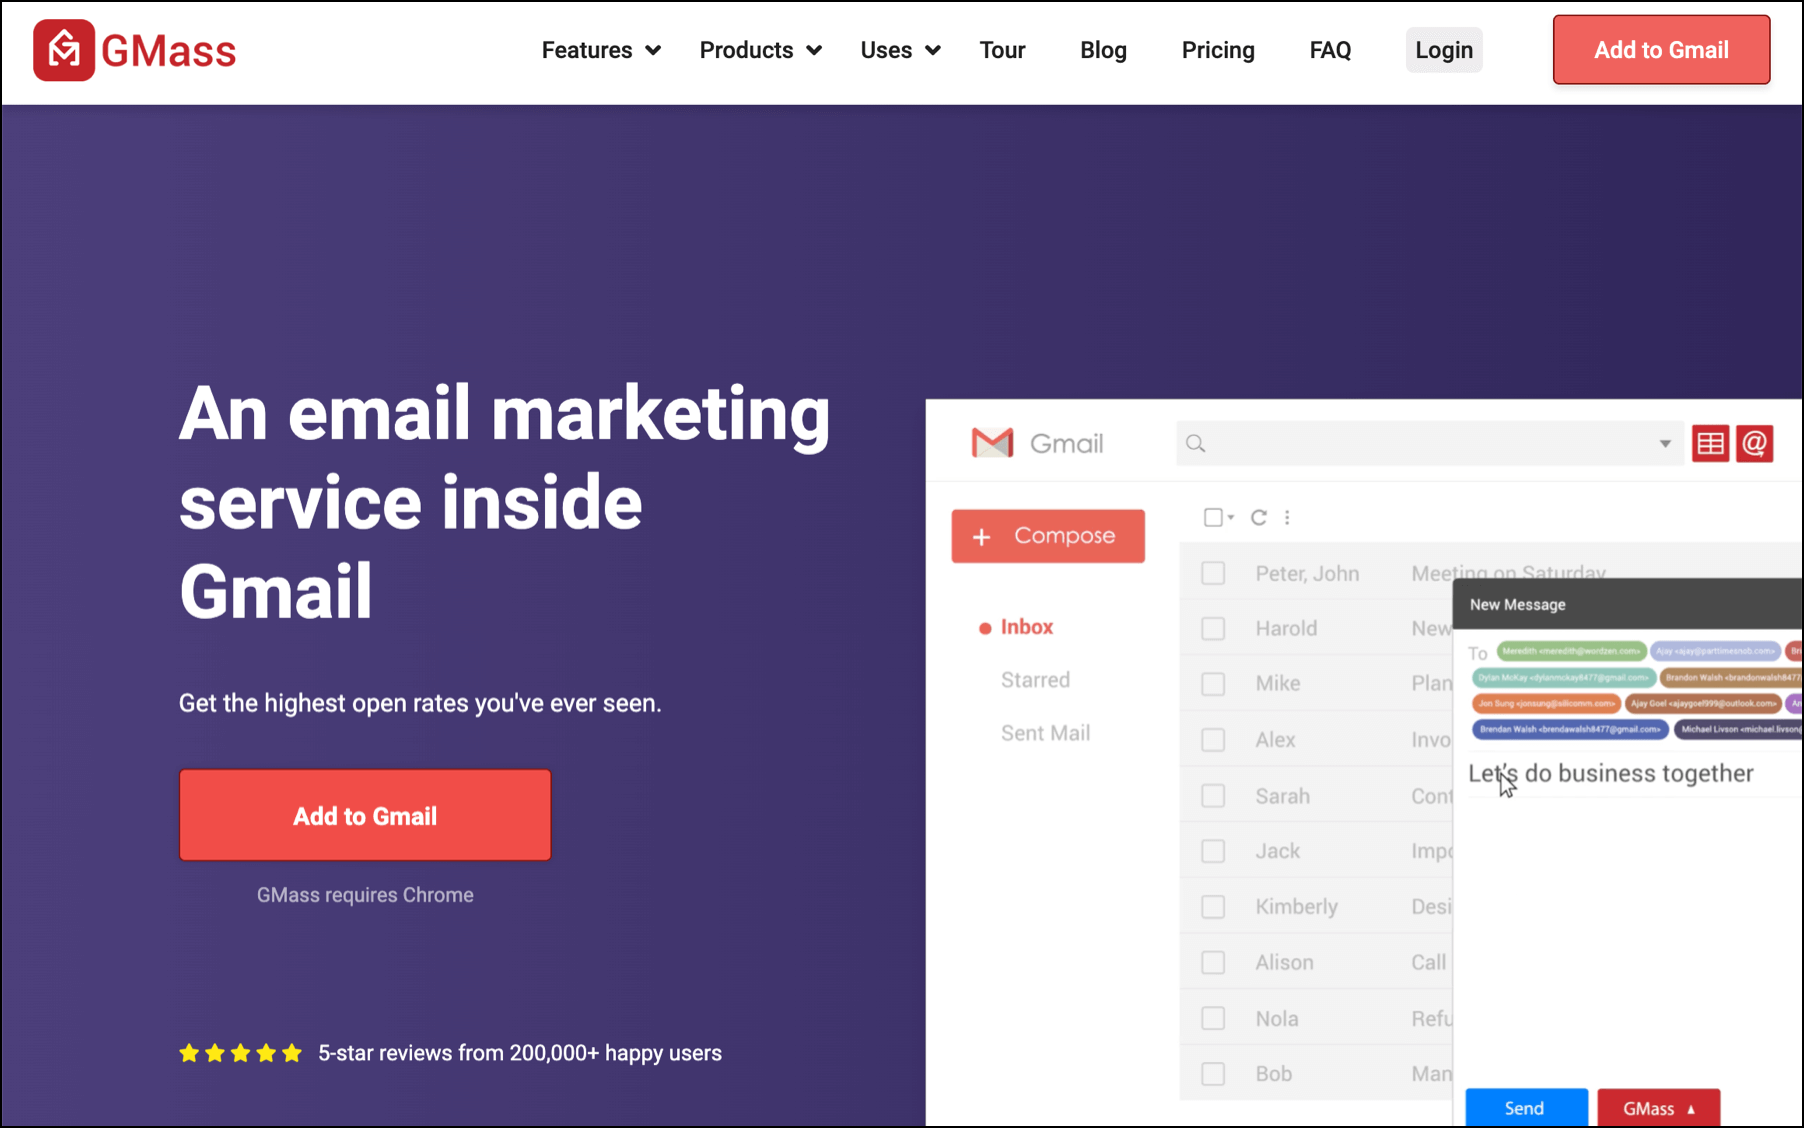
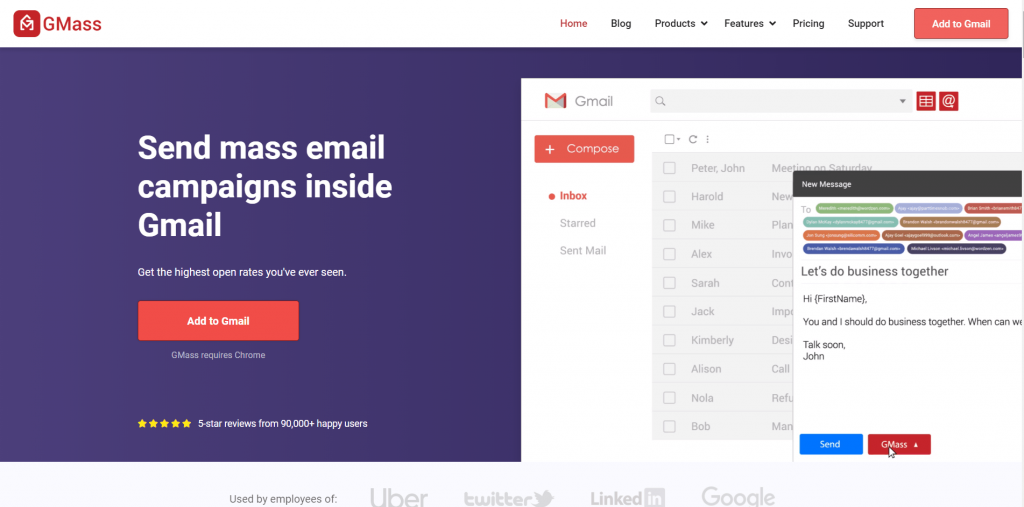
That’s why we made an email marketing tool like GMass, so you don’t have to worry.

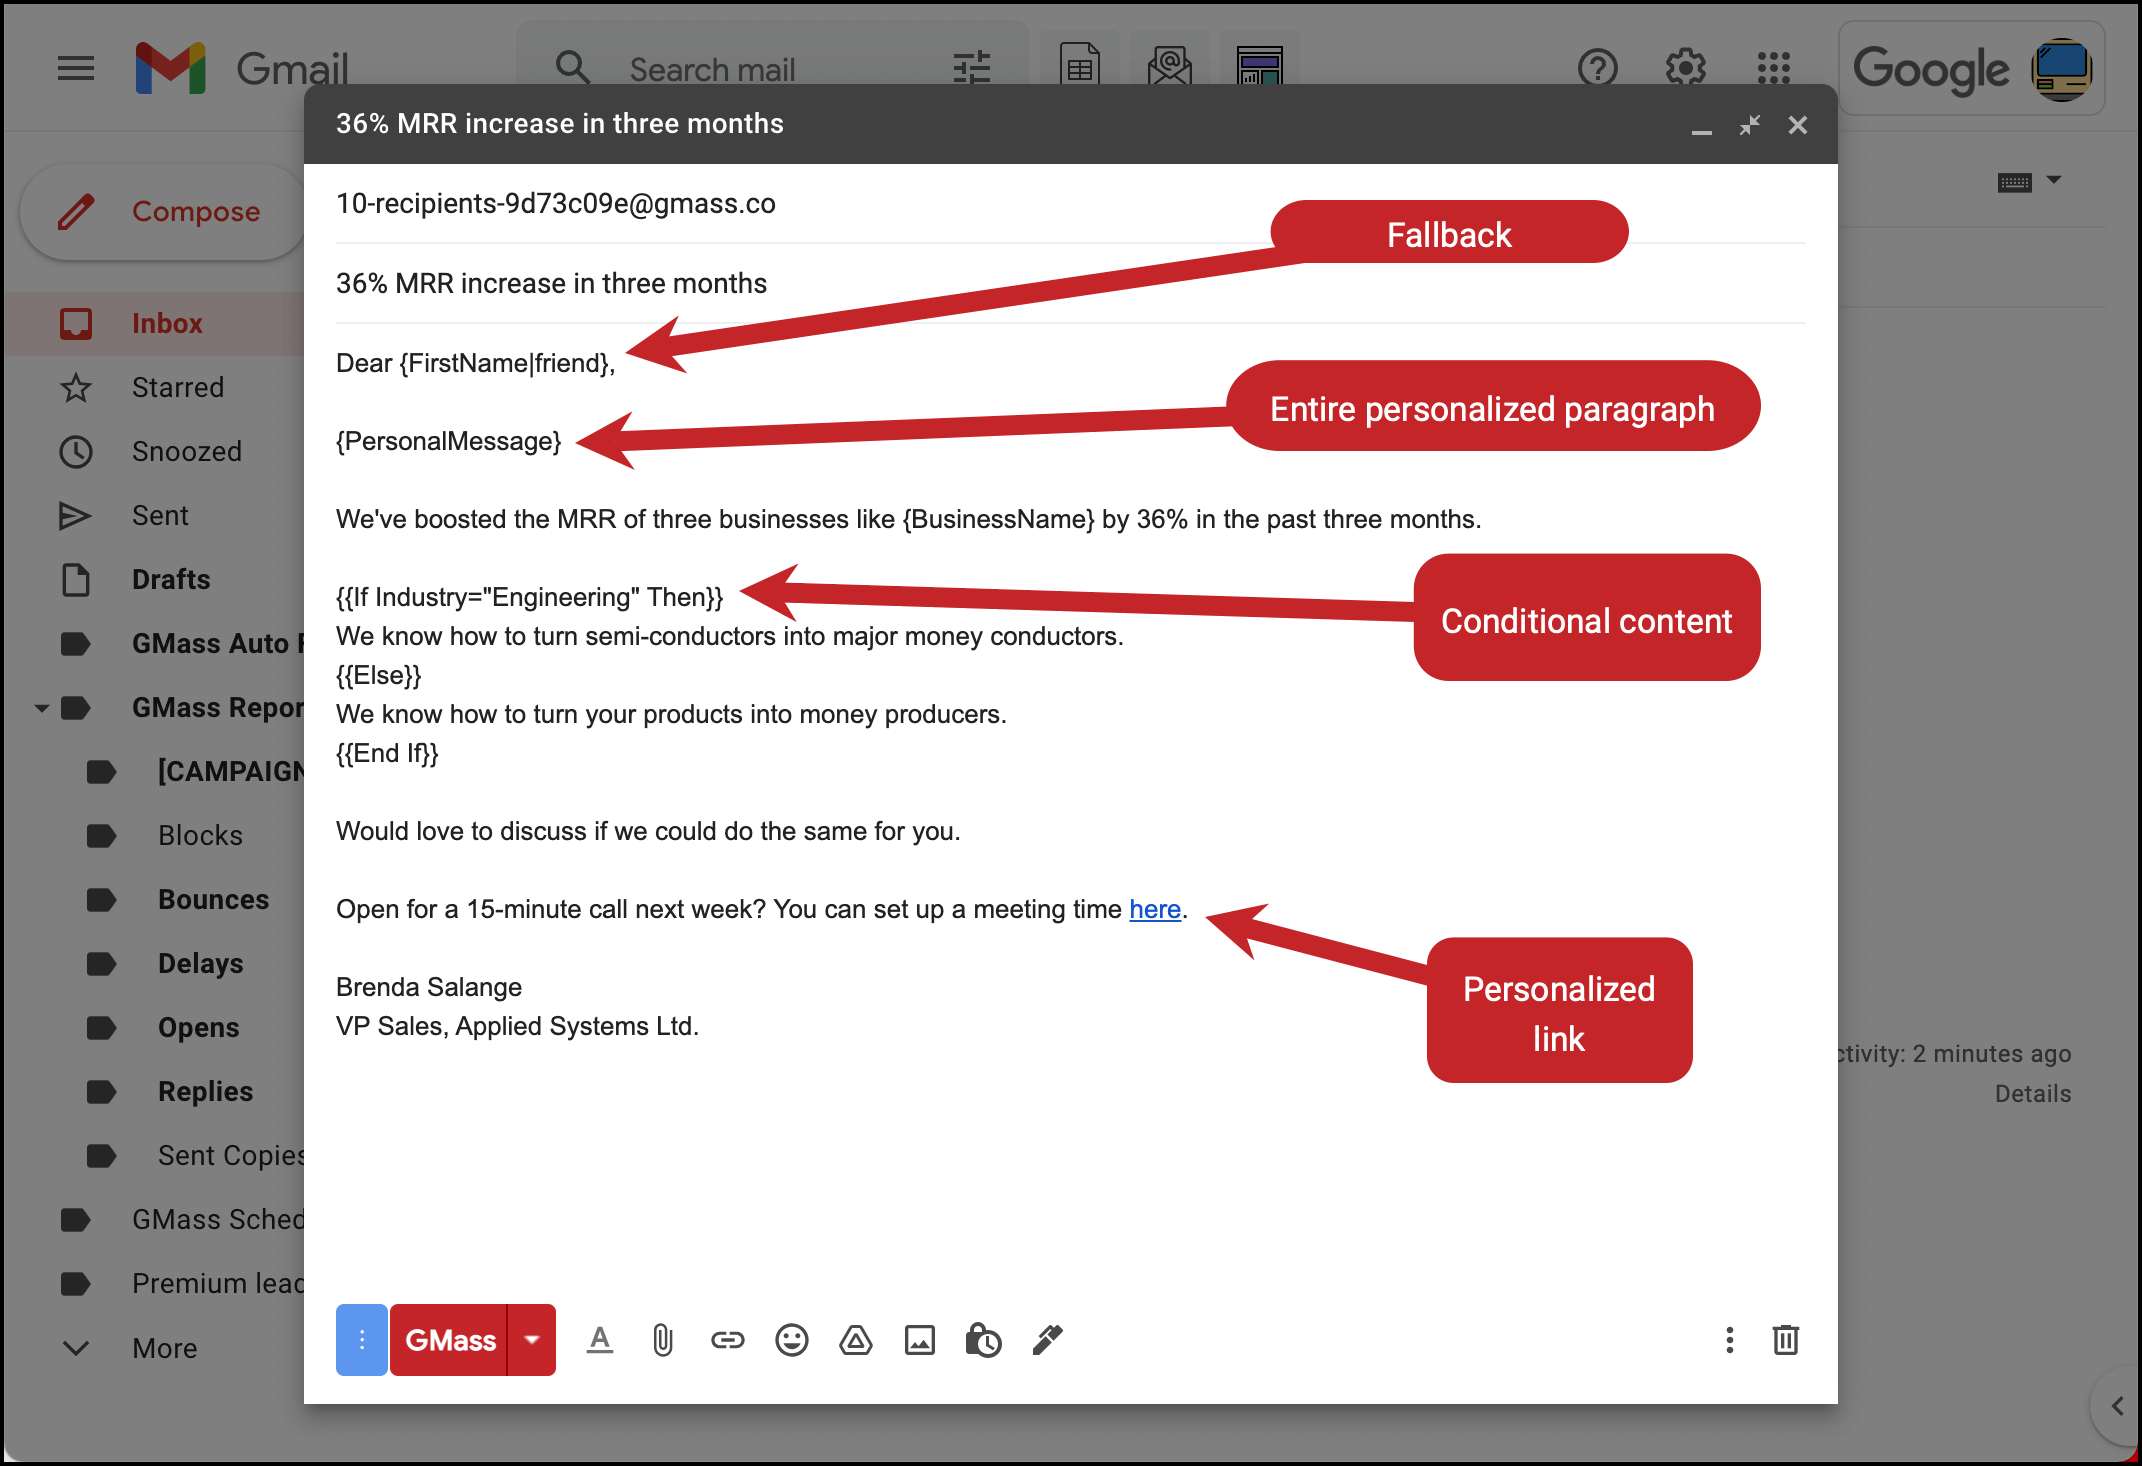
With GMass’ Automatic Advanced Personalization, you won’t have to personalize any of your sales outreach emails manually.

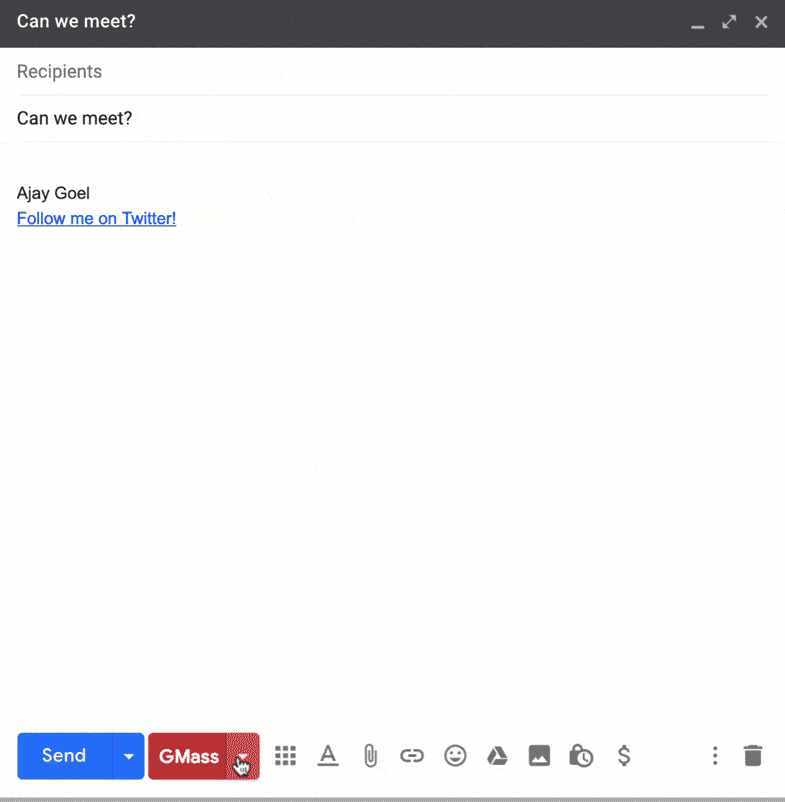
GMass’ marketing automation can directly insert a recipient’s name and company into your email and even automatically include personalized paragraphs, attachments, images, and links.

Lots of high-level personalization

2. A/B test your emails

As there are so many variables that affect your reply rate, what works for someone else’s target audience may not work for yours — even if you’re both part of the same industry.

That’s why it’s always important to A/B test your emails to determine what works best for you and your contacts.

What is A/B testing?
A/B testing involves sending variations of the same email to different segments of your email list.

For example, if you were sending prospecting emails, you could send an email with Subject Line A to one segment while you send the same email with Subject Line B to another segment.

Then you can compare how each variation performed to determine which one (Version A or Version B) resulted in more replies. Use that one for the rest of your cold outreach campaigns.

A/B testing has been shown to increase open rates by 49%, which is why it also bodes well for your reply rates.

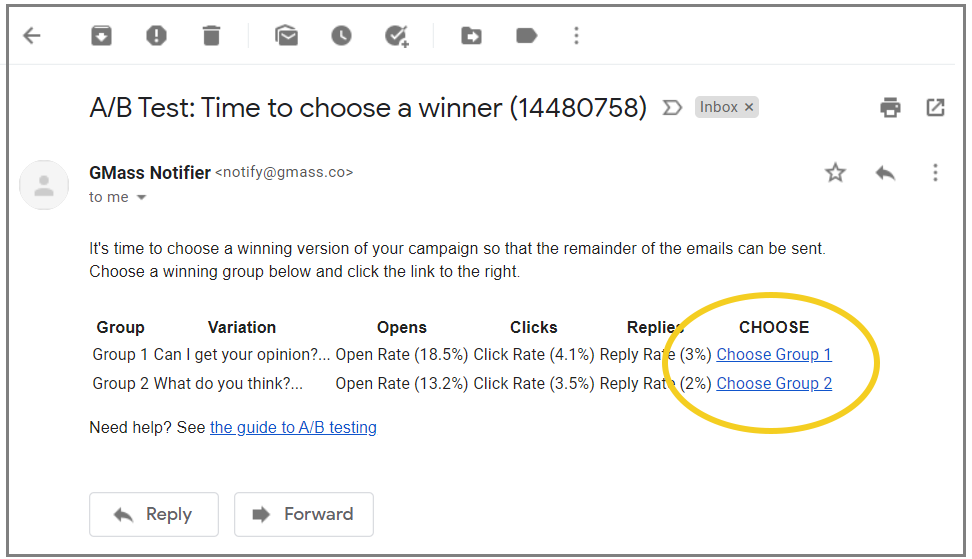
GMass has an A/B testing feature that fits into your workflow. You can create your variants using special tags inside an email, run the test on each variant to a portion of your list — then either manually pick the winner or even have GMass automatically send the better variant to the remainder of your list.

A/B notifier - time to choose a winner

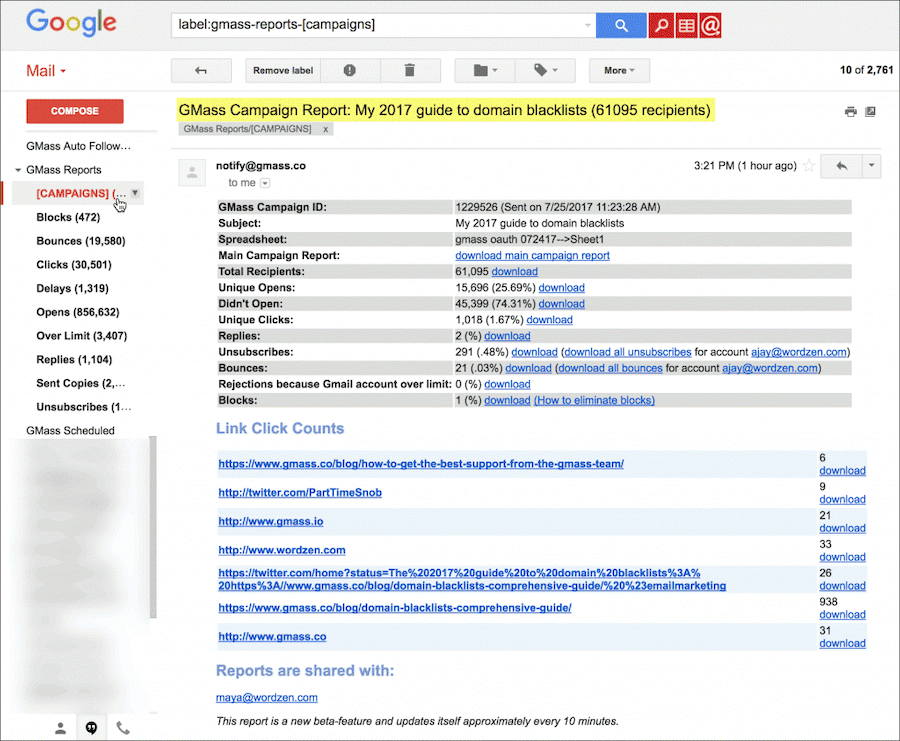
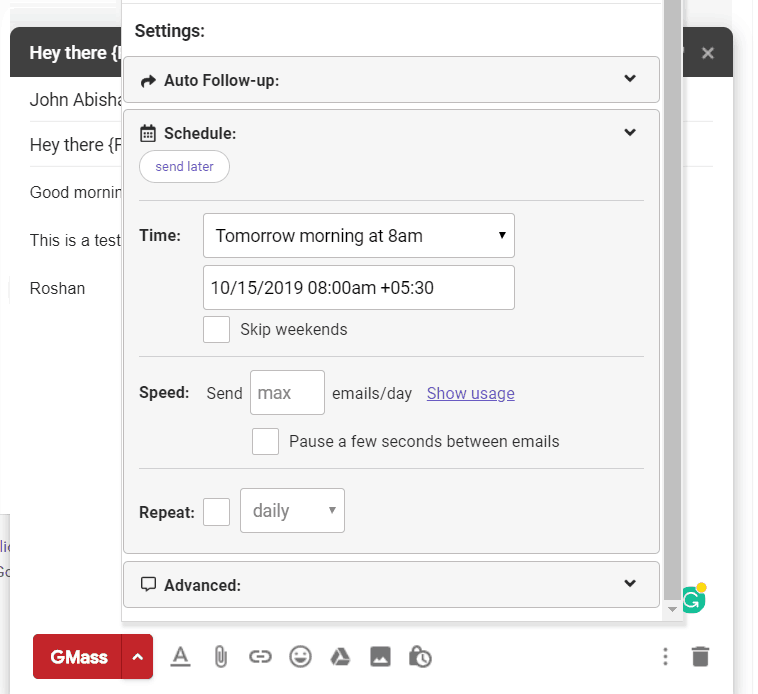
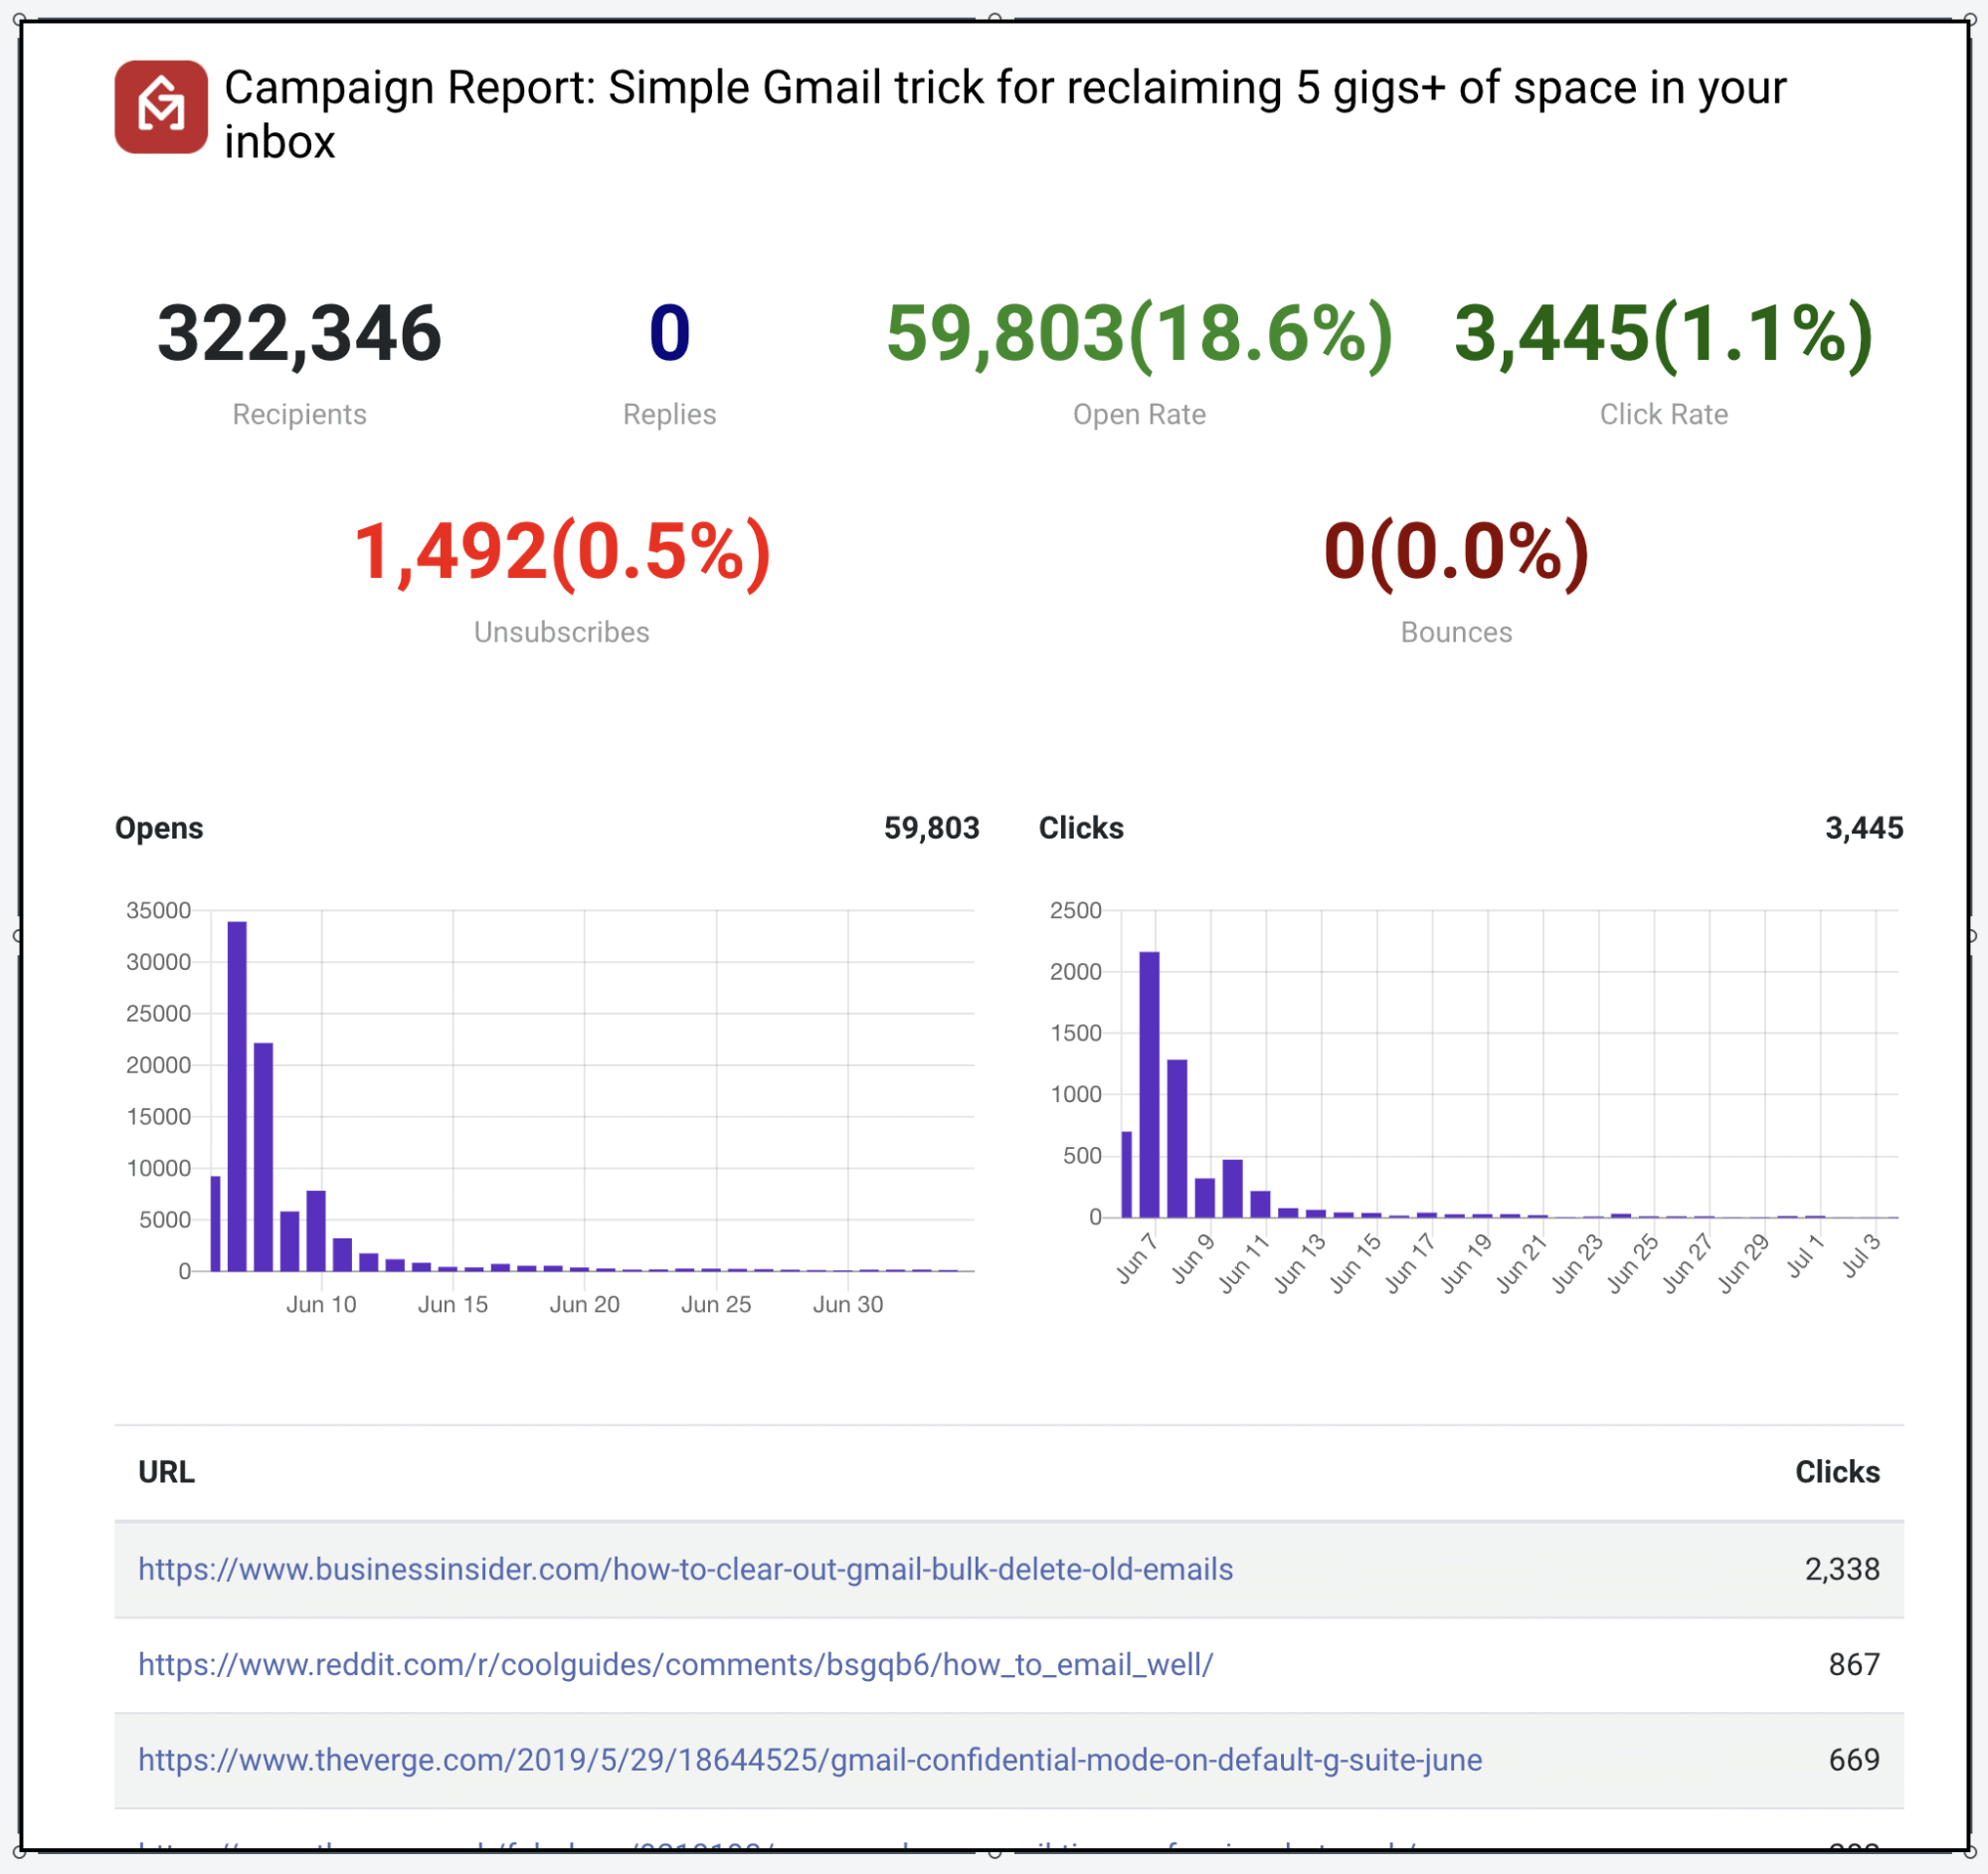
Whether or not you do A/B testing, you should, at the very least, monitor how your cold emails perform using GMass’ Campaign Reporting.

Reports are automatically generated after every email campaign, and you can access them in three spots: Right inside your inbox, in the GMass dashboard, or via a sharable web-based report. The reports highlight crucial metrics like your open rate, reply rate, click-through rate, unsubscribes, and more.

Campaign report

3. Filter your email lists

Is it possible to get a reply from someone who doesn’t exist?

Unfortunately, many email marketers put themselves in that predicament — marketing to people who aren’t there.

If you don’t regularly update your mailing lists, you may be sending emails to addresses that either no longer exist or have already blocked you.

Not only is sending emails to these addresses a waste of time and effort, but it can also:

  • Lower your sender reputation — leading to your emails heading straight to the spam folder
  • Disrupt your reply rates by skewing the data to reflect lower engagement levels

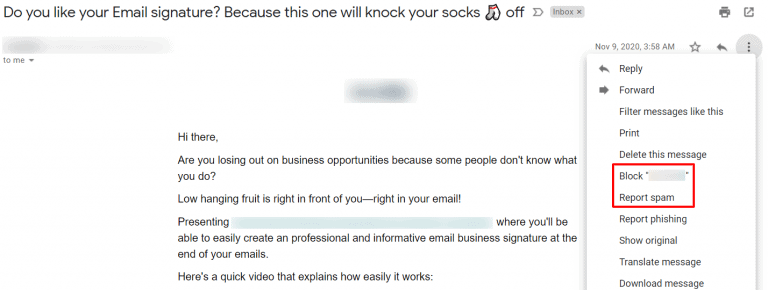
After all, there’s a big difference between cold email vs. spam — and it’s important you don’t accidentally wind up flagged as spam when you’re sending legitimate cold emails. Sending emails to dead addresses that hard bounce is a very quick way to add spam suspicion to your account.

(Want to read more on this topic? Here’s a deep dive into the question is cold email illegal? to keep you up to date on the line between your emails and spam ones.)

For example, you’re not going to get a reply from someone who has zero interest in what you’re offering — so why send them tons of follow-up emails?

Similarly, if an email address is no longer valid, you’re not going to get a reply — all that’s going to do is increase your bounce rate.

That’s why it’s important to maintain and segment your email lists to ensure that:

  • You’re sending emails to people who are actually interested in what you’re offering and might reply.
  • You’re sending emails to valid email addresses.

In fact, research has shown that targeted cold emails can receive average response rates of 15-25%.

With GMass, you can quickly build an email list within your inbox using the Gmail search feature or even use a Google Sheets spreadsheet to conduct a quick mail merge.

GMass has bounce management and unsubscribe management features to automatically suppress future emails to bounced or unsubscribed addresses — no manual work required on your end.

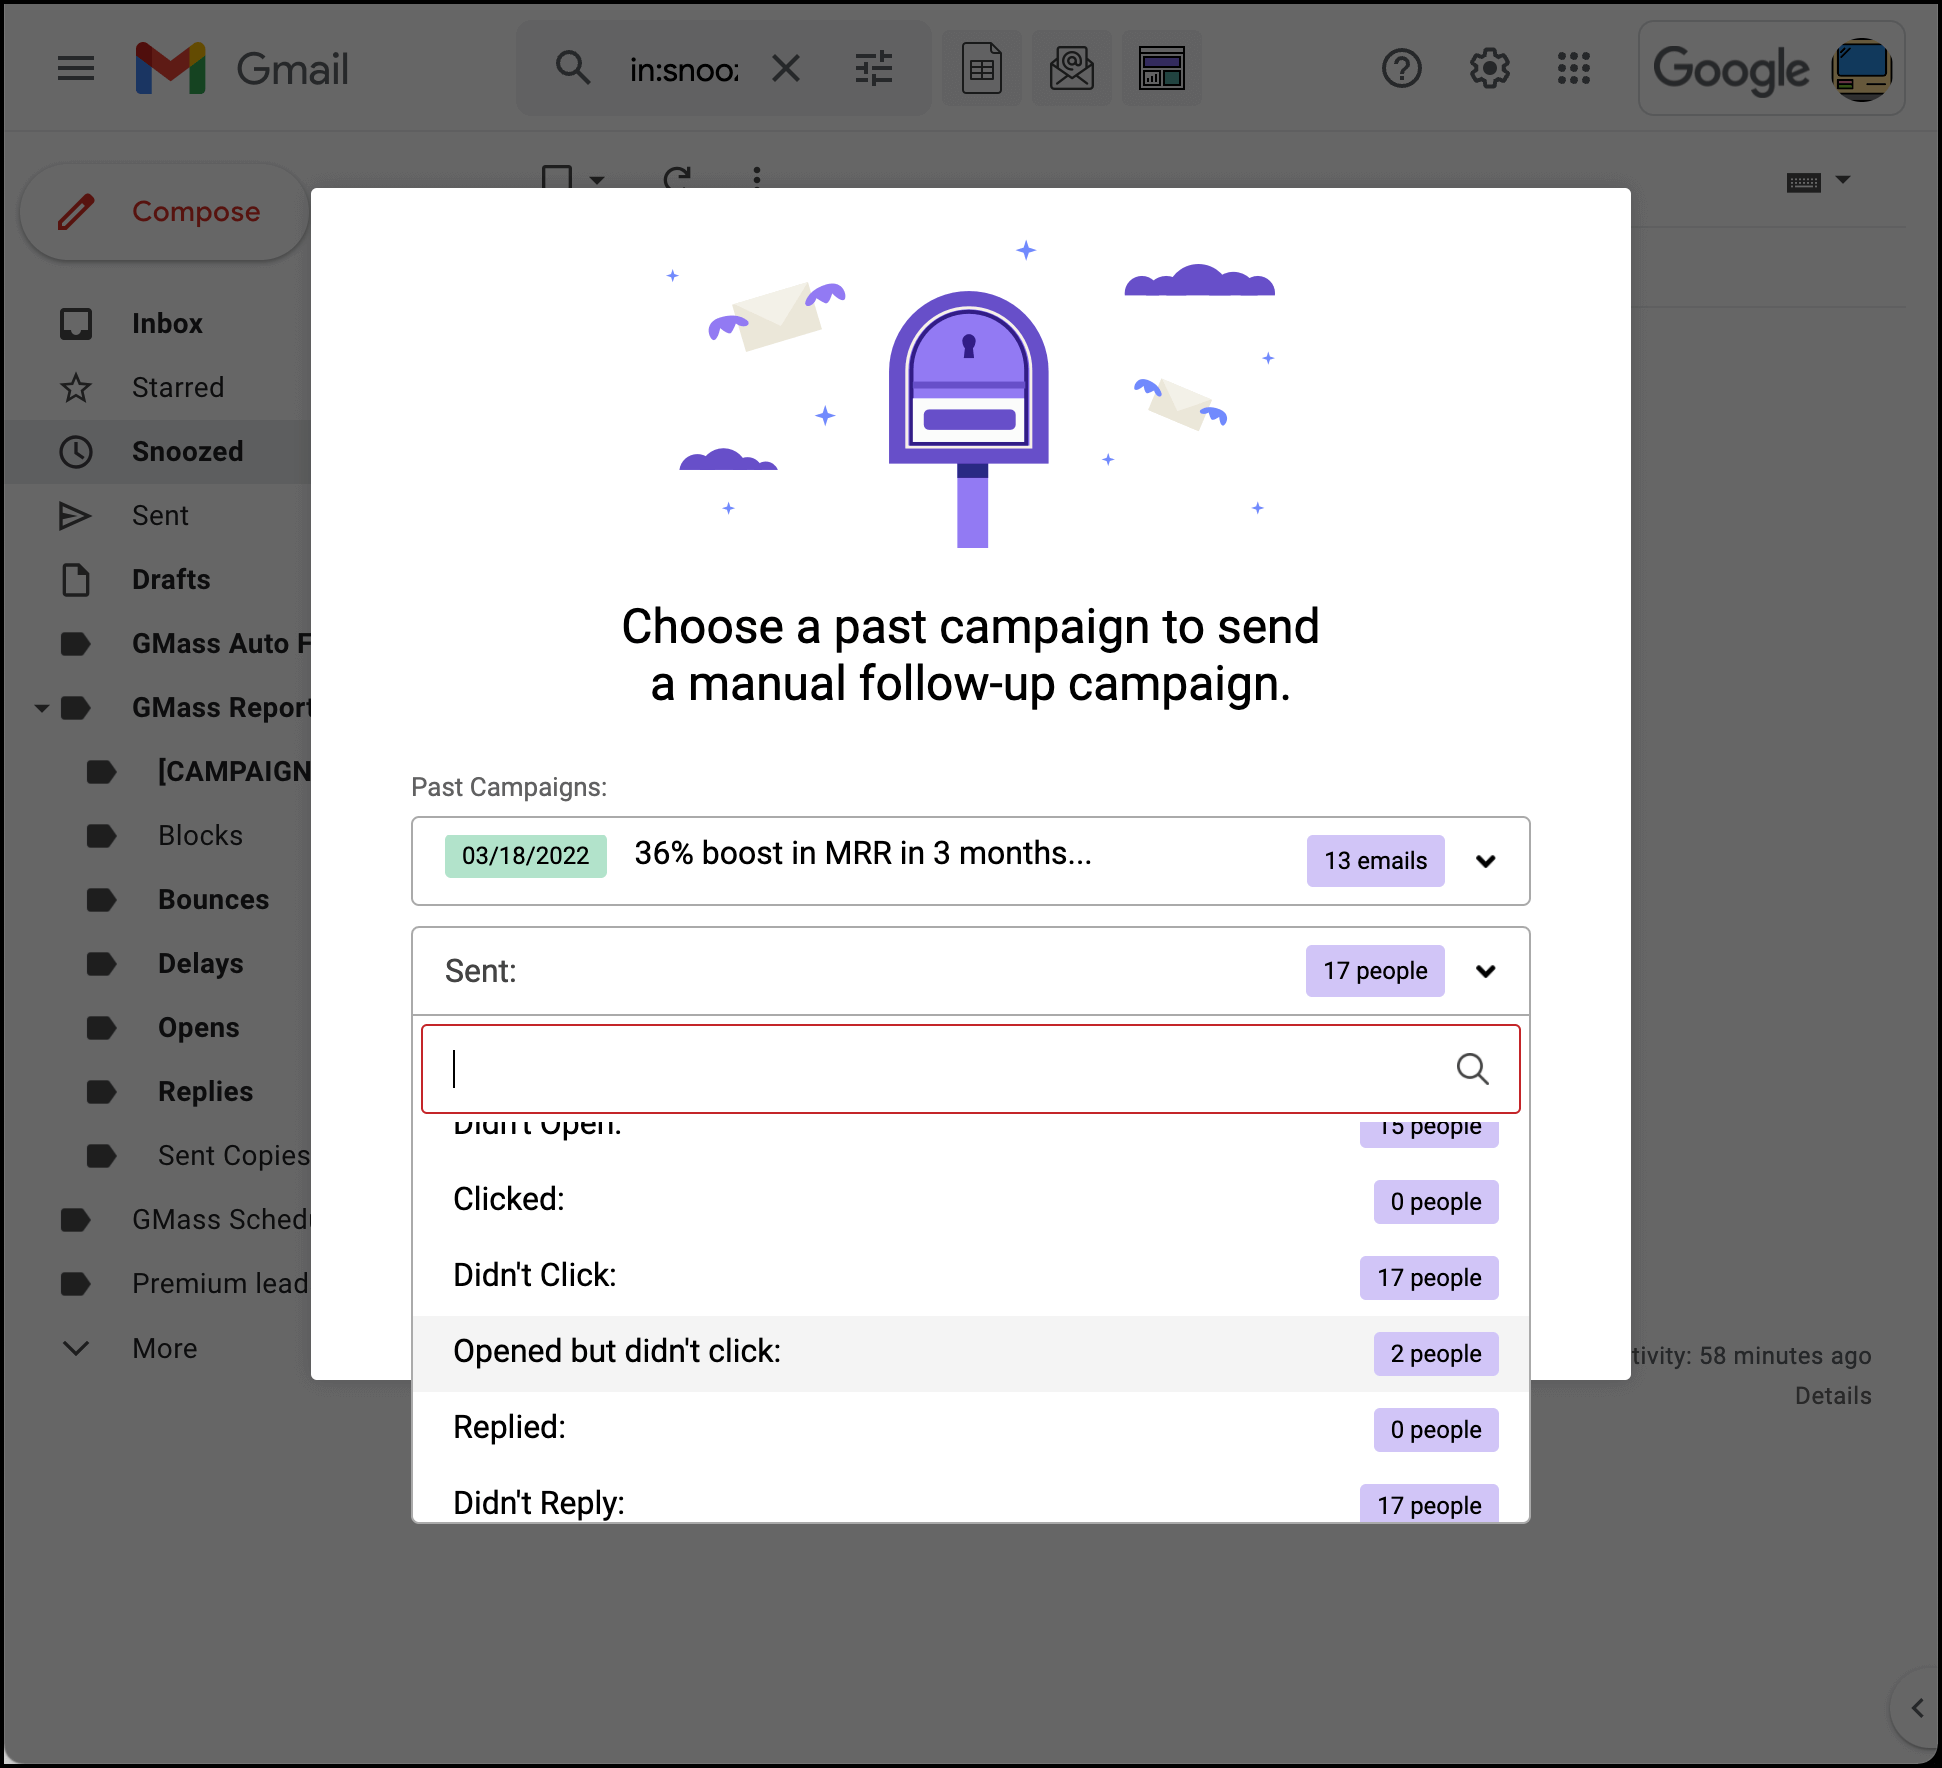
And with GMass’s segmented campaigns, you can send new campaigns to a segment of your list based on their behavior. For example, you could send an email to everyone who opened your emails but didn’t reply — and use new messaging to try to get them to respond.

Segmented choices in GMass

4. Always include a strong CTA

Including a CTA (call-to-action) at the end of your email is always a good idea.

Why?
It draws your prospect’s attention to the fact that you want them to do something — like reply — after reading the email. After all, if you don’t make it clear you’re looking for a reply, there’s a chance your contacts won’t realize they should reply.

Why take that risk when all it takes is a few lines to drive the point home?

Adding a simple line such as “looking forward to your reply” or “please let me know if you’re interested in moving this forward,” can make all the difference when it comes to increasing the efficiency of your sales process.

Tip: Here’s my guide on how to end an email for better engagement.

5. Follow the KISS principle

Keeping It Short and Simple is a fundamental cold email principle.

Why is it so helpful?
It ensures that the information you want to convey is easily accessible — making your outreach campaign as reader-friendly as possible.

Remember, cold emails are like cold calls — they aren’t something your recipient has asked for — so if they decide to open it, your sales rep needs to get their foot in the door and get their point across quickly.

If your email is too long and its purpose is unclear, they’re not going to bother reading through it or replying. Research shows that cold emails that are 50-125 words long receive reply rates of around 50%.

But don’t worry, your email doesn’t have to be lengthy or uninteresting. Check out my guide on how to start an email properly to avoid that from ever happening!

Note: These are just five of the hundreds of helpful things that can help you improve your cold email campaigns.

Cold Email Response Rates: Conclusion and Summary

While it’s hard to find a universal average cold email response rate — because it varies so much by industry, ask, and business — the broad average is about 1% to 5%.

However, it’s clear that it depends on a variety of factors. And when you manage those factors effectively enough, you’re sure to boost your reply rates in no time!

Remember that if you truly want to boost your email campaigns and maximize their engagement, you can’t do it alone.

You need a tool that can help you along the way.

And that’s where GMass comes in.

With features like automatic personalization, scheduling, and a spam solver, it’s got everything an email marketer needs!

So why not download the Chrome extension today and experience it for yourself?

Email marketing, cold email, and mail merge inside Gmail


Send incredible emails & automations and avoid the spam folder — all in one powerful but easy-to-learn tool


TRY GMASS FOR FREE

Download Chrome extension - 30 second install!
No credit card required
Love what you're reading? Get the latest email strategy and tips & stay in touch.


Want to schedule emails on the Gmail web app or mobile app?

Gmail’s Schedule send feature lets you send emails at a preset date and time. This way, the emails reach the recipient’s inbox when they’re most likely to engage, resulting in better visibility and opens.

The feature comes in handy if your team works remotely across different time zones and uses emails for work coordination. Additionally, you can use the Gmail delay send feature to schedule emails to yourself as reminders!

In this guide, I’ll cover how to schedule an email in Gmail using its web app and mobile app. I’ll also go over canceling and editing scheduled emails on the web and mobile apps.

Additionally, I’ll show you a better and hassle-free easier way to schedule your emails in Gmail.

This Gmail Guide Contains:

(Click on a link to jump to the specific section)

Let’s get started.

Further Reading:

Scheduling Emails in the Gmail Web App

First, I’ll go over how to schedule an email in Gmail using its web app.
Then, I’ll walk you through canceling and editing your scheduled emails on the web app.

A. How to Schedule an Email in the Gmail Web App

If you’re a Gmail user, email scheduling on its web app is straightforward.
Just follow these steps:

Step 1
Go to your Gmail account and sign in with your Gmail or Google Workspace (formerly Google Apps) account.

Sign in button

Step 2
From your Gmail inbox, click the Compose button at the top left of the screen.

Compose button

Step 3
This will open the compose window for your new email.

Once you’ve written the email, click the downward-facing arrow next to the Send button to bring up a pop-up.

Send button

Step 4
Click the Schedule send button.

Schedule send

Step 5
You should now see several options to schedule your email — Tomorrow morning, Tomorrow afternoon, Monday morning, or you can select your date and time by clicking Pick date & time.

Schedule send tab

Step 6
To select your own time and date from under the Pick date & time window, pick a specific time on the right and choose a specific date from the calendar on the left.

Pick date

Step 7
Click Schedule send to have the Gmail message sent at a later date and time.

And voila! You now have a scheduled message.

Note: The steps to schedule emails using Apple Mail are similar to Gmail’s Schedule send feature. The only difference is that you’ll find a Send Later button instead of Schedule send in Apple Mail. You can use the Send Later button inside Apple Mail for scheduled sending from your Gmail, Apple Mail, and Outlook accounts.

B. How to Cancel Your Scheduled Emails in the Gmail Web App

If you’ve scheduled an email but no longer want to send it, don’t worry. It’s pretty straightforward to cancel a scheduled mail from your Gmail inbox. Here’s how:

Step 1
Sign in to your Gmail account on your desktop browser.

Step 2
Locate the Scheduled folder on the left-hand side of the screen and click it.

Scheduled folder

Step 3
Select the email you want to cancel by clicking the checkbox to the left of the email.

Step 4
Finally, click the Cancel send button located just beneath the search bar.

Cancel send button

The scheduled send email will no longer be sent at the specified later date and time and will move from the Scheduled folder to your Drafts folder, where you can delete it.

C. How to Edit Your Scheduled Emails in the Gmail Web App

If you’ve scheduled an email but want to edit parts of your scheduled send email or change the scheduled date and time, here’s how you can do it:

First, follow the steps to cancel your email, as I mentioned above. Next, do the following:

Step 1
Go to your Drafts folder and find the email you want to edit.

Draft folder

Step 2
Select the email and make the necessary updates in the Gmail compose pop-up window that opens.

Compose popup

Step 3
When done, reschedule the email message.

You can opt to change the date and time here or use the scheduled date and time you added earlier.

You can reschedule the email by selecting the dropdown arrow next to the Send button and following the steps I mentioned earlier.

Dropdown arrow button

Go back to Contents

Now that you know how to schedule, cancel, and edit emails on Gmail’s web app, let’s check out how to do the same using its mobile app.

Scheduling Emails in the Gmail Mobile App

I’ll cover how to schedule your emails using the Gmail app on your smartphone and then show you how to cancel and edit the scheduled emails on its mobile app.

A. How to Schedule an Email in the Gmail Mobile App

Gmail’s mobile app can help you with scheduled sending on the go.

Here’s how to do it:

Step 1
Open the Gmail app on your Android or iOS device and tap the Compose button.

Step 2
Compose the email you’d like to schedule.

Step 3
In the Compose window, find the three dots located at the top of the screen.

While these dots are vertical in an Android device, they are horizontal in an iOS device.

Vertical dots button

Step 4
Then, tap Schedule send from the pop-up menu that appears.

Schedule send 2

Step 5
From the window that appears, select the later time and date you want to send your email.

Later time and date

B. How to Cancel Your Scheduled Emails in the Gmail Mobile App

Canceling an email through your Android smartphone or iOS device (iPhone, iPad, etc.) is straightforward.

Here’s how you can do it:

Step 1
Locate the Gmail app on your smartphone or tablet and open it.

Step 2
Tap the three lines located directly to the left of the search bar.

Three lines button

Step 3
Scroll down until you see the Scheduled folder and tap it. Then, select the scheduled send email you want to cancel.

Step 4

Tap the Cancel send button located at the top of the screen.
(The Cancel send button looks like an arrow with an X.)

Cancel button

The email will no longer be sent at the scheduled time and will be moved to your Drafts folder.

C. How to Edit Your Scheduled Emails in the Gmail Mobile App

You can also edit your scheduled emails through the Gmail app on your Android device and iOS device (iPad, iPhone, etc.).

Here’s how to do it:

First, follow the steps I mentioned above to cancel your scheduled message. Then, from your Drafts folder, do the following:

Step 1
Open the email and tap the little pencil icon to begin making changes to your scheduled message.

Pencil icon

Step 2
When done, tap the three dots located near the send icon.
On Android, these dots are vertical, while on iOS, they’re horizontal.

Three dots icon

Step 3
Select Schedule send and pick from the preset times (and dates) or select your own. You can choose to send the email at a later date and time or send it when you had initially planned. 

Later time and date 2

Go back to Contents

While Gmail’s scheduling feature is excellent, editing your scheduled emails is still a tiring process that involves deleting and rescheduling the emails. Additionally, if you want to schedule multiple emails, it can be very tedious as you’ll have to add dates/times manually to each one.

Fortunately, powerful email outreach tools like GMass can help schedule your Gmail emails effortlessly.

Bonus Tip: A Better Way to Schedule Emails in Gmail

Gmass

GMass is a powerful email marketing and outreach automation tool used by employees in companies like Linkedin, Twitter, and Google. It’s also a favorite among small business owners, startup founders, consultants, and casual email senders.

The tool operates completely inside Gmail and is available for free as a Chrome browser extension that you can from your desktop or laptop.

To start using GMass, download the Chrome extension and sign up with your Gmail account.

Here’s how you can schedule your Gmail emails with GMass:

Step 1
Access GMass’s scheduling settings by clicking the GMass dropdown arrow located near the Send button while you’re composing your email. (As shown in the screenshot below).

Dropdown arrow gmass

Step 2
Choose between a list of preset times from the dropdown menu or set your own custom time.

Schedule

Step 3
Then, click the main GMass button next to the send icon to schedule the email.
That’s all there is to it!

Click gmass button

It seems pretty similar to using the regular Gmail Schedule send feature, right?

Where GMass really shines is the editing process.

Instead of having to delete and then reschedule your Gmail messages, GMass neatly organizes scheduled emails in a GMass Scheduled label in your Gmail inbox. In addition to GMass’ Gmail label, you can also find the email in your standard Gmail Drafts folder.

Now you can quickly access each one and edit your scheduled email’s text and specific date & specific time in a matter of seconds — no canceling needed!

But wait, this is still a manual process, right?
How does the GMass Chrome extension help when you need to schedule tons of emails at once?

One of GMass’ best features is Automated Personalization — it can automatically personalize your emails with the recipient’s first and last names, the company they work for, or other details such as their date of birth.

Personalize

This way, all you have to do is compose one email for all your recipients and rest assured that each recipient will still receive a personalized email message that looks like it was crafted just for them.

And as you’re just composing one email for all your recipients, you only need to take care of scheduling that one email.

Here are some more useful GMass features:

  • Email list builder — quickly build large email lists just by searching.
  • Reply management — automatically categorize your incoming Gmail messages to avoid inbox clutter.
  • Automatic follow-ups — GMass can send automated, customized recurring emails as follow-ups to ensure your recipients see and respond to your outreach messages.
  • Reports and analytics — detailed reports on how many people opened, clicked, and replied to your Gmail message.
  • Gmail mobile app add-on — access powerful email outreach capabilities inside your smartphone using the GMass add-on for the Gmail Android app.
  • Google Sheets integration — send mail merge campaigns from your Gmail account by connecting GMass to a Google Sheet with the recipient’s contact info.
  • A/B Testing (new feature) — vary your subject line and email body using different content sets and see which version gets the best results.

Go back to Contents

Wrapping Up

Scheduling emails in Gmail is relatively easy and can help you ensure that your emails arrive in the recipient’s inbox at the right time.
However, remember that the process is still manual, and editing your scheduled emails isn’t hassle-free.

Fortunately, email tools like GMass can solve this.

GMass makes it super easy to schedule, cancel, and edit your emails in seconds. And from automatic personalization to in-depth analytics, you also get a host of powerful features to boost your email outreach efforts.

Just install the GMass Chrome Extension to supercharge your Gmail inbox today!

Email marketing, cold email, and mail merge inside Gmail


Send incredible emails & automations and avoid the spam folder — all in one powerful but easy-to-learn tool


TRY GMASS FOR FREE

Download Chrome extension - 30 second install!
No credit card required
Love what you're reading? Get the latest email strategy and tips & stay in touch.


Looking for some email marketing tips to grow your business?

Tons of businesses prefer email marketing over other digital marketing channels like social media.

Why?
Because email marketing allows you to reach out to prospects directly — giving you better results than many other outbound and inbound marketing channels.

However, it doesn’t mean that email marketing is easy.

You need to plan your email strategy, content, and timing carefully to achieve the best possible results.

In this article, I’ll highlight 15 solid email marketing tips that can skyrocket the performance of your marketing emails. I’ll also show you a tool to help you manage your email marketing efforts with ease.

This Article Contains:

15 Excellent Email Marketing Tips to Boost Your Outreach

    1. Send Emails at the Optimal Time for Maximum Engagement
    2. Use a Calendar to Manage Your Email Marketing Schedule
    3. Send Mobile-Friendly Emails
    4. Avoid Complicated Designs
    5. Pay Attention to Your Subject Line and Pre-Header Text
    6. Add a Personal Touch to Emails
    7. Include Links and CTAs
    8. A/B Test Emails for Better Results
    9. Send Follow-Up Emails
    10. Allow Readers to Unsubscribe Easily
    11. Regularly Update Email Lists
    12. Segment Your Email List to Send Only Relevant Content
    13. Don’t Overuse Exclamations and Capitalization
    14. Build Relationships Before You Promote Your Product
    15. Use an Email Marketing Tool to Automate and Monitor Emails

Let’s jump into it.

15 Excellent Email Marketing Tips to Boost Your Outreach

Let’s take a look at 15 tips that can help you boost your email performance and business growth:

1. Send Emails at the Optimal Time for Maximum Engagement

Did you know that the timing of your marketing emails can significantly affect your engagement levels?

When sending marketing emails, you should only send them when a person checks their inbox.

One of the best times to send out an email is early in the morning, around 6 AM, since most people check their emails when they wake up before they go to work.

You can also send promotional emails around 8 PM — as some people have a habit of checking their phone for emails and social media notifications before going to bed.

However, if you want to send out emails during the workday, you can send them around 2 PM since many people are usually free at that time.

Confused with all these conflicting times?
Don’t be!

The best time to send an email is when it works for you.
Test different sending times to discover what time works best for you and your unique audience.

2. Use a Calendar to Manage Your Email Marketing Schedule

If you want your marketing emails to perform well, your email marketing strategy has to be consistent.

And the best way to achieve consistency is by sticking to a schedule, right?
Use a calendar to manage your email schedule easily.

You can even set your content marketing plan around this calendar to ensure your email and content strategies are aligned.

For example, you can allocate topics for each week of the month and plan your emails around those topics.

This way, your emails will revolve around consistent topics, and recipients will know exactly when to expect your emails.

3. Send Mobile Friendly Emails

Did you know that emails that lack mobile device optimization are deleted in less than three seconds?

Today, most email recipients view their emails on a mobile device, so you need to send mobile-friendly emails.

You can use mobile friendly templates for most emails that contain images and other media. For plain text emails, ensure that you use easily skimmable text.

Most of us use HTML email templates these days. However, if you have a developer on your team who builds HTML templates, make sure those emails are optimized for mobile users.

4. Avoid Complicated Designs

Attractive email template designs can help you catch the eye of a subscriber easily.

From background colors to font types and images — there are tons of customization options available.

But what if your template design is too complicated?

A complicated email design not only looks bad on mobiles and other handheld devices, it also distracts your audience from the content of the email.

Consider keeping your email templates simple and ensure they display correctly on all platforms. This way, you’ll keep your emails attractive and get your content across to recipients without a hassle.

5. Pay Attention to Your Subject Line and Pre-Header Text

Pre-header text (preview text) is the text you see right after the subject line in your inbox — and it’s critical to your emails’ open rate.

Email Marketing Tips - Boost Your Outreach_Subject Line And Pre-Header Text

Including attractive pre-header text in your emails can help you quickly increase engagement rates. You can expect increased replies, a high click-through rate (CTR), and a bigger website visitor count.

But the problem?
Most marketers focus on the email subject line and pay little attention to pre-header text.

While they don’t necessarily leave the preview text blank, marketers rarely use pre-header text that matches or complements the subject line.

Pay attention to your subject line and pre-header text, and optimize them to ensure they complement each other. You can then expect to see high levels of engagement in emails!

6. Add a Personal Touch to Emails

Would you rather open a generic-looking email or one that addresses you personally?

Recipients will rarely respond to generic promotional emails.

If you want a high response rate and high engagement levels, be sure to personalize every marketing email in a way that resonates with your target audience. You can customize aspects like the subject line and how you greet the reader to make emails more personal.

This way, you can build a connection with your audience, which will help you easily convert subscribers into customers in the future.

Wondering how to send thousands of personalized emails?
Read my complete guide to mail merge personalization in Gmail. 

7. Include Links and CTAs

When you want to convert prospects, sending emails with valuable content isn’t enough. You need to figure out how to turn each of your marketing emails into a lead magnet.

One of the best ways to do this is to include links and a Call-to-Action (CTA). A CTA prompts your reader to take action — like click on a link or sign up on a site.

Using a CTA can push your audience to perform an action you want them to take. Using power words like “Download for free,” “Discover more,” or “Sign up now” in a CTA button can also significantly increase the click-through rate of promotional emails.

8. A/B Test Emails for Better Results

Split testing (or A/B testing) refers to the process of sending the same email with minor changes to several groups of recipients.

Marketers can choose A/B aspects to test such as:

  • From line
  • Subject line
  • Email content
  • Links
  • CTA
  • Email timing

When you send different versions to several small groups of recipients, you can see which version of an email performs best and send that version to the rest of your mailing list.

However, remember to A/B test only one aspect of an email at a time. Otherwise, you’ll have a hard time figuring out which email element is causing the performance gap.

9. Send Follow-Up Emails

Most email recipients won’t respond to the first email you send.

They’ll usually forget to open it or won’t have time because of other commitments.

This is why it’s essential always to send follow-up emails and give them a second chance to engage with your emails.

You can also try using the double-open strategy to increase engagement.

Here, you send the same email to a subscriber who hasn’t opened your initial email but with a different subject line.

Remember to rework your subject line and wait for at least 3-5 days before sending your follow-up email.

Having trouble writing a follow-up message?
Check out my guide on how to write follow-up emails.

10. Allow Readers to Unsubscribe Easily

This sounds a little counterintuitive, right?
Why would you allow your audience to unsubscribe easily?

While letting readers unsubscribe from your emails easily can lower the size of your audience, not allowing them to unsubscribe can be more harmful.

How?
When readers aren’t interested in your emails, the first thing they look for is a way to unsubscribe.

But if you don’t allow them to unsubscribe easily, they will still try to stop receiving your emails. So, users could report your emails as spam to stop receiving them.

This can hinder your email marketing efforts as it affects your sender reputation, and your emails now have a higher chance of ending up in any recipient’s spam folder.

If a reader feels your emails aren’t of interest to them, let them unsubscribe so you can focus only on prospects who are interested in your marketing emails.

11. Regularly Update Email Lists

If you’re looking for great email marketing results, ensure that you keep your email list updated regularly and remove inactive subscribers.

Sending emails to inactive addresses not only fails to deliver your message to an inbox but also affects your sender reputation and your overall deliverability levels.

Marketers spend too much time growing email lists and not enough time cleaning them regularly.

Remember, there’s no point in having an extensive email list if most of those addresses aren’t going to help you reach your marketing goals!

12. Segment Your Email List to Send Only Relevant Content

Email list segmentation helps you group recipients that have common attributes and interests.

Sending the same email to everyone on your list increases your chances of being irrelevant to some recipients. And when a potential customer finds your content irrelevant, they’ll unsubscribe from your emails.

However, certain customers will share similar interests and goals with each other — and reaching out to them together makes sense.

You can use segmentation to create personalized content that can influence similar recipients to act. Segmentation also allows you to design customer journeys for each group, which can improve efficiency and results.

13. Don’t Overuse Exclamations and Capitalization

Which emails scream “spammer” when they reach your inbox?
They’re the ones with tons of exclamation points and all caps in the subject line and email content.

Overusing exclamations and CAPS can remind your audience of spammy marketing tactics. These can inadvertently reduce your open rate and email deliverability. Additionally, if enough recipients decide to report your email, your domain can even be blacklisted by a spam filter.

Remember to keep your text simple and only use exclamation points and uppercase letters when necessary.

14. Build Relationships Before You Promote Your Product

Every email marketer wants to grow their audience and business. But that doesn’t mean you should start advertising your product from the first email itself.

The focus of your marketing efforts should be to build healthy relationships with prospects and increase brand awareness. When these prospects see the value that your business can provide to them, your conversion rate will increase.

Working to sustain relationships with each customer will also help you generate recurring revenue and grow your business.

15. Use an Email Marketing Tool to Automate and Monitor Emails

Managing a marketing campaign manually can be a tiring task, especially if you have hundreds or thousands of contacts in your list of email addresses.

If you’re looking for a powerful tool that will help manage all your email marketing efforts and support email marketing automation, GMass is built for you!

What is GMass?

Email Marketing Tips - Boost Your Outreach - Automate and Monitor

GMass is a powerful email tool that works completely inside of Gmail.

GMass’ features have made it a popular email outreach tool among employees of tech giants like Google and Uber and social media platforms like Twitter and LinkedIn.

Any small business, institution, or individual can use GMass to send any email marketing campaign through Gmail.

With GMass, you can:

  • Schedule and send email campaigns
  • Automatically personalize every outgoing email
  • Use email metrics to keep track of email performance
  • Automate the follow-up email process
  • Improve email deliverability with custom tracking domains

But that’s not all!
Anyone can use GMass.

All you need to do is add the Chrome extension to your browser, and you’re ready!

Key Features of GMass

Here are some of the best features of GMass:

1. Use Email Metrics to Measure Performance

Whenever you send an email campaign through GMass, it generates Campaign Reports that show you your emails’ performance.

You can check out metrics like:

  • Number of unsubscribes
  • Number of replies
  • Open rate
  • Click-through rate

You can quickly access all of these reports from the Campaigns tab inside your Gmail inbox.

Email Marketing Tips - Boost Your Outreach - Automate and Monitor

2. Customize Emails Automatically

Remember, email subscribers are far more likely to interact with personalized emails.

GMass helps you automatically customize every email in a campaign so that recipients feel like they’ve received tailor-made emails. GMass can add customized links, images, and text — and even insert a recipient’s name from their email address.

If you want further personalization, GMass also offers conditional content that can help you further customize hundreds or thousands of emails at once.

Email Marketing Tips - Boost Your Outreach - Automate and Monitor

3. Automate Follow-Up Emails Easily

Most recipients won’t interact with your first email.

They’ll either forget to reply or just ignore it.

So, it’s always important to send follow-ups to your emails.

Thankfully, GMass has a feature to help automate your follow-up emails to increase email engagement. Using GMass, you can customize the follow-up email content, the number of follow-ups, and the time gap between follow-ups!

Email Marketing Tips - Boost Your Outreach - Automate and Monitor

4. Schedule Emails Easily

Having trouble waking up early to send emails at the right time?

Let GMass take care of it!

All you need to do is create your email and schedule it.

GMass will then send the email automatically at the scheduled time.

If you need to reschedule an email, just head to the Drafts folder and change the timing.

5. Conduct Mail Merges With Google Sheets Integration

Imagine manually creating a list of hundreds of email addresses for a campaign.
Exhausting, right?

With GMass, you can link a Google Sheet to carry out a mail merge easily for any email marketing campaign. GMass will automatically add each email address from a Google Sheet into your emails — you won’t have to do anything!

Wrapping Up

Email marketing is one of the easiest ways to grow your customer base — provided you know how to do it right. You need to have a consistent marketing strategy and focus on delivering value to each prospect.

Use the tips I’ve mentioned above to refine your marketing strategy. Pair these up with an email marketing and personalization tool like GMass, and you’ll achieve your email marketing goals in no time.

Download the GMass Chrome extension and take your email campaigns to the next level today!

See why GMass has 300k+ users and 7,500+ 5-star reviews


Email marketing. Cold email. Mail merge. Avoid the spam folder. Easy to learn and use. All inside Gmail.


TRY GMASS FOR FREE

Download Chrome extension - 30 second install!
No credit card required
Love what you're reading? Get the latest email strategy and tips & stay in touch.


Want to create the best email signatures?

An email signature is a block of text or an image added to the end of your emails. It usually contains your name and contact info to give your recipient a better idea of who you are and how they could reach you.

In this article, I’ll cover what an email signature is, its key elements, and the different ways to create email signatures. I’ll also highlight three of the best email signature examples and how to create an email signature easily inside Gmail.

This Article Contains:

(Click on links to jump to a specific section.)

Let’s get rolling.

What Is an Email Signature?

An email signature is a combination of text, images, and links added to the end of your emails. Think of it as your business card in the email world!

It usually contains :

  • Your full name
  • Any necessary contact info
  • Your company logo and name
  • Your website URL
  • Your social media handles

Here’s an example of a good email signature:

Best Email Signatures - What is an email signature

Why Should You Use Email Signatures?

Email signatures matter because they:

  • Provide essential contact details that a recipient or potential customer can use to reach you
  • Establish a sense of legitimacy and professionalism
  • Convey who you are and how you may be of assistance to your email recipient
  • Generate brand recognition — especially if you add your company logo to your email campaigns
  • Include exclusive promotions and sales offers that captivate your audience
  • Function as a scheduling tool where the recipient can schedule and start a meeting with you directly from their inbox

The 7 Elements of an Email Signature

The key elements in a great email signature are:
(Click on the links to jump to an element.)

  1. Name
  2. Job title
  3. Company logo and name
  4. Contact info
  5. Social media links
  6. Call to action
  7. Disclaimer

Here’s how all the elements come together:

Best Email Signatures - 7 Elements Of An Email Signature

Let’s break each element down.

A. Name

This element is usually the first line of text within your email signature.

Including your full name lets your recipients know who the email is from and can help them trust your emails as there’s a genuine person behind them. Although some companies send emails in the name of a fictitious employee, that is not recommended.

B. Job title

Always include your affiliation info or job title and department in the signature.

This gives your recipients an idea about your expertise and helps them know more about the role of the person emailing them.

C. Company logo and name

Add your company name and logo to the email signature if you work as an employee. If you’re a freelancer, you could include your blog’s name/logo and attach a link to it.

Doing this shows that you’re reaching out professionally, which can establish credibility and can even improve brand awareness in the long run.

D. Contact info

Always include your company website within the contact info. This allows the receiver to verify your company details directly from their inbox.

You can also include the physical address of your company within the signature — especially for businesses where the location is important.

It’s wise to add at least one mobile phone number (with country code) and sometimes a secondary email address to your business contact details so that the recipient has multiple ways to reach you.

E. Social media links

You can include links to your company’s relevant social media profiles on LinkedIn, Twitter, Facebook, or Instagram. Alternatively, you can add your personal social media profiles to the email signatures.

Doing this can add credibility, which can be reassuring to your recipients.

F. Call to action

Adding a call to action (CTA) inside your email signature isn’t necessary for all email senders. However, if you’re a business owner or salesperson, you should consider adding one.

It’s an excellent opportunity to nudge your recipients to take action on an email — whether that’s asking for a callback, suggesting a Calendly link to schedule a demo, or signing up for an ebook.

Just remember to choose CTAs that work best with your business goals and brand voice.

G. Disclaimer

A disclaimer within your email signature is a confidentiality statement informing your recipients what they can and can’t do with emails sent from a company. This is often a legal requirement for any corporate email signature.

3 Fantastic Email Signature Examples

Looking for some references to see what makes great email signatures?

Here are three great examples of different types of signatures:

A. Minimal

You could create a minimal email signature that simply highlights your full name, designation, contact info, and social links.

This is a great default signature structure for anyone as it highlights your contact information succinctly and can be added to any kind of email easily.

Best Email Signatures - Fantastic Email Signature Examples - Minimal

B. Company-Centric

You could choose to make your signature more company-centric rather than individual-centric.

In addition to highlighting your contact information, it mentions your designation and even has an image dedicated to your company to establish brand recognition.

Best Email Signatures - Fantastic Email Signature Examples - Company-centric

C. Detailed

While this email signature is more detailed than those I highlighted earlier, it’s still very clear — without any unnecessary information.

Even the disclaimer is neatly placed at the bottom, preventing it from drawing attention away from your contact information.

Best Email Signatures - Fantastic Email Signature Examples - Detailed

4 Ways to Create Terrific Email Signatures

Here are the four most widely used methods for creating email signatures, along with their pros and cons.

1. Text editor

This email signature solution is the easiest to use.

Type all the info you need, like your name, company name, and external links, and then add an image or logo into a text editor such as Microsoft Word or Google Docs.

Then, tweak it with custom fonts, white space, and dividers until you’re happy with it.

Pros

  • Easy to use
  • Affordable

Cons

  • The formatting might change based on the email client or email app you use, like Outlook or Gmail.
  • Text-editor signatures may not be mobile-friendly.

2. Graphics editor

If you’re familiar with a design tool like Photoshop, you could create a unique and customized email signature banner that perfectly matches your brand guidelines and personal signature style.

You can choose from a wide range of fonts and graphic elements or look for a selection of templates to create an attractive email signature banner.

Pros

  • You have complete control over the signature design process.
  • You can easily add visually-appealing custom branding.

Cons

  • Most tools won’t allow the links inside your signature banner to be clickable.
  • You need to purchase an editing tool and know how to use graphic elements.

3. HTML code

You could also create your entire signature using HTML code.

HTML signatures allow you to create a responsive design that displays text in a specific font size or family. You can also apply different image sizes, add social media icons, include an animated GIF, and feature your profile picture or product photo within your promotional banner.

Pros

  • Plenty of customization options allow you to create a distinctive email signature.
  • You can create a signature template that works across multiple platforms.

Cons

  • You might have to hire a developer if you aren’t familiar with coding in HTML.
  • Email signature management can be time-consuming, as you have to test how the signature looks across various devices.

4. Email signature generator

If you’re not comfortable with a graphic editing tool or HTML but still want a professional email signature, you can opt for third-party signature generators.

You can use an email signature generator’s drop editor and builder to create an appealing and professional email signature for your business emails.

Pros

  • You can select an email signature template from tons of options.
  • It’s easy to edit and manage content for different signatures.

Cons

  • Most email signature software isn’t free, and some may require subscription fees.
  • There are limited customization options as you’ll be choosing from preset templates.

7 Tips to Create Excellent Email Signatures

Here are some email signature tips you might want to consider:

1. Keep it simple

Try to use a simple design for signatures on both business emails and personal emails.

Remember, the goal is to balance clarity and professionalism.

Don’t add too much information to your signature block, use a readable font, and adopt a color palette that is neither too bland nor too bright.

2. Make it mobile-friendly

Most people use a mobile device to access their emails quickly, and your signatures may not look the same across their various devices. That’s why it’s essential to check the mobile device compatibility of your multiple signatures.

Most email signature generators help with this by giving you a template that works across the board.

3. Maintain consistency

Different colleagues or team members in your organization might use widely different business email signature designs. This can compromise your signature’s legitimacy and its capacity to generate brand awareness.

Remember that email signatures reflect your brand personality, so it’s best if all teams throughout your entire company stick to a template or two for their official signatures. This helps convey a cohesive brand voice.

4. Get social

Try to include social icons linked to your company’s profile on LinkedIn, Facebook, or Twitter. You could also add links to your personal social media channels.

Adding a social icon is a nice touch because it gives your audience more information to work with and an additional way to reach you or your company.

5. Always double-check before sending

Before you send an email, always ensure that your email signature links are working and that the contact information is accurate.

If there’s a broken link or some contact info is incorrect, your recipients won’t be able to contact you easily.

6. Use design hierarchy

Since your email signature block contains relevant content like your name, contact info, and so on, it’s best to design your email signature layout in the right hierarchy.

Use different font types, colors, and weights to direct your reader’s attention to the essential selection of elements in your signature content.

For example, you’ll probably want the company name and website to stand out. So, use a bold and crisp font there. As for the disclaimer, minimize its font size, use a lighter text color, and position it at the end.

This way, your company’s name and website stay in the spotlight, helping you convert more leads.

7. Keep it updated

Just as your company or personal brand evolves, so should your signatures. Redesign your email signature design template to create a new version from time to time.

This gives a strong brand impression and shows that your brand grows with time.

However, when you make changes to your email signature, remind everyone in your company to follow suit, and ensure that everyone adopts the updated template.

How to Create an Email Signature Easily in Gmail

Configuring your Gmail settings to add signatures is easy.

Here are the steps to create, add, and edit your Gmail signature:

  1. Go to gmail.com and sign in with your credentials.

Best Email Signatures - How To Easily Create An Email Signature In Gmail

  1. From the new window that opens, click the Settings icon on the top right and then click on See all settings.

Best Email Signatures - How To Easily Create An Email Signature In Gmail

  1. In the General tab, scroll down till you find the Signature section.
  2. Click on Create new, type in your Signature name, and click Create.

Best Email Signatures - How To Easily Create An Email Signature In Gmail

  1. Add your signature elements to the textbox on your right. This includes your text, social links, images, and so on.

You can also copy-paste signature elements from your text editor, graphics editing tool, HTML template, or email signature generator.

Best Email Signatures - How To Easily Create An Email Signature In Gmail

  1. Once done, scroll down, and then click Save changes.

Now, to insert your signature block to an email, click the Insert Signature button (while composing an email) to add your email Gmail signature.

Best Email Signatures - How To Easily Create An Email Signature In Gmail

Here’s what your message could look like with an email signature example.

Best Email Signatures - How To Easily Create An Email Signature In Gmail

Bonus Tip: How to Add Signatures Quickly to Bulk Emails

If you’re an email marketer, you probably send emails to hundreds of recipients every day.
However, you can’t waste time adding your signature to each email manually, right?

Don’t worry.

If you want to include signatures in your bulk email marketing campaigns, just use GMass.

Wait, what’s GMass?

Best Email Signatures - How To Quickly Add Signatures To Bulk Emails

GMass is powerful marketing and outreach software that works within Gmail. Its superior mail-merge features and straightforward user interface make it a popular tool used by employees in large companies like Google and Uber and social media giants like Twitter and LinkedIn.

It’s also a perfect marketing channel for casual Gmail users, solopreneurs, digital marketing professionals, small businesses, and institutions like churches, too.

To get started with GMass, just download the Chrome extension, and sign up with your Gmail or Google Workspace account.

Here’s how you can add a signature block to your marketing or bulk emails with GMass:

  1. Click Compose to launch a new message window.

Best Email Signatures - Best Email Signatures_ How To Quickly Add Signatures To Bulk Emails

  1. Enter “[email protected]” in the To field.
  2. Type and format your signature content in the single email message body, and hit the GMass button to send.

When you do this, GMass will save your signature so that it can be used in the future.

Best Email Signatures - How To Quickly Add Signatures To Bulk Emails

Once your signature is added, it will automatically appear in all emails you send out. You don’t need to add them manually anymore!

The process is as easy as that!

Final Thoughts

An email signature is vital as it’s an easy way to give your recipient some important information.

You can include your designation, company name and logo, secondary contact information, and social media icons to give them all the reference points they need to take things forward. Mail signatures also allow you to add a personal touch to your emails and nurture brand awareness.

To create the best email signatures, remember to keep your signature content simple, informative, social, hierarchical, balanced, and up to date.

And with GMass, you can power-up your Gmail outreach capabilities and add mail signatures to all your emails automatically.

So why not try GMass today and amp up your email game?

Ready to send better emails and save a ton of time?


GMass is the only tool for marketing emails, cold emails, and mail merge — all inside Gmail. Tons of power but easy to learn and use.


TRY GMASS FOR FREE

Download Chrome extension - 30 second install!
No credit card required
Love what you're reading? Get the latest email strategy and tips & stay in touch.


Your spam filter keeps your inbox free of irrelevant emails like junk mail and phishing scams and pushes them to the spam folder.

But where is it? And how do you make sure bad emails go there — while the emails you want make it to your inbox?

In this article, I’ll give you a step-by-step guide on finding and managing the spam folder in Gmail and Outlook on both the web app and mobile devices.

Trying to keep the emails you send out of the spam folder?

GMass turns Gmail into an email marketing + mail merge platform.

And 99% of users report THE best deliverability they’ve ever had!

Learn more about how GMass makes sure your emails land in the inbox


Want to read deeper about spam emails?
Read my detailed article on what they are and five ways to stop them.

Spam Folder Management Guide: Table of Contents:

(Click on the links below to jump to a section)

Let’s jump right in.

How to Manage Your Spam Folder in Gmail

Gmail is pretty efficient in filtering your emails.

However, sometimes false positives may occur when Gmail’s spam filter incorrectly identifies a legit email as spam.

For example, an email might have a subject line with spam trigger words. Alternatively, promotional emails in which you have a legitimate interest come from a shared IP address that has a bad sender reputation — or contain a domain name that’s ended up on a spam blacklist.

These factors can prompt Google’s spam filter to route the incoming emails directly to the spam folder.

That’s why you need to know how to manage your spam folder in Gmail.

I’ll explain how to:

1. How to Find Gmail’s Spam Folder and Delete Spam Emails

Here’s a step-by-step guide on how to find your spam folder in Gmail’s webmail interface and mobile app.

I’ll also show you how you can delete spam emails to clear up your spam folder.

On the Web App

1. Open Gmail and sign in to your email account on your computer.
2. Scroll down on the left sidebar that displays all the folders, including your inbox folder.
3. Click on the More option and scroll down to find the spam folder.

more option

4. Click on the spam folder (indicated with an exclamation icon).

spam option

5. To delete a single spam message, select it and click the trash can icon at the extreme right to delete it.

delete spam

6. To delete all the spam emails in the folder, click the check box at the top left to select all messages and click Delete forever.

delete forever

7. You can also empty your spam folder with one click. All you have to do is click Delete all spam messages now from the notification that appears above.

delete all spam

On the Mobile App

Here’s how to navigate the Gmail app to find your spam folder:

1. Log in to your Gmail account on your iPhone or Android device.
2. Click the three bars (burger icon) in the upper-left corner to open the main menu.

three bars

3. Scroll down, and you’ll find the spam folder.

the spam folder in the gmail app for android and ios devices

4. To clear your spam folder in one shot, tap on Empty Spam now at the top.

empty spam now

5. To delete a single message, select the message and tap delete (bin icon) at the top right.

delete icon

Go back to contents

2. How to Unhide Your Spam Folder in Gmail (if it’s hidden)

When you set up your Gmail or Google account, the spam folder is hidden by default on the web app.

Fortunately, you can change your Gmail spam folder to “Show,” making it easier to monitor how many spam emails you receive and check that important emails aren’t going to the spam folder accidentally.

Note: On the Gmail mobile app, the Spam folder is shown by default. 

Here’s how to unhide your spam folder in Gmail:

1. Log in to Gmail, click on the Settings icon and select See all settings.

see all settings

2. Click on the Labels tab.

labels tab

3. Click on Show next to the Spam label.

show next to spam

4. Now, your Spam folder should appear on your Mailbox Menu with the rest of your folders.

spam folder 2

Go back to contents

3. How to Report or Block Spam in Gmail

If you want to move spam emails to spam in Gmail, you can either report the emails or block them.

While both options send emails to your spam folder, Report Spam doesn’t get rid of the spam address for good — it just moves the existing email to spam.

On the other hand, Block ensures you don’t get any future emails from the address.

Here’s how you do it on the webmail and mobile versions:

On the Web App

You can block email addresses from Gmail’s More Menu option or Search bar.

Messages from blocked addresses will automatically go to the spam folder.

Here’s how you can block or report spam from the web app:

Option 1. Using the More Menu

This is an easy method to block opened spam emails in a snap. Here’s what you should do:

1. Open the email message you want to block and click the three vertical dots (More menu) beside Reply.

three dots icon

2. Select Block [sender] or Report spam from the drop-down list.

block and report spam

3. When you click Block [sender], you’ll get a confirmation pop-up.

block icon

Click Block in the pop-up to block the sender.

4. If you click Report spam from the drop-down menu, the selected message will go directly to the spam folder.

5. If you click Report spam on an email where you’re a subscriber, a confirmation pop-up will appear with the options: Report spam & unsubscribe and Report spam.

report spam

If this is the only message from the sender that you want to mark as spam, click Report spam. If you wish to unsubscribe as well, select the other option.

Quick Tip: You can also Report spam without opening an email message. If you suspect incoming emails to be spam from the subject line itself,  just click the checkbox to select the email you want to mark as spam. From the options that appear on the top, select the Report spam icon (exclamation mark).

exclamation icon

Option 2. Using the Search Bar

Here’s how to use Gmail’s search bar to block spam emails:

1. Click the Show Search Options icon at the right side of the search bar.

show search icon

2. Add the email address or domain name you want to block to the From field. If you want to block multiple email addresses, use the vertical bar (|) or comma (,) between email addresses or domain names.

3. Click Create Filter.

create filter

4. From the new dialog box that appears, choose Delete it.

delete it

5. Click Create Filter, and the email address or domain will be blocked.

On the Mobile App

Here’s how you can report or block spam from the Gmail mobile app:

1. Reporting Spam

To Report spam, open the email and click the More Menu at the top right of the Gmail interface.

report spam box

2. Blocking the sender

To Block an email from your phone, open the email and tap the More Menu in the top right of the message.

block sender

Go back to contents

4. How to “Unspam” Emails in Gmail (Reporting Emails as “Not Spam” So Future Sends Go to Your Inbox)

Remember, sometimes even legitimate emails go to your spam folder for a variety of reasons.

Here’s how to “unspam” emails (move them from Spam to your primary inbox folder) in Gmail so future messages from that sender are more likely to go to your inbox.

On the Web App

Follow this three-step process to unspam / report not spam specific emails from Gmail’s web interface:

1. Go to your spam folder and select the message you want to remove from the folder.
2. Click Not Spam from the options that appear above.

not spam

On the Mobile App

Here’s how to move your emails from your spam folder to your inbox on the Gmail mobile:

1. Go to your spam folder and select the email you removed from your Gmail spam folder.
2. Tap on the More Menu option at the top right and select Report not spam.

report not spam

Go back to contents

5. How to Whitelist Important Email Addresses in Gmail

Whitelisting (adding senders to your safe sender list) helps ensure that future messages from particular addresses and domains never end up in your spam folder.

Here’s how to do it on the web and mobile app.

On the Web App

Here’s how you can whitelist email addresses and domains in your Gmail account:

1. Log in to Gmail and select the Settings (gear icon) at the top right corner and click See all settings.

see all settings

2. Go to Filters and Blocked Addresses and click on Create New Filter.

filters and blocked addresses

3. Enter the email address you want to whitelist in the From field and click on Create Filter.

from field

4. Select Never send it to Spam from the checklist that appears and click Create Filter.

never send it to spam

All the emails from the whitelisted email IDs or domains will now be delivered to your Gmail inbox.

On the Mobile App

Here’s how you whitelist email addresses in the Gmail app:

1. In the Gmail app, tap and hold the email from the address you want to whitelist.
2. Tap the three dots (Menu) in the upper right corner and select Move to.

Move to

3. From the dialog box that appears, choose Primary to move the email there.

Primary box

All future emails from the sender will now always land in the Primary tab of your inbox folder.

Go back to contents

Want to improve your Gmail experience?
Check out my comprehensive guides on:

How to Manage Your Spam Folder in Outlook

We’ve all been bombarded with unwanted emails at some time, which is why it’s vital to know how to manage your Outlook spam folder.

I’ll explain how to:

Let’s get started:

1. How to Find Outlook’s Spam Folder and Delete Spam Emails

Locating the junk mail or spam folder and deleting spam in Outlook is pretty easy. Here’s how to do it:

On the Web App

Here’s how you can find the Junk Mail folder in Outlook.com.

1. Open your Outlook account.
2. In the Folders tab on the left, click Junk Email. (On the web app, this is the name Outlook uses for the spam folder.)

junk email

3. Select the message you want to delete from Junk Email and click Delete at the top.

delete in outlook

4. To clear your Junk Email folder, just click the Empty folder option at the top.

empty folder outlook

On the Mobile App

In its mobile app, the spam folder is known as the Junk Email folder.
Follow these three steps to find it:

1. Open your Outlook app and click the burger icon at the top left.

burger icon outlook

2. You’ll find the Junk Email folder in the list, where you can view your spam messages.

junk email tab

3. To delete a single email from the Junk Email folder, select the spam message and click on the bin icon (delete) at the top right.

bin icon outlook

4. To clear your Spam folder, just click Empty Spam at the top left.

empty icon outlook

Go back to contents

2. How to Mark Emails as Spam in Outlook

Here’s how you can quickly mark emails as spam in Outlook web and mobile apps:

On the Web App

Here’s how you can mark unwanted marketing emails as spam in Outlook.

1. Select the email(s) and click on the Junk icon at the top of the screen.
2. Select Junk from the drop-down to instantly move them to the Junk folder.

junk folder outlook

On the Mobile App

Here’s how you can send spam emails to the junk mail folder in the Outlook app:

1. Select the email (or multiple emails) you want to send to the junk email folder.
2. If you’re an Android user, tap the move file icon at the bottom.

move file icon

3. From the options that appear, select Junk Email.

junk email box

4. If you’re an iOS user, tap the folder/arrow icon at the bottom and select Spam.

Go back to contents

3. How to Block Spam Email Addresses in Outlook

Here’s how you can easily block an email address in Outlook.

Note: You can’t block email addresses/domains from Outlook’s mobile app.

1. Select an email/emails you want to block from your inbox.
2. Click on the Junk tab at the top.

junk on top

3. From the drop-down, select Block.

block

4. Click OK from the confirmation pop-up. And it’s done.

ok pop-up

Go back to contents

4. How to Unblock and Unspam Emails from Outlook’s Junk Folder

If you’ve blocked an email address by mistake or had legitimate emails end up in spam, follow these steps:

On the Web App

Here’s how you can unblock and unspam emails on the web app:

How to Unblock Emails

1. Go to Settings and select View all Outlook settings.

settings icon

2. Select Mail and click Junk email.

mail and junk email

3. Click the trash can icon at the right of the address/domain you want to unblock and click Save.

bin icon and save

How to Unspam Emails

1. Open Junk Email and select the messages you want to mark as not spam.
2. Select Not junk from the Not Junk tab at the top toolbar.

not junk

3. You can also open an email in the junk folder and click It’s not junk at the top.

How to Unspam Emails on the Outlook Mobile App

You can’t unblock email addresses in Outlook’s mobile app.
However, you can still remove the important emails from the junk folder to your mail inbox.

Here’s how you can unspam emails in the Outlook app:

For Android Users

1. Go to the Junk Email folder.

junk email folder

2. Open the email you want to move to your inbox and click the three dots at the top right corner.

three horizontal dots

3. Select Move to folder and select Inbox. Alternatively, you can select Mark as not junk.

move to, mark as

For iOS Users

1. Go to the Spam folder.
2. Tap Edit at the top right corner.
3. Select the email you want to move to the inbox from junk.
4. Choose Mark at the bottom left.
5. Tap Mark as Not Junk.

Go back to contents

5. How to Whitelist Email Addresses in Outlook

Here’s how you can whitelist email addresses and domains to ensure that emails from them never end up in your Junk Mail folder:

On the Web App

Here’s a step-by-step guide on how you can whitelist addresses and domains (add them to your safe sender list) on Outlook.com:

1. Click on Settings and go to View all Outlook settings.

settings icon

2. Select Mail and then click on Junk email.

mail and junk email

3. Go to the Safe senders and domains section.

safe senders

4. Click +Add and enter the email address/domain in the box that appears below it.

Add icon

5. Press enter and click Save.

Click save

On the Mobile App

To whitelist email addresses via the Outlook app, all you have to do is:

1. Open an email whose address you want to whitelist and tap the three dots (Menu) at the top right corner of the screen.

three horizontal dots

2. Tap Move to folder. 

move to folder

3. Select Inbox from either the Favorites or Folders List.

Inbox options

4. Ensure that the Focused tab is selected under Inbox.

focused tab

What’s the Focused Inbox in Outlook?
The Focused Inbox in Outlook contains all your important emails while the other not-so-important ones automatically go to the Others tab.

Since you can’t access the safe senders and domains option in the mobile app, you can opt for this method instead.

Go back to contents 

Now let’s go over why emails end up in the spam filter in the first place.This information will help you learn what to avoid when sending emails:

Why Do Emails Go to Spam Folders?

Your mailbox provider has a spam filter that determines your spam folder placement. The spam filtering process detects and blocks unwanted emails based on three major factors.

1. Spammy Email Content

Whether it’s Gmail, Outlook, or Yahoo Mail, spam filters rigorously check the email content in the email body, header, and subject line to identify spam trigger words.

For example, an email with the subject line “Get FREE Social Media Subscribers!” could be marked as spam.

Refraining from spammy content will help improve your email deliverability.

2. Poor Sender Reputation

If you want to avoid being marked as a spammer during spam filtering, you should verify your mailing list before sending marketing emails to your subscribers.

Why?
Sending promotional emails to disposable email addresses, a spam trap, or inactive accounts on your mailing list will result in hard bounces and spam complaints to your ISP. This, in turn, affects your inbox placement rate and brings down your sending reputation.

As a result, most emails you send will be marked as spam.

3. No Email Authentications

Any legitimate email address and sender domain should be verified and authenticated with SPF, DKIM, and DMARC records.

Here’s a breakdown of what these are:

These protocols help spam filters recognize emails as legitimate — keeping them out of the spam folder. However, if these protocols are absent, spam filters will have a hard time verifying the email, and it could end up flagged as spam.

You can also check your records by using this free email analyzer tool.

Go back to contents

Spam Folder Management Guide — And Staying Out of the Spam Folder Yourself: Final Thoughts

Finding spam folders in a mailbox provider like Gmail or Outlook isn’t tricky.

Just follow the steps I covered here, and you should have no trouble locating them.

And if you want to ensure that your emails don’t end up as spam, have a quick look at GMass.

GMass turns it into something else

It’s just about the fastest and easiest email sending tool you’ll ever find — it works right inside Gmail, so there’s nothing new to learn — and we’re obsessively focused on making sure your messages wind up in the inbox, not the spam folder.

Whether you’re sending out a cold email or email marketing campaign to a ton of people… or using mail merge to send birthday invites or a church bulletin to a dozen.

You can read up on what makes GMass better and different than any other email platform… or jump right in by downloading the Chrome extension. It’s free to get started (no credit card required!) and you can be sending within five minutes.

Email marketing, cold email, and mail merge inside Gmail


Send incredible emails & automations and avoid the spam folder — all in one powerful but easy-to-learn tool


TRY GMASS FOR FREE

Download Chrome extension - 30 second install!
No credit card required
Love what you're reading? Get the latest email strategy and tips & stay in touch.


Since the beginning of our history, the workflow for creating an email campaign has been to choose your list first, usually meaning a Google Sheet, wait for the Gmail Compose window to be launched, then set your Subject and Message and send. We’ve heard complaints from users about this workflow — that it felt unnatural and clunky. Users told me that they’d rather work on the content of the email first, and then set the list later, right before sending.

New button and a better workflow

Starting today, you have the option to do just that — now you can launch a Compose window on your own, start working on your Subject and Message, then then later on, choose the list you want to send to, using the new GMass button that appears inside the Compose box.

The new button in the upper-right of the Compose window makes life easier.

Now when you click Compose in Gmail, the Compose window will contain a tiny GMass button in the upper right, in the same row as the To field, and right next to the Cc and Bcc options. If you don’t see the new button, then just click into the To area to expose it. When you click the new button, you’ll get a pop-up asking how you want to set your list — either from a spreadsheet or a prior campaign.

These two options are the equivalent of the two old buttons which are still next to the Gmail Search bar. But now, when you choose your spreadsheet or prior campaign, the To field of the existing Compose window will be set, rather than GMass launching a new Compose.

Why is this better?

This is better for several reasons.

  1. It’s more natural to work on your content first and set your list later.
  2. In the past, once you connected a campaign to a particular Google Sheet, you couldn’t change your mind later and set it to a different Google Sheet. You had to cancel your campaign and start a new one with the new Sheet. Now you can just click the new button to set a new spreadsheet.
  3. You can copy/paste the GMass-generated list address (like [email protected]) to a new Compose window and send a new campaign using the Sheet that’s connected to the list address. This saves you the extra step of re-connecting to your Sheet.
  4. If you’re using any third party content creation tools or any API services like Zapier that set your content for you in a Gmail Draft, all you have to do is open up that Draft and click the new button to set your list.
  5. If you wanted to do something fancy like send a mass forward to an email list in a Google Sheet, there was no easy way to do that. Now, just use the Forward function in Gmail, and then click the new GMass button to set your list. Anytime you set a list in the Compose box, the To field will be set with a GMass-generated address that represents your list, and at the same time, the GMass Settings box will be updated with the new personalization options based on the spreadsheet you’ve selected.

Will the old buttons still work?

Yes. For now, we’re leaving the Google Sheet button and the prior campaign button next to the search bar — but at some point in the future, we’ll remove them and make the new button inside the Compose window the new standard by which to choose your email list.

Email marketing, cold email, and mail merge inside Gmail


Send incredible emails & automations and avoid the spam folder — all in one powerful but easy-to-learn tool


TRY GMASS FOR FREE

Download Chrome extension - 30 second install!
No credit card required
Love what you're reading? Get the latest email strategy and tips & stay in touch.


Doing a basic Gmail search is pretty easy.
But if you want to skyrocket your email productivity, you’ll need to use Gmail search operators.

Search operators save you tons of time by making it quick and easy to locate specific emails in Gmail. You can also use them to filter your incoming emails for a more organized mailbox experience.

In this article, I’ll briefly cover how to use Gmail search (with screenshots). I’ll also explain all about Gmail search operators, including the 20 best search operators, and show you how to use search operators to filter incoming emails.

Finally, as a bonus, I’ll tell you how to create email lists using Gmail search.

Further Reading:

  • If you’re just getting started on Gmail, check out my step-by-step guide on how to use Gmail.

This Article Contains:

(Click on links to jump to specific sections)

Let’s get started.

How to Use Gmail Search

Using Gmail’s Search box is incredibly easy.

You can find the Search bar at the very top of your Gmail inbox screen, in both the web and mobile apps.

Here’s how to perform a Gmail search:

  • Type the keyword or phrase (search query) you’re looking for into the Search box at the top, and Gmail will automatically start listing suggestions.
  • You can either choose from one of these suggestions to your search query or press Enter to get more search results.

Type gmass (a search query)

But what if you want to get even more specific search results?
If you’re using the web app, Gmail’s Advanced search option can help you out here.

With the advanced Gmail search, you can narrow your search results according to:

  • The sender.
  • The file size.
  • The date you received the message.
  • The email’s label, like starred or unread Gmail messages.
  • Whether there was an attachment.
  • Google Chat messages, and more.

In addition to advanced search, you can use Gmail’s search chips feature to filter emails by sender, recipient, whether the email is unread, and so on.

Advanced search

Additionally, you can now quickly filter search results on Android devices due to a new feature similar to search chips. The new search filter is available for Android users with a Google Workspace, G Suite Basic, or Business account.

This new feature was launched alongside the “personalised results” (based on search history, location, etc.) feature for the Google app. It shows the search filter buttons (From, Sent to, etc.) under the Search bar (or Search box) of your Gmail Android app.

Unfortunately, you can’t use the search filter on your iPad or any other iOS device for that matter.

However, you can leverage Gmail’s search operators to perform a more refined search on the Gmail web app, iOS app, and Android app.

Go back to Contents

What Are Gmail Search Operators?

Gmail’s search operators (also known as search commands) are strings of text that you can use to enhance Gmail’s search capabilities.

Think of Gmail’s search operators like the keyboard shortcuts that you routinely use to perform your tasks quicker.

These advanced search operators narrow down search results (by filtering out the irrelevant emails) to help you find the specific message you’re looking for quicker.

It’s also possible to combine more than one search operator to refine your search results further.

For example, you can combine the search parameters (operators) to find emails from a specific sender that contained attachments and were sent in the last two months.

All you need to do is find the relevant advanced search operators and type them into the search box. Then, Gmail will automatically filter your search results based on the search parameters used.

Go back to Contents

Now that I’ve explained what search operators are, I’ll go over some of the most helpful search operators for the Gmail app:

20 Useful Gmail Search Operators

Here are 20 search operators that could come in handy for your Gmail searches:

1. Specify the Sender (from:)

If you want to search for an email from a particular person or email address, this search operator can be beneficial.

To filter search results by sender, use the “from:” command.

For example, “from:ajay” will show you all the emails you’ve received from Ajay.

from

You can also search for emails from multiple senders using the search command “from:(sender1 sender2 sender3)”.

For example, “from:([email protected] [email protected] [email protected])” will show emails from these multiple senders.

2. Search by Recipient (to:)

You can also search for emails sent to a specific recipient using the “to:” search operator.
For example, “to:Max” will show all the emails you’ve sent to Max.

3. Search by Subject Line (subject:)

If you remember the subject line (or parts of it) of the email you’re looking for, you’ll find this command helpful.

To use this command, type in “subject:” followed by the words you’re looking for in the search bar.
For example, “subject:marketing” will bring up all emails that contain the word “marketing” in the subject line.

4. Search by Messages That Have a Specific Label (label:)

If you’ve used labels to categorize certain emails, you can search for emails with specific labels by using the “label:” Gmail operator.

For example, if you’ve created a label for Tutorials, you can use the “label:tutorials” command to search for an email under your “Tutorials” label.

Alternatively, you can search for emails with or without labels using the search operators “has:userlabels” or “has:nouserlabels”.

The “label:” Gmail operator is best combined with other operators. However, remember that only your individual email messages are labeled and not the entire conversation.

Check out my step-by-step guide on how to use Gmail labels.

5. Search for a Specific Message in Folders Like Spam and Trash (in:anywhere)

When you run a regular Gmail search, it automatically excludes emails that have been deleted or marked spam.

But if you don’t know the specific folder the email is in, you may want to bypass this. In that case, the “in:anywhere” command can be a lifesaver.

It will search across all folders, including the Spam folder.

For example, “in:anywhere book club” will search for the keyword book club across every folder.

Go back to Contents

6. Search for a Message Sent Within a Certain Time Period (after: before: older: newer:)

Gmail lets users search for emails that were received during a certain time period.

To do this, use one of these commands:

  • “after:”
  • “before:”
  • “older:”
  • “newer:”

For example, if you want to find email messages received after August 8, 2021, type in “after:08/08/2021”. Alternatively, if you want to find an email from before October 19, 2021, use “before:10/19/2020.”

Note: These are American values. If you’re searching in Europe or Asia, where dates are expressed, for example, as 19 October 2021, then you would search this way: “before:19/10/2020.”

7. Search for a Message Older or Newer Than a Specific Time Period (older_than: newer_than:)

To narrow your search results even further, this is an excellent trick for returning more specific results.

If you remember when you received the email, try searching for the email by using “d” for the day, “m” month, and “y” year, and theolder_than or newer_than command.

For example, “older_than:4d” will bring up all the emails in your inbox that you received more than four days ago.

8. Search for Messages That Have an Attachment (has:attachment)

Gmail has a useful command that allows the user to filter their email search results to highlight only emails that include an attachment.

To use this search operator, type in “has:attachment” in the search bar. For example, “has:attachment invoice” will display all emails with the word “invoice” and an attachment.

9. Search for an Exact Phrase or Word (“ ”)

If you remember an exact word or phrase from the email you want to find, try using the “ ” command with the specific word to narrow your results further.

For example, if you want to find an email with the details of a virtual book club meeting you attended sometime before on Google Meet, try using: book club meeting to refine your search results.

10. Search for a Specific Message with Words Close to Each Other (AROUND)

Gmail will even let you search for words in an email if the words aren’t next to each other.

In other words, if you can only remember a few random words included in the email, you can still try to find it using this search filter.

For this, use the “AROUND” command.
However, there’s a caveat — you’ll need to use a number to estimate how many words apart the words you’re looking for are.

For example, “Friday AROUND 6 book club” will search for emails that have six words between “Friday” and “book club.”

Go back to Contents

11. Specify the Recipient Who Received a Copy (cc: bcc:)

If you want to filter results according to who received a copy of the email, type in either “cc:” or bcc:” in the search bar.

For example, “cc:ajay” will show all emails in your Gmail inbox that Ajay has also received.

Check out my in-depth guide on using the CC and BCC fields the right way.

12. Search for Emails With a YouTube Video

When you’re trying to track down that funny cat video your coworker forwarded via email, you can use “has:youtube” to show only those specific emails featuring an embedded YouTube link.

13. Search for Emails by the Size of the Attached File in Bytes (size:)

If you’re searching for an email with an attachment of a specific size, you can use “size:”. 

Simply type the search operator with the size of the attachments or content you’re looking for. For example, “size:50M” to find emails with attachments that are 50 MB in size.

14. Search for Emails Smaller or Larger Than a Certain Size (larger: smaller:)

You can also search for emails with files smaller or larger than a specific size in bytes using “larger:” or “smaller:”.

For example, use “larger:50MB” to find emails with attachments bigger than 50 MB in size or “smaller:50MB” to find emails with attachments smaller than 50 MB in size.

15. Search for Emails by Category (category:)

Gmail separates your inbox into categories that appear as tabs at the top of your mailbox, including Primary, Social, Updates, Forums, and Promotions.

You can search for emails in any of these categories using the “category:” search feature.

For example, you could use “category:social” to find all those specific emails under the Social tab in your mailbox.

Go back to Contents

16. Search for Emails Marked as Important (is:important)

You can search for any emails you’ve marked as Important by typing the search operator “is:important” into the search bar.

Gmail will then display all the emails you’ve marked as Important.

17. Search for Snoozed Emails (in:snoozed)

If you’ve snoozed an email that you wanted to read later, you can search for that email by typing “in:snoozed” into the search bar.

Gmail will then display all the emails you’ve snoozed.

18. Search for Emails That Have a Google Drive Attachment (has:drive)

You can use the Gmail search operator “has:drive” to search for emails that include any Google Drive attachments.

19. Search for Emails That Have a Google Doc, Sheet, or Slide Attachment (has:doc has:spreadsheet has:presentation)

If you want to search for an email with a Google Doc, Google Sheet, or Google Slide attachment, you could use one of these search operators.

To search for emails with a Google Doc, use the search operator “has:document”.

And if you want to find emails with a Google Sheet attachment, use the command “has:spreadsheet”. Finally, to search for emails with a Google Slide, use the Gmail operator “has:presentation”.

20. Search for Emails with a Certain Filename or File Type (filename:)

When you know the file names attached to the email you’re looking for, you can use the Gmail search operator filename:”. 

For example, if you’re searching for an email with a PDF file attached, you could use “filename:pdf”.

Alternatively, if you know the name of the file, you could search using that. For example, “filename:reports.txt”.

Go back to Contents

You know how to narrow your search results using Gmail’s search commands.

But did you know that you can use these search operators to create incoming email filters?

How to Use Search Operators to Filter Incoming Emails

Once you create filters for your incoming emails (using search operators), Gmail will use them to screen all your incoming emails automatically.

You can use these commands to send an email to a label automatically, archive it, delete it, forward it, or even star it.

Additionally, if you’re a Google app developer, you can use the Gmail API to filter your mailbox.

Note: You can only do this on the web app. The Gmail app for mobile devices doesn’t support the search operators feature.

A. How to Create a Gmail Filter in the Web App

Creating a Gmail filter is very easy. Here’s how to do it:

Step 1
Log in to your Gmail account on a computer.

Step 2
Type your query or search operator into the search bar and click the little gray down arrow next to the search field.

For example, I’m using the “from:” command here to filter for emails sent by Ajay.

down arrow

The advanced search drop-down will now appear.

Advance dropdown

Step 3
You can now customize your filter for personalised results.

For example, I want this filter to focus on emails sent by Ajay that have the words “Friday Night Plans” included.

Once done, click Create filter at the bottom of the search window to create your Gmail filter.

Create filter

Step 4
Next, you need to choose what you’d like the filter to do from the option list that appears and click Create filter.

For example, if you select “Star it”, every email you receive from Ajay with the words “Friday Night Plans” will be starred automatically.

Add forwarding address

Now, what if you want to edit or delete a Gmail filter?
I’ll cover that next.

B. How to Edit or Delete a Filter in the Web App

Removing or editing filters you’ve made in Gmail is very easy.
Just follow these simple steps:

Step 1
Log in to your Gmail account on a computer and click the Settings icon from the top-right corner.

Settings icon

Step 2
From the Quick settings menu that appears, click See all settings.

Quick settings

Step 3
Navigate to the Filters and blocked addresses tab.

Filters and blocked addresses

Step 4
From there, you can see all the filters you created. All you have to do then is to edit or delete filters.

Edit or delete filter

However, that’s not all you can do with a Gmail search operator. Search operators are also helpful for creating email lists when you add the right tool to the mix!

Go back to Contents

Bonus Tip: How to Use Gmail Search to Create Email Lists

It doesn’t matter whether you’re a business owner or the host of a book club; most of us maintain email lists that we use to send emails regularly.

However, manually building these email lists can be a tedious and time-consuming process.

Instead, you can use a powerful outreach tool like GMass with Gmail search to easily create massive mailing lists in seconds.

Gmass

GMass is a powerful email outreach tool used by employees in powerhouses like Google and Uber, as well as social media giants like Twitter and LinkedIn. It’s also perfect if you’re a small business owner, startup founder, or even a casual email sender.

To use GMass, all you have to do is download the Chrome extension and sign up for free with your Google Workspace or Gmail account.

Then, follow these steps:

Step 1
Log in to your Gmail inbox. Then, enter the term you want to search in your search bar.

For example, say you want to send an email announcing the opening of a new tadpole tank store. You’ll enter the search term in the search bar (in this case, “tadpoles”) and click on Gmail’s search button (magnifying glass).

Enter search term

Gmail will then display all emails which include your search term. These are people connected to the term in your emails.

Tadpole results

Step 2
Click the Build Email List button (red magnifying glass).

Build list

Note: GMass will search for a maximum of 5,000 Gmail messages for email addresses. If you enter a search term (or search query) with more than 5,000 matching messages, only the most recent 5,000 messages will be used to find email addresses.

A black popup will appear indicating that GMass is compiling an email list using the addresses found in your search results.

Black popup

Note: The GMass “Build Email List” (red magnifying glass) button is only displayed after you’ve performed a Gmail search or clicked on labels. Once you perform either of these actions, a specified subset of your emails will be displayed. 

At other times, the button won’t be displayed. 

Step 3
Once GMass has built the email list, a Gmail Compose window will appear.

In the To field, you’ll have an alias address displayed. This alias address represents the recipients in your list. The Gmail Send button will also be hidden.

Send options

You can also choose to display the Send button and the recipients’ actual addresses in your email list instead of the alias address.

New message

Note: If you want to connect to an email list in a Google Sheet or past campaign, click the GMass icon next to the Cc and Bcc buttons. 

Step 4
You can then compose your subject line and email message and click the GMass button to send the mail.

Click send after composing

Go back to Contents

Wrapping Up

Running a search for emails in Gmail is incredibly easy.

If your results are too broad or aren’t returning the email you’re looking for, Gmail gives you multiple features to find important emails.

Additionally, when you connect Gmail with a powerful tool like GMass, you can also build email lists with Gmail search. And from scheduling emails to automatically personalizing your emails, GMass can revolutionize how you use Gmail on the web and Android app.

Just download the GMass extension to super-charge your Gmail inbox today!

See why 99% of users say they’ve had their best deliverability ever with GMass


Email marketing, cold email, and mail merge all in one tool — that works inside Gmail


TRY GMASS FOR FREE

Download Chrome extension - 30 second install!
No credit card required
Love what you're reading? Get the latest email strategy and tips & stay in touch.


An email header is the part of an email that contains information about the mail sender, receiver, and subject.

Each email has a custom header that includes technical information for efficient email delivery, and you can view the complete header on email apps like Gmail, Outlook, Yahoo, etc.

In this article, I’ll cover everything you need to know about email headers, including what it is and why it’s essential. I’ll also show you how to view your complete email header across different email apps.

This Article Contains:

(click on the links below to jump to a specific section)

Let’s get started.

What is an Email Header?

The header (internet header) is the section of your mail that includes information like the sender details, receiver details, subject, and date. Other technical details like the Return Path, Reply-To Field, and Message ID are also included in an email header.

Here’s what a complete email header looks like:

Complete email header

But wait… don’t headers just refer to the top of the email?
In most documents, a header generally refers to the top of the page, while a footer refers to the data at the bottom of the page.

However, email headers don’t function in the same way.

Email headers are specialized pieces of information that contain data that’s vital to mail deliverability. And while some aspects of the email header can be found at the top of your email, your custom header needs to be accessed separately.

So what is the start of the email called?
The information at the start of an email message is called the preheader text.

Preheader text

Your preheader text refers to the lines of text mentioned after your subject line in your inbox. Strong preheader text can go a long way in getting recipients to open your emails.

Back to contents

Now, let’s see why the entire header is important to an email.

Why Do You Need an Email Header?

Here are a few reasons why email headers are essential:

1. Email Headers Protect Against Spam

The header contains several information fields that help email service providers (ESPs) differentiate spam emails from genuine emails. ESPs analyze the header information to determine the legitimacy of the mail and whether it should be delivered to the intended recipient.

These ESP protocols protect your mail account and personal data from phishing attacks and spam emails.

2.  The Message Header Clarifies Sender/Receiver Information

Every email header contains the From (message source) and To fields. There’s also the Subject field and Date indicator, highlighting the time and date when a new message was sent.

Without the information from the message header, you wouldn’t be able to view source details or identify the email’s sender or receivers – and you might not be able to determine if the message body (email body) contains legitimate information.

3. Email Headers Help You Track an Email’s Route

When a user sends a new message through email, it originates in a sending mail server and travels through several Mail Transfer Agents (MTAs) before reaching the intended recipient.

When this new message passes through an MTA, it’s automatically “stamped” by the mail server with custom header lines like the recipient, date, and time of the mail.

This header information can help the recipient track the email route — allowing them to check all the MTAs the email passed through to arrive at its destination. This is useful when trying to view message source details and physically track down the origin of malicious and spam emails.

But that’s not all.

If you expand the email header, you can even obtain the IP address of the sender to track the message source further.

Back to contents

How to Access Your Email Header (Step-by-Step Guide)

Here’s a step-by-step look at how you can view a complete email header on email apps like Gmail, Microsoft Outlook and Yahoo Mail:

1. How to View the Full Email Header in Gmail

Here’s how you can view header details in Gmail (Not applicable to the Google apps on mobile devices):

Step 1
Open the Gmail webmail client on a new tab and click on the mail for which you want to see the message header.

Test message

Step 2
When the message body is visible, click on the three dots next to the Reply button to open the menu.

Three dots icon

Then, select Show Original in the drop-down menu.

Show original

Step 3
The long header will display in a new window in its original HTML format. It will show some header field details like the IP address, authentication results, DKIM signature, and the MIME-version.

If you want to download and view header details separately, click on Download Original.

Download original

Back to contents

2. How to View the Full Email Header in Microsoft Outlook

Here’s how you can view your email header in the Microsoft Outlook email client:

Step 1
Double click and open the mail for which you want to view header details.

Header details

It will open in a new window.

New window

Step 2
Click on File, situated right next to the message tab to open the file menu.

When you can view menu details, click on Properties at the bottom of the window.

Properties option

You can find the header information like the IP address of the sender in the Internet headers section of the dialog box.

Internet headers

Back to contents

3. How to View the Full Email Header in Yahoo Mail

Here’s how to view the entire message header in Yahoo Mail:

Step 1
Click and open the email for which you want to see the entire header.

Yahoo email header

Step 2
Click on the three dots next to the Spam button on the top right.

More option

Then click View raw message in the drop-down menu to see the internet header.

View raw message

The mail header will then open in a new window.

New window 2

Back to contents

What Are the Different Aspects of an Email Header?

Let’s take a look at the technical aspects of the entire header and what they mean:

  1. From
  2. To
  3. Date
  4. Subject
  5. Return-Path
  6. Domain Key and DKIM Signatures
  7. Message-ID
  8. MIME-Version
  9. Received
  10. X-Spam Status

And here’s where each aspect is located in an email header:

Aspects of email header

Let’s break each element of the entire message header down:

1. From

The From field of the internet header indicates the name and email address of the sender.

2. To

This field of the mail header contains the email’s receiver’s details.

It includes their name and their mail address. Fields like CC (carbon copy) and BCC (blind carbon copy) also fall under this category as they all include details of your recipients.

If you want to find out more about carbon copy and blind carbon copy, check out how to use CC and BCC.

3. Date

This is the timestamp that shows when the email was sent.
In Gmail, it usually follows the format of “day dd month yyyy hh:mm:ss.”

So if an email had been sent on the 16th of November, 2021, at 4:57:23 PM, it would show as Wed, 16 Nov 2021 16:57:23.

4. Subject

The Subject mentions the topic of the email. It summarizes the content of the entire message body.

5. Return-Path

This mail header field is also known as Reply-To. If you reply to an email, it will go to the address mentioned in the Return-Path field.

6. Domain Key and DKIM Signatures

The Domain Key and Domain Key Identified Mail (DKIM) are email signatures that help email service providers identify and authenticate your emails, similar to SPF signatures.

7. Message-ID

The Message ID header field is a unique combination of letters and numbers that identifies each mail. No two emails will have the same Message ID.

8. MIME-Version

Multipurpose Internet Mail Extensions (MIME) is an internet standard of encoding. It converts non-text content like images, videos, and other attachments into text so they can be attached to an email and sent through SMTP (Simple Mail Transfer Protocol).

9. Received

The Received field lists each mail server that an email went through before arriving in the recipient’s inbox. It’s listed in a reverse chronological order — where the mail server on the top is the last server the email message went through, and the bottom is where the email originated.

10. X-Spam Status

The X-Spam Status shows you the spam score of an email message.

First, it’ll highlight if a message is classified as spam.

Then, the spam score of the email is shown, as well as the spam threshold for the email.

An email can either meet the spam threshold of an inbox or exceed it. If it’s too spammy and exceeds the threshold, it will automatically be classified as spam and sent to the spam folder.

Back to contents

Wrapping Up

Email headers play a crucial role in ensuring that your emails are delivered successfully. They’re also key in helping you determine the origin and legitimacy of your emails.

You can check out everything I’ve written in this article to understand why email headers are important and how you can access them on various email clients.

See why GMass has 300k+ users and 7,500+ 5-star reviews


Email marketing. Cold email. Mail merge. Avoid the spam folder. Easy to learn and use. All inside Gmail.


TRY GMASS FOR FREE

Download Chrome extension - 30 second install!
No credit card required
Love what you're reading? Get the latest email strategy and tips & stay in touch.


Gmail labels help you categorize emails, making it easier to find your emails later.

But to actually benefit from this handy feature, you’ll need to learn the ins and outs of using labels on both the Gmail web and mobile apps.

Don’t worry.

In this article, I’ll briefly cover what Gmail labels are and show you how to create and manage labels on the Gmail web app and mobile app. I’ll also share three no-nonsense tips to help you make the most of Gmail labels, including how to quickly build email lists using Gmail labels.

This Step-by-Step Guide Contains:

(Click on links to jump to specific sections)

Further Reading:

What Are Gmail Labels?

Instead of a traditional folder system, Gmail uses a label system to help organize your inbox.

How is a Gmail label different from a folder?
While an email can belong to only one folder in an email service like Microsoft Outlook, an email can have multiple labels in Gmail.

In other words, your email can live in more than one place at the same time.

For example, as a Gmail user, you can assign an email to the labels “Marketing” and “Operations” without creating a copy of the email for each label.

Multiple labels selected

Go back to Contents

Now that you know what Gmail labels are, let’s go over how to use and manage them on Gmail’s web app.

How to Use Labels on the Gmail Web App

To help you make the most of this handy Gmail feature, I’ll show you how to:

I’ll cover how to use labels on Gmail’s mobile app later.

First, let’s learn how to create a label on the web app.

A. How to Create a Label on the Gmail Web App

There are several methods for creating labels in Gmail.

I’ll show you two easy ways here:

Method 1: Create the Label and Move Emails at the Same Time

You can use this method whether you’re looking to assign a new label to multiple emails or to add emails individually.

Step 1
Sign in to your Gmail account.

Gmail home page

Step 2
Select the email message or messages you want to label from your Gmail inbox and click the label button (or label icon) located below the Gmail search box.

Label icon below search box

Step 3
In the dialog box that appears, click Create new.

Create new label dialog box

Step 4
Provide a name for your label and hit Create.

Step 5
Alternatively, you can right-click on a message, hover your mouse over Label as, and click Create new.

Right click, then Label as, and Create new

Then, enter a new label name, and you’re good to go.

Method 2: Create the Label and Move Emails Separately

This method is probably the quickest way to create a custom label.

However, unlike the earlier method, you can’t instantly add emails while creating a label this way.

Step 1
Open Gmail and scroll down the sidebar on the left side and click on More.

More button in sidebar

Step 2
Scroll down to the bottom of the label-related options until you find the Create new label option.
Then, click on Create new label.

Create new label button in sidebar

Step 3
Type in a label name and hit Create to complete the process.

Create Work/Marketing label

B. How to Move an Email to a Label on the Gmail Web App

Gmail offers several ways to move emails to a different label.

I’ll cover two methods here:

Method 1: Move One Email at a Time

Step 1
Sign in to your Gmail account and open the email message you want to move.

Step 2
Click on the Move to icon (with a right-facing arrow) below the Gmail search box.

Move to button below search box

Step 3
In the drop-down menu that appears, select the label to which you want to move the email.

Select Work/Marketing label to move email

Method 2: Move a Batch of Emails

Step 1
Go to your Gmail inbox and select the emails you want to move by ticking the checkboxes to the left of each email.

Step 2
Click on the Move to icon and select the Gmail folder (or label) into which you’d like to move the Gmail message.

Moving multiple emails with Move to option

Go back to Contents

C. How to Edit or Delete Labels on the Gmail Web App

Gmail lets you edit or delete labels quickly.

Here’s what you need to do:

Step 1
Sign in to your Gmail account, and find the label you want to edit or delete in the sidebar on the left.

Step 2
Hover your mouse over the label, and you should see a three vertical dots icon; click the icon.

Three vertical dots next to Marketing label

Step 3
Click on the Edit option to edit the label.

Edit option for labels

Here, you can rename the label or click the checkbox next to “Nest label under:” to nest this label under another label.

Step 4
Once you’re done making edits, click Save.

Save Operations label under Marketing Ops

Step 5
If you want to delete the selected label, click on Remove label.

Remove label

D. How to Show or Hide Labels on the Gmail Web App

Gmail gives you the option to use hidden labels, which are hidden from the left sidebar.

Let’s explore how you can show or hide Gmail labels:

Step 1
Sign in to your Gmail account, and click the gear icon in the top right-hand corner to open the Quick settings menu.

Step 2
To see the complete list of Gmail settings, click See all settings.

Sell all settings button under Quick Settings

Step 3
Navigate to the Labels tab located under the search box.

Labels tab

Step 4
Under the Labels tab, scroll down till you find the label names.

Here, you can choose whether to show or hide different labels.

Show or Hide labels

Go back to Contents

E. How to Create Nested Labels on the Gmail Web App

A nested label functions the same way that subfolders do: one parent folder can include multiple subfolders. Likewise, you can add multiple child labels within a parent label to declutter your label list.

Here’s how to go about creating nested labels in Gmail:

Step 1
Sign in to your Gmail account, and scroll through the left sidebar until you find the label to which you want to add a sublabel.

Step 2
Hover your mouse over the label, and click on the vertical three dots icon that appears.

Step 3
Click Add sublabel from the menu that pops up.

Add sublabel button

Step 4
A dialog box asking you to provide details for the sublabel will appear.

Enter a name for your sublabel, click the checkbox next to Nest label under, and select the parent label from the drop-down list.

Nest Marketing label under Marketing Campaigns

Step 5
Finally, click Create, and you’re good to go.

F. How to Color-Code Labels on the Gmail Web App

Color-coding your Gmail labels helps you quickly identify labels from the sidebar. This is handy if you use a lot of different labels to organize your mailbox.

Here’s how you can color-code labels in Gmail:

Step 1
Open Gmail and find the label you want to color-code from the sidebar on the left.

Step 2
Hover your cursor over the label, and click the three dots icon that appears.

Step 3
Click on Label color and pick a color you want to use for the label. You also have the option to add a custom color for your labels.

Label color button

Later, if you want to remove a label’s color, just follow the same steps as above. Instead of picking a label color, click on Remove color.

G. How to Automatically Label Incoming Emails on the Gmail Web App

While Gmail’s labels help organize your inbox, manually adding labels to emails can be time-consuming.

Fortunately, Gmail offers an effective workaround — the functionality to automatically assign incoming emails to labels based on specific criteria.

Here’s how you can create Gmail filters to do that:

Step 1
Open Gmail and click on the Show search options button at the right end of the search box.

Show search options button

Step 2
In the dialog box that appears, enter the parameters based on which you want to label emails.

For example, to filter future emails coming from a specific sender (Eric), I’ll enter their email address ([email protected]) in the From field.

Step 3
Once you’ve included all the relevant criteria for filtering, hit the Create filter button.

Create filter button

Step 4
The next screen will ask you what you want Gmail to do with the incoming messages.

Click the checkbox next to “Apply the label:”, select the label where you want to send the filtered emails, and hit Create filter.

Apply the Marketing label

Gmail will now automatically send incoming emails matching the criteria you provided to a specific label.

Go back to Contents

Next, we’ll explore using labels on Gmail’s mobile apps.

How to Use Labels on the Gmail Mobile App

Gmail’s mobile app lacks much of the web app’s functionalities — you can’t create or edit labels, for instance.

However, you can:

I’ll first show you how to add a label to your emails with Gmail’s mobile app.

Note: The steps for adding labels to emails and moving emails to other labels are virtually the same for Android and iOS devices. However, the Gmail Android app doesn’t let you automatically label messages, while the Gmail iOS app does.

A. How to Add a Label to Emails on the Gmail Mobile App

On the Gmail mobile app, you can choose to assign a label to an email or assign a label to multiple emails at once.

I’ll go over both methods here.

Method 1: Assign a Label to a Single Email

Step 1
Open the Gmail app on your mobile device.

Step 2
Select an email and open it.

Step 3
In the top right-hand corner of the screen, tap the More options button.

The button looks like three vertical dots on an Android phone. On an iPhone and other iOS devices, the button has three horizontal dots.

Three dots button inside Gmail Android app

Step 4
Tap Change labels.

Change labels button inside Gmail Android app

Step 5
Select the multiple labels you want to add to the email and tap OK.

Method 2: Assign a Label to Multiple Emails

Step 1
Open the Gmail app on your mobile device.

Step 2
Select the email messages in your Gmail inbox you want to assign labels.

Select email in Gmail mobile app

Step 3
Tap the three vertical dots (on Android devices) or three horizontal dots (on iOS devices) icon at the upper right corner.

Select multiple emails then clik on the three dots icon

Step 4
Tap Move to.

Move to button in the Gmail mobile app

Here’s what the Move to (destination Gmail folder) window looks like:

Destination folder in Gmail mobile app

From here, select the multiple labels you want to assign to the selected emails.

B. How to Move Emails to Another Label on the Gmail Mobile App

You can quickly move emails from one label to another on the Gmail mobile app.

Here’s how to do it:

Step 1
Open the Gmail mobile app and click the Menu button on the top left.

Menu button in Gmail mobile app

Step 2
Scroll down the menu bar until you find the label containing the emails you want to move.

Selecting Work label in the Gmail mobiel app

Step 3
Select the emails you wish to move to another folder and click on the three dots icon on the upper right corner.

Select an email in the Gmail mobile app, then click on the three dots icon

Step 4
In the dialog box that opens, tap on Move to.

Click on Move to button to move selected email

Now, select the destination label to which you want to move the emails.

Select folder to which you will move the email

You can also automatically redirect emails to a specific label using the Gmail mobile app.

Wondering how?
Read on to find out.

C. How to Automatically Label Incoming Emails on the Gmail iOS App

Note: While you can automatically assign labels to emails on the Gmail mobile app for iOS devices, you can’t do so in Gmail’s Android mobile app.

Let’s go over the steps for assigning labels automatically to emails on Gmail’s iOS app:

Step 1
Open the Gmail app on your iOS device and click the Menu icon on the top right corner.

Menu button in the Gmail iOS app

Step 2
Scroll down the menu bar and tap the Gmail Settings button.

Settings button in the Gmail iOS app

Step 3
Select your Gmail account.

Selecting an email account in the Gmail iOS app

Step 4
Click on Label settings in the Settings Menu that opens.

Label settings in the Gmail iOS app

Step 5
Tap the label you want to assign to the emails.

Choosing a label under Label Settings in the Gmail iOS app

Step 6
Click on Add….

Add button for automatically adding emails to a label

Step 7
Enter a name or email address in the From field.

You can also add other criteria (for example, a keyword) for filtering emails. For this, click on And… and add any additional filtering criteria for the emails.

Then, click Save.

Save label settings in the Gmail iOS app

Later, any future emails coming in that match the given criteria will automatically be assigned labels.

Go back to Contents

Now that we have seen how to use and manage labels on Gmail’s web and mobile apps, I’ll share a few tips to help you make the most of this handy feature:

3 Actionable Tips to Help You Make the Most of Gmail Labels

Here are three practical tips to help you use Gmail’s label feature to its fullest potential:

Tip #1: Use Labels to Improve Your Search Results

You can use Gmail’s labels for more than just organizing your inbox.

Labels can also be used to filter out unwanted emails and narrow your search when you’re looking for important emails in your message list. Using labels to improve your search can be done on all platforms, and the steps remain the same whether you’re using mobile or desktop.

For example, if you want to quickly find unread messages in your message list with the “Operations” label, type label:operations label:unread into the search bar.

Hit search, and you’ll find only see unread messages marked with the “Operations” label.

Search for emails with specific labels

Need to narrow your search even further?
Read my comprehensive article on how to use Gmail Search for some handy tips.

Tip #2: Add Labels When Composing Your Email Message

Gmail labels aren’t reserved only for your incoming emails.

You can also add them to those important emails you’re sending out. This way, you can organize your outgoing emails better.

Wondering how to add a label to your Gmail draft?
Just click the three dots icon at the bottom right of your new Gmail message window, select Label, and choose from your existing label list or create a new one — it’s that easy!

Add a label to a New Message

Tip #3: Build Mailing Lists Using Gmail Labels

It doesn’t matter if you’re a business owner, email marketer, or book club leader; we all need to maintain important mailing lists. However, manually creating a mailing list can be a time-consuming and tedious task.

Fortunately, you don’t have to do it manually anymore.

With powerful Gmail Chrome extensions like GMass, you can easily create massive mailing lists in seconds.

GMass works in tandem with the Gmail label feature to help you create email lists quickly.

To start using GMass, download the Chrome extension and sign up for free using your Gmail or Google Workspace (formerly G Suite) account.

Here’s how to use GMass to build an email distribution list using Gmail’s labels:

Step 1
Log in to Gmail and connect GMass to your Gmail account or Google Workspace account.

Connect a Gmail account to GMass

Step 2
Select the label of your choice from the sidebar on the left.

Select Operations label from left sidebar

Step 3
Click the “Build an email list from Gmail search results.” button (red magnifying glass icon).

Build email list button

Step 4
GMass will begin compiling a mailing list of every email address within that label. When complete, Gmail’s Compose window will appear where you can write your email.

New Message window with To recipients added

Note: You can also create an email list in a Google Sheet and connect it with GMass to send out mail merge campaigns.

Step 5
Compose the subject and body of your email. When you’re ready to send, click the red GMass button.

However, that isn’t all GMass can do.

GMass also helps you:

Go back to Contents

Wrapping up

While Gmail’s label system may take some getting used to, labels are an easy way to organize your inbox quickly. They go beyond the traditional folder method — labels can be used to enhance your searches and automatically classify any incoming messages.

And with the right tools, they can even help you create email lists!

If you’re looking for hassle-free email management in Gmail, GMass is your best bet.

Download the Chrome extension today and sign up for free with your Gmail or Google Workspace account, and see the benefits for yourself!

See why GMass has 300k+ users and 7,500+ 5-star reviews


Email marketing. Cold email. Mail merge. Avoid the spam folder. Easy to learn and use. All inside Gmail.


TRY GMASS FOR FREE

Download Chrome extension - 30 second install!
No credit card required
Love what you're reading? Get the latest email strategy and tips & stay in touch.


A well-organized inbox is one of the easiest ways to improve email productivity.

Fortunately, Gmail offers several effective ways to manage your inbox — the easiest being Gmail labels (or folders). 

These folders enable you to organize your important emails better, making them easily accessible. 

In this article, I’ll first clarify how Gmail’s folder system works. Then, I’ll cover how to use folders in Gmail using its web app and mobile app, including how to create, nest, and remove your Gmail folders.

This Gmail Guide Contains:

(Click on links to jump to specific sections)

Let’s get started.

Further Reading:

Gmail Folders vs. Labels

Gmail doesn’t have a traditional folder system like Microsoft Outlook.
Instead, it has Labels.

How are labels different from folders?
In a conventional folder system, an email can belong to only one folder. However, you can add multiple labels to an email in Gmail.

For example, it’s possible to assign an email to the labels “Weekend plans” and “Personal” — without creating a copy of it for each label.

Since a Gmail label and a folder are essentially the same, I’ll be using “labels” and “folders” interchangeably in this guide.

Now that you know what a Gmail folder (or label) is, let’s go over how you can use it on the Gmail web app:

How to Use Folders on the Gmail Web App

Gmail’s folders can help you organize your inbox better and manage emails more efficiently.

But for effective inbox organization, you’ll first need to know how to create and manage labels inside Gmail. To help you out, I’ll talk about:

Let’s dive straight into creating folders on your Gmail web app:

A. How to Create Folders on the Gmail Web App

While there are several ways to create new folders in the desktop version of Gmail, I’ll cover the two easiest methods in this guide.

i. Method 1: Using Email Options to Create Labels

Step 1
Sign in to your Gmail account.

Sign in

If you don’t have a Gmail account, sign up and set up your new mailbox.

Step 2
Click the checkbox next to a message in your inbox to select it. Then, right-click on it to bring up several options.

Hover your mouse cursor over the Label as option and click Create new.

Remember, I’m using “labels” and “folders” interchangeably in this guide.

Create new option

Step 3
Provide a name for your new folder in the dialog box that appears and hit the Create button when you’re finished.

New label

Note: You’ll also notice the option to nest the label. You can nest one or multiple labels inside another label. Nesting a label is Gmail’s equivalent of creating a subfolder.

I’ll go into more detail on how to create a nested label later in this guide.

ii. Method 2: Using the left sidebar to create labels

Step 1
Open Gmail and scroll down the left sidebar until you see More. Then, click the More button.

More option

Step 2
From the additional options that appear, click + Create new label.

Create new label

Step 3
A pop-up appears, asking you to name your new folder. Enter the name and hit Create.

New label

Step 4
Instead of clicking Create new label,  you can also click Manage labels in the left sidebar to open the Labels tab.

Keep scrolling down until you see the Create new label button.

Create new label button

Step 5
Click the Create new label button, and you’ll see the same dialog box as before.

Name your new folder, click Create, and you’re good to go!

New label

Pro tip: To create a folder, you can also select an email, click the little label icon (or folder icon) below the search bar, and follow the steps outlined above.

label icon

Once you’ve created your new folder, you can add the relevant emails to it.

Go back to Contents

B. How to Move Emails into Folders on the Gmail Web App

Moving your important emails into Gmail folders is much easier than creating new folders.

Here’s how to do it on Gmail’s desktop version:

Step 1
To move a single email, click and hold to drag the message and drop it in the desired label on the left sidebar.

Step 2
If you’d like to move multiple emails at a time, check the boxes on the left of the emails you want to move.

Check boxes

Then, click and hold to drag them over to the required folder on the left sidebar.

Step 3
Alternatively, you can right-click the message you want to move, click the Move to option, and select your desired folder from the list.

Move to option

But how do you move important emails to a folder automatically? Let’s find out.

C. How to Assign Emails to a Folder Automatically on the Gmail Web App

Gmail also lets you avoid the hassle of manually assigning emails to folders.
All you have to do is create automatic email filters!

Here’s how it works:

Step 1
Once you open Gmail, click the Show more options icon in the search bar at the top of the screen.

Show more options

Step 2
If you want future emails from a specific email address redirected automatically to a chosen folder, enter that email address in the From field of the drop-down menu that appears.

This way, all future emails from this email address will automatically go to the folder you assign.

Note: You can also fill in other filter criteria to create a more restrictive filter.

To

Step 3
Click the Create filter button when you’re done.

Create filter

Step 4
From the new window that appears, select the Apply the label to add a label to these emails. Then, choose which label to apply.

Choose label

Step 5
Finally, click the Create filter button.

Gmail will now send all incoming emails from that email address to the specific folder you have chosen.

Alternatively, open the specific emails to which you want to apply a filter, and click the three vertical dots next to the label icon (folder icon).

Folder icon

From the drop-down menu that appears, select Filter messages like these and follow the steps outlined above.

Filter messages like these option

Go back to Contents

Next, I’ll discuss the steps to nest a folder inside another in Gmail.

D. How to Nest Folders on the Gmail Web App

Nesting folders in Gmail is very similar to creating subfolders inside a parent folder.

i. Method 1: Create a New Nested Folder in an Existing folder

Here’s how to create a new nested label inside an existing label:

Step 1
Open your Gmail inbox. Then, navigate to the label list on the left-hand side of the screen, and find the label you want to make the parent label.

Step 2
Hover your mouse over the folder and click on the three vertical dots that appear. Then, from the list of options available, pick Add sublabel.

Add sublabel

Step 3
Then, give it a name and hit Create.

New label under work

ii. Method 2: Turn an Existing Folder into a Subfolder

Follow the steps below to take an existing label or folder and turn it into a subfolder:

Step 1
Hover your mouse cursor over the desired folder to reveal the three vertical dots.
Then, click Edit from the drop-down menu.

Edit option

Step 2
All that’s left is to choose which folder it should be nested under — click your choice.

Edit label

Besides creating, moving, and nesting folders, you might often need to rename folders. I’ll share the steps to do so in Gmail.

Go back to Contents

E. How to Rename a Folder on the Gmail Web App

Want to change the folder names you’ve already created?
Here’s how to do it:

Step 1
From Gmail’s left sidebar, select the particular label you want to rename and hover your mouse over it to reveal the three vertical dots.

Step 2
Click Edit and rename the folder.

Edit option

Type in the new name and save. That’s all there is to it!

Edit label under marketing

Now how do you delete a folder from Gmail? Let’s explore that next.

F. How to Remove a Folder on the Gmail Web App

Follow the below steps to remove a label from the Gmail web app:

Step 1
From your inbox, find the folder you want to remove from the left sidebar and open it.

Step 2
Then, click the three vertical dots next to the folder name and click the Remove label button from the drop-down menu.

This is a Delete Folder equivalent as it removes the folder from Gmail.

Remove label

Note: When you remove a label, Gmail doesn’t delete the emails under that label. It only erases the label.

Go back to Contents

G. How to Assign Colors to Your Folders on the Gmail Web App

If you want to maximize your inbox organization, you can assign different colors to your folders to easily differentiate between them.
For example, you can mark an important folder in a bright color like red to make it easy to spot.

Here’s how to color-code your Gmail folders on the web app:

Step 1
In your mailbox, go to the left sidebar and find the folder you want to color.

Step 2
Hover your mouse over the desired folder and click the three vertical dots that appear.

Step 3
Then, click Label color from the drop-down menu and pick the color of your choice.

label color

H. How to Show or Hide Your Folders on the Gmail Web App

If you have tons of folders and don’t want them crowding up your sidebar, Gmail lets you choose between showing and hiding folders.
To do this, follow these simple steps:

Step 1
From your Gmail inbox, click the More option from the left sidebar.

More option

Step 2
Next, click the Manage labels option.

Manage labels options

Step 3
This will take you to the Labels tab, where you can see all your folders listed.

Labels tab

To select the folders you want to make visible or not, click the show or hide buttons next to the folder name.

Go back to Contents

Next, I’ll go over how you can use and manage folders on the Gmail web app:

How to Use Folders on the Gmail Mobile App

The Gmail mobile app lets you move emails and also automatically assign email addresses to folders.

I’ll show you how to:

Let’s first go over how to move emails to folders on the mobile app.

A. How to Move Emails into Folders on the Gmail Mobile App

While the mobile app won’t let you create new folders, you can move emails into your existing folders.

Here’s how to do it:

Step 1
Open the Gmail app on your mobile device.

Step 2
Select the message or messages you want to move from the Gmail inbox.

Blue tick

Step 3
There are three vertical dots at the upper right corner of the mail app screen; tap on them.

Three dots

Step 4
Now tap Move to and select the desired folder.

Move to option

This is how the Move to (destination folder) window looks:

Move to tab

It’s a label list from which you can select the folder of your choice.

Go back to Contents

B. How to Move an Email to Another Folder on the Gmail Mobile App

If you wish to move your emails from one Gmail folder to another, you can do so easily on the mobile app.

Step 1
Open the Gmail app on your mobile device and click on the Menu icon. If you don’t have a Gmail account, download the mobile app, sign up, and set up your brand new mailbox.

menu icon

Step 2
Click on the folder that contains the email to be moved.

Work folder

Step 3
Select the email you want to move to a different folder and click on the three-dots icon on the upper right corner of the mail app screen. To move multiple emails, click on the checkbox next to them to select them.

Three dots icon

Step 4
From the drop-down menu, click on the Move to option and select the desired label.

Move to icon

The Move to window will have all the folder names except the parent label (parent folder) that contains the selected email.

Move to window

Go back to Contents

You can also use Gmail’s mobile app to redirect emails directly to specific folders.

Curious?
I’ll go over that next.

C. How to Assign Labels to an Email Automatically on the Gmail Mobile App

Note: You can only assign labels automatically in iOS devices to move incoming emails to a specific folder. This feature is absent in Gmail’s Android mobile app.

Here are the steps to automatically assign labels to a folder on the Gmail mobile app on iOS devices.

Step 1
Open the Gmail app and click on the Menu icon.

Menu icon 2

Step 2
From the Menu, click on Settings.

Settings folder

Step 3
Select your Gmail account.

Select gmail account

Step 4
From the list of options in the Settings Menu, click on Label settings.

Label settings

Step 5
From the list of labels, click on the label name of the particular folder. In the subsequent label window, click on Add.

Label settings tab

Add label

Step 6
Type a name or email in the “From” field. To add other search criteria (like a keyword), click on And. Then, click Save. 

Specific emails from the email address will now be automatically sent to the folder.

Save label

Note: You can’t rename or edit a Gmail folder from the mobile app. You also cannot create a custom folder (custom label) in the mobile app either.

Go back to Contents

Wrapping Up

Organizing your mailbox can be a pain. But with Gmail folders, it becomes far easier!

You can quickly create, delete, rename, and even assign colors to folders in minutes. And while the mobile app may lack some features, the web app more than makes up for it.

Try out the handy steps I covered here to organize your Gmail inbox easily!

See why GMass has 300k+ users and 7,500+ 5-star reviews


Email marketing. Cold email. Mail merge. Avoid the spam folder. Easy to learn and use. All inside Gmail.


TRY GMASS FOR FREE

Download Chrome extension - 30 second install!
No credit card required
Love what you're reading? Get the latest email strategy and tips & stay in touch.


Looking for the best GetResponse alternatives for 2021?

GetResponse is an email marketing platform that offers landing page builders, marketing automation, and Customer Relationship Management (CRM) solutions.

However, GetResponse isn’t perfect.

For example, it doesn’t have a free plan and has an interface that many find confusing.

In this article, I’ll highlight five excellent GetResponse alternatives to overcome those drawbacks. I’ll cover their key features, pros, cons, and pricing to help you choose the right tool.

This Article Contains:

(Click on links to jump to a specific section.)

Let’s jump right into it.

What Is GetResponse?

GetResponse is a popular email marketing tool that helps you create marketing lists, plan and manage email campaigns, and analyze their performance.

While it’s primarily an email marketing service, GetResponse also offers features like:

  • Landing pages
  • Sales funnel management
  • Support for webinar funnels
  • Paid ad management
  • And more

Limitations of GetResponse

While GetResponse offers a ton of features, here are a few key drawbacks that hold it back from being the perfect tool for you:

  • GetResponse doesn’t offer a free plan. This makes it unsuitable for small teams who don’t want to commit to a paid plan.
  • Several user reviews mention that GetResponse’s user-interface can be challenging.
  • Its automation feature and templates support minimal customizations.

Check out my in-depth GetResponse review for a clearer look at this tool.

Top 5 GetResponse Alternatives

Sure, GetResponse is a capable email marketing tool. However, its limitations could weigh your email marketing down.

Instead, why not try these GetResponse competitors?

  1. GMass
  2. Mailchimp
  3. Sendinblue
  4. Pabbly Email Marketing
  5. MailerLite

To help you make an informed decision, I’ll highlight their key features, pros, cons, and pricing.

1. GMass

GetResponse Alternatives - GMass

GMass is a powerful email marketing platform that works inside Gmail.

Its versatility and advanced outreach capabilities make it a popular GetResponse alternative used by employees at companies like Uber and Google and social media giants like Twitter and LinkedIn.

GMass is also the go-to tool for casual Gmail users, solopreneurs, small business owners, and even institutions like churches.

GMass Key Features

Here’s what makes GMass an excellent GetResponse alternative:

A. Email analytics and reporting

Analytics and reporting help you understand how your campaigns performed and where you could do better.

Every time you send an email campaign, GMass generates a detailed Campaign Report in your inbox.

It breaks down your campaign performance and highlights metrics like:

  • Total recipients to whom you sent the campaign
  • Number of unique opens and clicks
  • Reply and unsubscribe rates
  • And much more

Additionally, GMass gives you highly accurate metrics as it bypasses most pixel tracking blockers.

GetResponse Alternatives - GMass

You can leverage this information to develop a better and more informed campaign strategy the next time.

B. Automatic email personalization

If you want to boost email engagement, ensure that you personalize emails for each customer. This will improve their experience as they won’t receive a generic email that feels mass-produced.

Unfortunately, it’s impossible to manually customize every email you send if you’ve got an extensive subscriber list.

GMass helps you auto-personalize your bulk emails by automatically including recipient names, personalized paragraphs, links, and images.

GetResponse Alternatives - GMass

C. Email list builder

It’s super easy to build your mailing lists in GMass.

All you have to do is enter a relevant keyword in the Gmail search bar and click Search. For example, if you wanted to create an email list for your book club, type “book club” into the search bar.

Then, GMass quickly builds an email list from the results, and they will be added automatically to your new email.

GetResponse Alternatives - GMass

GMass also makes it easy to build an email list directly from your Google Sheets spreadsheets. Just connect your sheet with GMass, and your email list will be ready!

D. Automated follow-up emails

Sending follow-up emails is an easy way to improve subscriber engagement.

Follow up emails gently nudge subscribers who might have missed out on your previous emails and didn’t open them.

With GMass, you can set up an automated workflow to keep sending follow-up emails until your recipient opens the email, clicks on a link, or responds to it.

GMass even lets you customize everything about those follow-up emails. You can automate elements such as:

  • Trigger to send a follow-up email
  • Number of follow-ups to send
  • Time interval between follow-up emails
  • Content of your follow-up messages

GetResponse Alternatives - GMass

E. Schedule bulk emails

Sending your emails at the right time helps you improve customer engagement as your emails reach your customers’ inboxes when they’re most active.

Luckily, mass email scheduling is super-easy with GMass.

Just compose your message and then schedule it.

When the time arrives, GMass automatically sends out your email campaign.

And if you want to reschedule your emails, go to the Gmail Drafts folder, find the email, and make your adjustments.

GMass Pros

  • Works within the Gmail user interface
  • Automatically detects your recipients’ first names from their email addresses
  • Can improve the delivery rates for bulk email campaigns
  • Saves older emails as templates to reuse in your future campaigns
  • Powerful free version
  • Access email marketing capabilities on your Android phone with the mobile add-on

GMass Cons

  • Only works with Gmail

GMass Pricing

GMass offers three comprehensive pricing plans:

  • Individual:
    • Standard: $25 per month or $225 annually. Includes unlimited emails, contacts, and campaigns. Plus mail merge personalization, Spam Solver, and dozens of other features.
    • Premium: $35 per month or $325 annually. All Standard plan features, plus auto follow-up sequences, API access and Zapier, and triggered emails.
    • Professional: $55 per month or $525 annually. All Premium features plus GMass MultiSend for inbox rotation and high-priority support.
  • Team:
    • Professional: starts at $145 per month for a team of five – supports all features.

2. Mailchimp

GetResponse Alternatives - Mailchimp

Mailchimp is an email marketing tool that helps you send bulk email campaigns, set up email automation, and create landing pages.

Check out my in-depth Mailchimp review.

Mailchimp Key Features

  • Marketing API to sync emails, manage campaigns, and send transactional or marketing emails directly from your website or app
  • Advanced list segmentation to organize your contacts into different segments for improved targeting
  • Integrations with apps like PayPal, Calendly, Asana, etc., to boost email management capabilities
  • Advanced automation to send transactional emails, build a personalized customer journey, and optimize email send times

Mailchimp Pros

  • Drag-and-drop editor makes it easy for any marketer to create email designs and templates.
  • Detailed reporting that includes clients, geo-tracking, Google Analytics, and social media
  • Easily import contacts from spreadsheet software like Google Sheets and Excel, and CSV or TXT files.

Mailchimp Cons

  • Difficult to navigate the user-interface and personalize settings
  • Pricing quickly gets expensive when adding more contacts
  • Limited customer support for users of the “Free” plan

Mailchimp Pricing

Mailchimp offers four pricing plans:

  • Free: supports up to 2,000 contacts and one audience (subscriber) + 10,000 monthly email sends + a free Mailchimp domain + more
  • Essentials: starts at $9.99/month — supports up to 50,000 contacts and three audiences + 500,000 monthly email sends + A/B testing + more
  • Standard: starts at $14.99/month — supports up to 100,000 contacts and five audiences + 1.2 million monthly email sends + custom templates + single-step and classic automation builder + more
  • Premium: starts at $299/month — 200,000+ contacts and unlimited audiences + over 3 million monthly email sends + advanced list segmentation + 24/7 phone and chat support + more

3. Sendinblue

GetResponse Alternatives - Sendinblue

Sendinblue is a digital marketing platform that focuses on email marketing and marketing automation. It also has transactional email capabilities and supports Facebook Ads management.

Check out my in-depth Sendinblue review.

Sendinblue Key Features

  • Email template library to create quick email designs for your campaigns
  • Drag-and-drop editor to create personalized emails for your customer base
  • Marketing automation workflows to help you with autoresponder needs
  • Manage ads on a social media platform like Facebook to improve engagement
  • Personalized SMS marketing campaign support to approach any potential customer on mobile, too

Sendinblue Pros

  • Unlimited contact lists and segmenting without additional costs
  • Send Time Optimization improves engagement by choosing the optimal time to send emails
  • Automatically send transactional emails based on user-interactions on your website or app

Sendinblue Cons

  • Challenging to set up and has a user-interface that isn’t intuitive
  • Only the “Enterprise” pricing plan allows multi-user access
  • Extra cost for critical features like A/B testing when on the basic plan (Lite).

Sendinblue Pricing

Sendinblue offers four pricing plans:

  • Free: supports 300 emails/day + unlimited contacts + SMS campaign management features + Zapier integration
  • Lite: starts at $25/month — supports 100,000 emails per month + all “Free” plan features + no daily email sending limit
  • Premium: starts at $65/month — supports 1 million emails per month + all “Lite” plan features + unlimited automation + Facebook Ads + live chat + landing page
  • Enterprise: contact Sendinblue for a custom quote — supports all “Premium” plan features + dedicated account manager + priority customer support

4. Pabbly Email Marketing

GetResponse Alternatives - Pabbly Email Marketing

Pabbly Email Marketing is an email marketing and marketing automation platform that helps you send promotional emails. It comes with built-in SMTP capabilities and can also integrate with other SMTP providers.

Check out my in-depth Pabbly review.

Pabbly Email Marketing Key Features

  • List management to organize and manage your subscribers from one place
  • SMTP routing to connect with SMTP providers like Amazon SES and Mailgun, etc.
  • Marketing automation to deliver your emails based on a pre-set schedule
  • MX cleaner to remove invalid or unresponsive email addresses from the mailing list
  • Email tracking to identify the number of emails delivered, opened, and clicked

Pabbly Email Marketing Pros

  • Drag-and-drop email builder lets you quickly create email designs for campaigns.
  • Zapier integration allows you to connect it with several external web applications.
  • Pabbly can add subscription forms to your websites to capture leads.

Pabbly Email Marketing Cons

  • Users can’t send any emails using the “Free” plan.
  • The built-in SMTP service for sending your emails isn’t easy-to-use.
  • There’s no mobile app to manage email campaigns from your smartphone.

Pabbly Email Marketing Pricing

Pabbly Email Marketing offers four pricing plans:

  • Free: simply to explore the features
  • Rookie: $29/month — supports up to 5,000 subscribers + MX cleaner + drag-and-drop builder for emails + add multiple SMTPs + subscription forms + Zapier integration + list management + more
  • Pro: $49/month — supports up to 15,000 subscribers + all features are included
  • Advance: starts at $99/month — supports 50,000+ subscribers + all features are included

5. MailerLite

GetResponse Alternatives - MailerLite

MailerLite is an email marketing tool with a built-in editor, subscriber management capabilities, automation features, and campaign reports.

MailerLite Key Features

  • A/B split testing to identify your most effective emails
  • Campaign reports to track opens and clicks, which devices your customers used to view these emails, and so on
  • Drag-and-drop landing page creator to help you design custom landing pages
  • Responsive website forms to generate new leads

MailerLite Pros

  • Send automated emails, such as abandoned cart emails, to customers directly from your ecommerce website.
  • Email templates help you save time while creating appealing email newsletters for your business.
  • Automatically personalize your emails by customizing the name, subject, and content, etc.

MailerLite Cons

  • Challenging to set up, and it takes time to get familiar with the user interface.
  • Users report deliverability issues like emails ending up in the promotions folder.

MailerLite Pricing

MailerLite offers the following pricing plans:

  • Free: supports up to 1,000 subscribers + drag-and-drop editor + file manager + landing pages + subscriber management + automated campaigns + email campaign reports + more
  • Premium: starts at $10/month — supports 1,000+ subscribers + all “Free” features + unlimited emails + live chat support 24/7 + remove MailerLite logo + newsletter templates + custom domains + more

Final Thoughts

GetResponse is a decent email marketing platform.

However, the tool still falls short because of its difficult-to-use interface and the lack of a free plan.

Fortunately, it has tons of capable email marketing software competitors like GMass.

GMass is the perfect GetResponse alternative since it offers superior outreach capabilities to businesses of all sizes.

With GMass, you can send personalized bulk emails, set up automated follow-ups, build custom mailing lists, and do so much more.

So why not try GMass today and skyrocket your campaign performance?

And while you’re at it, check out why GMass is a fantastic Mailchimp alternative and a compelling rival to other email marketing software like:

Email marketing, cold email, and mail merge inside Gmail


Send incredible emails & automations and avoid the spam folder — all in one powerful but easy-to-learn tool


TRY GMASS FOR FREE

Download Chrome extension - 30 second install!
No credit card required
Love what you're reading? Get the latest email strategy and tips & stay in touch.


GMass