Tired of the sluggish growth, meager revenues and limited user engagement from your website? In our vast experience, one of the ways you can change all that is by having a do-over in the form of a website redesign.
If done the right way, website redesign can catapult your business in the most impactful of ways, from creating a high-impact brand presence to reaching your target audience in a highly-effective and cost-efficient manner.
But like most design-oriented changes, users can react to the website redesign in a counterproductive way. So how do you ensure that customers react to the designs positively? How do you tailor the redesigns in a manner that meets the already-established needs of the website while being able to accommodate future needs? How do you facilitate clarity, ease-of-use and seamless adaptability of the new designs while meeting (or better yet, exceeding) the average industry metrics?
Well, the truth is that there’s no simple all-encompassing answer to all those questions, considering different companies and clients require different kinds of investments in money, time, human capital and risk mitigation for their website redesigns.
The bigger the company, the higher the investments (time, money and human capital) required to process a new design. And the more complicated a redesign is, the more risk-mitigation measures are often required to complete the process.
Fortunately, this guide will provide sufficient answers to the above-mentioned questions—and many more—by giving a multifaceted framework of how you can master your website redesign, whether you are dealing with a small or big client/company. Some of the key highlights in the guide include:
- A comprehensive look at the process of creating a successful website redesign
- An analytical look at the role of experimentation in the success of website redesign
- Best-practice strategies for success in website redesign
- Examples of companies that have succeeded/made mistakes in their redesigns
Follow us below as we take you through a deep dive of these highlights…
OVERVIEW OF THE WEBSITE REDESIGN PROCESS
In order for a website redesign to be considered as successful, it must tackle the specific web design problems (along with related business problems) that necessitated the website redesign in the first place.
This success can be assessed by mainly comparing the resulting metrics from the new design against those of the previous design while ensuring that the right design aspects of initial design are carried onto the redesign. Essentially, that’s the reason data-driven leveraging and design experimentation are heavily considered as the topmost components of the redesign process–given that you can’t measure any metrics without data and you can’t test or prove efficiency without experimentation.
More than that, the redesign process must be inclusively consultative, allowing for input from the companies that requested for the redesign, alongside user insights and the professional views of the website designers. Doing so will greatly help you avoid overlooking key aspects of the process while simultaneously mitigating unnecessary risks that would otherwise slow down the process or lead to unsuccessful redesign projects.
THE WEBSITE REDESIGN PROCESS
Different industries and companies seek website redesign services to solve different problems and serve different needs. Additionally, different web designers approach the redesign process differently. As such, plenty of consultation and assessment is often required in order to ensure that the website redesign process meets its intended goals.
Below is a comprehensive look at the steps involved in a website redesign process.
Discovering Pain Points and Setting Goals
This phase entails assessing the needs of your current website and then using those pain points to set goals for your to-be-redesigned website.
Discovering Pain Points
These points can come in a variety of ways. For starters, the goals could be based on the intuitive needs or personal preferences of the website owners. Moreover, you may find potential change points off negative feedback from your current customers regarding aspects such as usability, mobile-friendliness or even the load-time of the site. Then, of course, you could find solid change points from your website metrics i.e. making changes to ensure that your site meets or exceeds industry averages.
Setting Goals
Whichever goals you set here, the key guiding factor here should be that the goals adequately address the pain points you’ve discovered in the first phase. As earlier mentioned, different companies and industries have different needs, which means that the goals here can be as simple or as complicated as you want them to be.
Some of the common website redesign goals that can be set in this phase include:
- To increase page load time
- To increase free trial signups
- To increase time spent on the site
- To increase checkouts after viewing of products
- To increase engagements with your audience (i.e. through likes and shares)
Background Research and Input Collection
In order to discover the pain points of your site, you will obviously have to conduct research on both theoretical and analytical levels. As a limitation, though, such research is often very elementary. For a better affirmation of the redesign needs and goals, better research must be conducted—providing the crucial premise of this background research and input collection stage.
User and Industry Research: This can be done in a variety of ways, including talking to your customers, consulting experts in your industry and comparing your needs and goals against those of your competitors. Doing this not only helps to confirm your hypotheses for the redesign, but it also provides copious insights that can be used to strengthen your goals, experimentations and eventual designs.
Website Analytics Data Assessment: Use the analytics that you have been collecting on your site to validate your redesign goals and needs. This is important in helping you know how to prioritize your needs. For example, if the analytics data indicate that your website suffers most from limited time spent on the site, then you can ensure that your redesign process prioritizes on solving this problem.
Developing a User Experience Brief
Simply put, a user experience brief is a document that summarizes your current site challenges and goals for the website redesign in one place. This brief is what serves as a guide for what to do or ignore during the design process. Based on this important, it is fundamental that you take your time to put together an all-inclusive brief, spelling out all your pain points and highlighting your goals with clarity.
Developing a Visual Identity
In this phase, focus is on creating a visual identity for the redesigned website by deciding on elements such as mood and tone of your site. Also, you should ensure that other visual aspects like themes and icons merge congruently, and are tailored to suit the “feel needs” of your site.
If you are not able to do this through your in-house design personnel, you can outsource the services of other professionals who are vastly knowledgeable in identifying the visual aspects—like color palettes, textures, and UI component—that will suit your designed site in the best way.
Content Creation
Irrespective of the industry, content is always king, particularly if we are talking about web-based companies. At this stage, it is therefore exceedingly important that you identify the top content needs for each of the pages in your site, and then proceed to create high-quality headlines, subheadings, and other related content for these pages. Alternatively, you can create a content outline that will guide whatever it is you plan to put in the pages and the site, at large.
In some instances, you may be required to create more than just an architectural guide of future content or the headlines and subheadings. For example, in complex sites with diverse categories, the content creation stage may require you to choose category sections and types of content, which will need to be infused in the web design. Like in visual identity, you are at liberty to outsource professional help in this content creation stage.
Prototyping the Site
By the time you arrive at this stage, you should already have a good mental picture of how you want your redesigned site to look. To change that mental picture into a practical one, you will need to prototype the proposed design of the new site. There are many ways you can do this, but website redesign best practices recommend that you use wireframes or low-fidelity mockups to prototype the site. Besides the advantage of cost-effectiveness, wireframes can be produced quickly and they come with tons of important easy-to-use tools that ease the prototype process.
Advisably, ensure that you create a wireframe for each of your redesigned site’s pages, making certain that images, body copy, headings, site navigation and other relevant elements are highlighted properly. Once you are done with such elements, proceed to the stage of prototyping the key design aspects of your site, including textures, color palettes, and UI components.
If you notice any potential challenges with the redesigned site, make sure that you go back and change the designs up to the point where everything looks satisfactory. Leaving this stage with an untested prototype would create huge problems for you later, so do whatever it takes to ensure that you move on to the next phase with a good, experimented-on prototype.
Website Development
If you have a good design prototype, this phase shouldn’t take that long, considering it only involves coding the site. Of course, the scope of coding can vary widely, depending on whether you will be keeping or changing the technology that powers your redesigned site.
While the site is under coding, remember to include relevant analytics that will help you keep track of the metrics and data you’d want to analyze. Once you are done with coding, do a preliminary test to assess the functionality of the site (and make changes where necessary until you are satisfied that it is performing as expected).
Launch and Q&A
With everything in place, all that remains is for you to set a launch date and fire up the new site and enjoy the benefits that come with your hard work.
As a note, though, you should ensure that you have a plan in place for any unexpected bugs, performance challenges or other problems that might come up, given that new sites tend to come with such issues. A good example here would be having a rollback plan in place, or alternatively having your technicians on standby to address any arising issues.
Additionally, you should have some Q&As ready to help you in collecting data on how the new site is functioning, along with a checklist to help establish if your pain points, goals and objectives are attended to.
A good example of a website redesign project that followed all these steps and came up with a highly-successful redesigned site is Netflix’s streaming service in 2011. With the American entertainment giant looking to grow its profits, increase its retention numbers and accelerate its engagement rates; the management decided to take the bold step of redesigning its streaming interface. The company faced a couple of challenges, but thanks to the data-driven strategies and solid experimentation techniques that were involved in the consultative process, the redesign project was a resounding success, allowing Netflix to grow from 24 million members in 2011 to over 75 million members in early 2016. Additionally, Netflix saw a remarkable 2.5x retention increase and a 4.5x engagement increase during that duration.
THE ROLE OF EXPERIMENTATION IN WEBSITE REDESIGN
During the redesign process, a lot of changes are usually made at its many stages, thus making it difficult to isolate problems after the launch. This is where the experimentation process comes in very handy.
By infusing experimentation in the design process (rather than running the experimentations after the launch), you are able to test new designs, experiment with a variety of content and even decide on the best elements for your site.
What is experimentation?
Experimentation is design process that involves the multifaceted use of three processes—A/B testing, conversion rate optimization (CRO), and personalization—to test a site’s elements prior to launch. With key consideration of these elements, you stand a great chance of avoiding a failed website launch or facing mega problems after launch that may lead to huge losses and even force a rollback to previous site design.
Here’s a look at the role played by each of the three components of website experimentation
A/B Testing
Also referred to as split testing, A/B testing is a process that involves comparing two elements of your web page, blog or app to establish the version that performs best. By using A/B tests, you don’t have to deal with guesswork, as the tests will clearly guide you on the best elements with regards to designs for your site.
Additionally, A/B tests help in risk mitigation by highlighting potential flaws during the design phase; something that encourages safety of the site before launch.
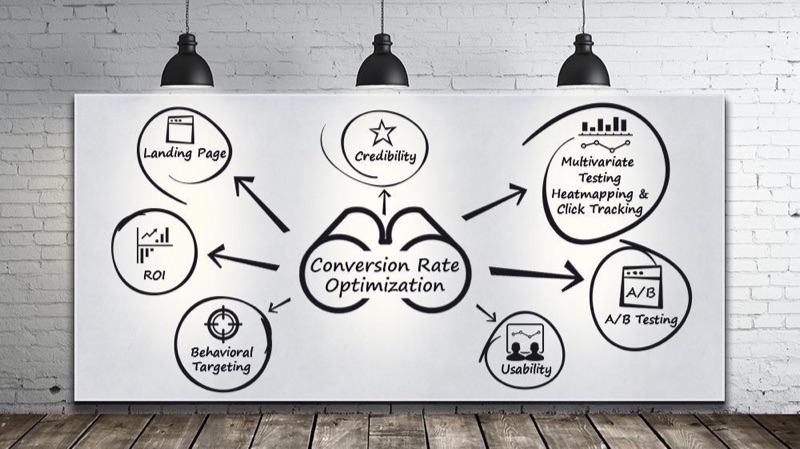
Conversion Rate Optimization (CRO)
CRO is a highly structured process that aims at improving and easing the flow of your website through your engagement or purchase funnel, and then eventually to conversion. With regards to CRO, conversion is defined as the target action by a visitor to your site; an action that supports your business goals such as making a purchase, making a download or signing up to your site.
By increasing conversions, your site’s ROI is increased without you spending extra money. As a process, A/B testing is one of the methods used in CRO. There are many other ways to increase ROI through CRO, all of them being largely dependent on the nature of your website and its targeted conversions.
Besides its value in ROI increase, different CRO processes can easily help you to discover challenges in the design process (i.e. areas where user get stuck), thus saving you a lot of headaches that would otherwise be hard to deal with after launch.
Personalization
Derived from the word personal, personalization simply refers to the strategy where website owners tailor their site to meet individual needs of specific visitors based on their motivations and tastes.
The more personalized your site it, the more you are likely to engage your visitors in an emphatic and lasting way, leading to desired conversions.
In the design process, we discussed “user and industry research” under the background research phase. The opinions collected from these users can form a good basis for your personalized designs, with your web designers ensuring that your site is tailored to accommodate the top needs of these users.
Infusing Experimentation into the Redesign Process
Below is a brief look at how you can infuse experimentation before, during and after the website redesign process to mitigate challenges while encouraging success and cost-effectiveness.
Before the Redesign Process
Before you commence the redesign process, you can use experimentation to determine the best types of changes that would be most impactful to your needs or conversion rates. Additionally, you can use customer feedback on your current site or incorporate expert opinion from industry leaders to hypothesize your redesign plans.
During the Redesign Process
This section pretty much entails following what we’ve described in A/B testing, CRO, and Personalization. While doing so, special attention should be paid to validating the redesign elements, conducting more qualitative user and industry research, and identifying potential areas for optimizing the redesign process.
After the New Site Launch
One of the best ways to do experimentation after the launch of a site is to use the Q&As you created during the launch to confirm whether or not the new site performs as is intended. This performance could be based on conversions, personalization measures and/or other data metrics.
An example of the value of experimentation in the success of the redesign process is highlighted by a case study on Digg. Per reports from the company, Digg wanted to take advantage of the industry trend toward social networking in 2010, planning a redesign process that would involve the creation of a new backend, new UI and a new content algorithm to accentuate their company’s social media problems. Unfortunately, the company failed to infuse experimentation in the design process, instead of resorting to focus only on the design aspects. On making the launch, the redesigned site backfired in a big way, especially with regards to the backend that couldn’t handle the site’s traffic. Resultantly, Digg lost a huge chunk of its audience–26% traffic decrease in the US and 34% traffic loss in the UK; something that could have easily been avoided had the company infused A/B testing and other experimentation measures in the redesign process.
BEST PRACTICES FOR SUCCESS IN WEBSITE REDESIGN
Clear and Targeted Goal-setting
The goal-setting phase is unquestionably the most important stage of redesigning a website, considering everything else in the redesign process if built off this stage. It is therefore very crucial that your goals are clearly defined and well-targeted to meet the objectives of the new site design.
To make certain that your redesign plans stay on track, ensure that your goals address all the key questions that drive the new design process. For example: What are the top design priorities by the site’s owners? Which success metrics are to be achieved by the redesigned site? What are the site’s main opportunities for improvement? Which industry trends can help take the site to the next level? What can be done during the design to increase customer engagement and the realization of conversions?
Allocate Your Resources Realistically
As has been detailed above, the website redesign process is highly involving, which means that you will most likely have to spend a decent amount of money and allocate sufficient time and human capital resources for the success of the process. Prototyping, website development and the experimentation stages are usually the most involving stages in terms of resources. However, that doesn’t mean you shouldn’t allocate sufficient resources for, let’s say, the background research and content creation stages. Ultimately, each phase of the design process affects each other in one way or another, thus necessitating unbiased and realistic allocation of resources throughout the entire site design process.
Assemble a Balanced Team
Usually, product managers and web designers constitute the core team in the design process, and rightfully so. That being said, the success of the process calls for everyone to do his/her job properly, which means market researchers, users, industry experts and data analysts (among others) must all be involved in helping design the new site. Like the cogs in the redesign process, a single member of this diagnostic team can easily mess up the design process, so no one’s importance should be overlooked.
Build a Flexible Site to Allow For Future Changes
The world of online business is in a constant state of flux, with new technologies and trends emerging and changing every other day. As such, your redesigned website should be tailored flexibly to allow for potential changes in the future. This point is especially important to keep in mind when structuring the content creation part of your new site.
Plan and Aim High
There’s nothing wrong with starting small or budgeting small when planning for your website design. However, the ubiquitous nature of web-based business can easily lead to unprecedented huge growths, meaning the smallest of ideas can change into global sensations overnight. So rather than aiming and planning small in your current redesign plans and then having to incur lots of resources when you want to make upgrades; you’d rather plan big and save yourself all that trouble. Of course, best-practice budgeting techniques should be duly considered here.
Structure Your Metrics Accordingly
The key metrics to track in the design process vary from industry to industry, so we can’t say that there is one universal way for you to track the metrics and do your experimentation. Even so, studies conducted by various website redesign experts indicate that the following metrics should be given top consideration per their industries, more so in regard to experimentation:
Top E-commerce Website Metrics
- Checkout rate
- Add-to-cart rate
- App downloads
- Average value of orders
- Average revenue per visitor
Top B2B Website Metrics
- Accounts created
- Free trial signup rate
- Engagement metrics
- Lead qualification rate
- Average site visitors
- Lead form conversion rate
Media Website Metrics:
- Engagement metrics
- Most popular stories and videos
- Ad revenue from display and video
- Video watches and video completions
- Average number of stories read per visit
Continually Run Experiments (Even after Launch)
Launching a successful site is indeed a cause for celebration, but your work shouldn’t stop there. From data collection on how the new site is performing to measuring the metrics against your goals, to looking for new opportunities that can help you hit your conversions, to optimizing and refining components of your new site; there are plenty of things to do and avenues to exploit after launching your website.
It is only by looking into such avenues and making such improvements that you’ll be able to stay ahead of the rest of the pack in the highly-competitive global business world.
SUCCESSFUL WEBSITE REDESIGN AT A GLANCE
In recap, any successfully redesigned website should be able to incorporate aspects of the following key disciplines and elements:
- Analytics
- Content
- Design
- Engineering
- Marketing
- UX
- Product Management
As far as your website redesign brief is concerned, your checklist should at the very least include the following elemental components:
- Challenges with the current site
- Goals for designing the new site
- Research on user and industry insights
- Experimentation structure and techniques
- Desired results following the launch of the new site
In conclusion, it’s worth noting that website redesign is always a highly-involving process that calls for the convergence of several design elements, tons of data-backed insights and research, immense contributions from members of the design process and the use of solid experimentation techniques for the project to be a success. You are therefore not going to have it easy when redesigning your website. However, if you consider the guidelines and recommendations detailed in here; then your burdens will be lightened and your chances of launching a successful and masterful website redesign will be highly increased.
Ready to send better emails and save a ton of time?
GMass is the only tool for marketing emails, cold emails, and mail merge — all inside Gmail. Tons of power but easy to learn and use.
TRY GMASS FOR FREE
Download Chrome extension - 30 second install!
No credit card required
Ajay is the founder of GMass and has been developing email sending software for 20 years.
Love what you're reading? Get the latest email strategy and tips & stay in touch.