<img height="1" width="1" style="display:none" src="https://www.facebook.com/tr?id=1822615684631785&amp;ev=PageView&amp;noscript=1"/>

Looking to demystify Google Contacts — from accessing your Gmail contact list to using it for mass emails?

You’ve been a Gmail user for years… but there’s a good chance you’ve never messed around with your Google Contacts. You may not even know where your Gmail contacts list is located.

It’s not you, it’s them.

Google contact list management can get cumbersome sometimes since it requires going back and forth outside of Gmail to manage it.

In this article, I’ll give you a step-by-step guide on how to access your contact list in Gmail. To help you manage your Google contacts list easily, I’ll also cover how to add contacts, label them, check for duplicates, and delete contacts.

Plus, I’ll show you the easiest way to send individual, personalized mail merge messages to your Google Contacts. (With their first names automatically detected and inserted into those emails!)

Google Contacts: Table of Contents:

Let’s get started.

How to Find Your Gmail Contacts (Step-by-Step Guide)

If you’re confused about where your Gmail contact records (especially after various Gmail interface updates), don’t worry!

You can access your Google contact list in two ways:

I’ll cover both methods in this section.

Just follow these simple steps, and you’ll find your Gmail contact records in no time:

The Gmail Method

Here’s how to access your Gmail contact records from your Gmail account:

Step 1

Log in to your Gmail account and click on the square-like Google Apps icon on the upper right corner of your Gmail inbox.

Gmail interface showing the Google Apps icon

The Google Apps drop-down menu will pop-up.Gmail interface showing the Google Apps drop-down menu

Step 2

Click on the Google Contacts icon. Gmail interface showing the Google Contacts icon in the Google Apps drop-down menu

Step 3

Once you click on the icon, your Gmail contact list page will appear.Google Contacts interface

The Google Homepage Method

You can access your contacts from your Google homepage as well. However, you must be signed in to your Google account for this to work.

Here are the steps to access your contacts list from the Google homepage:

Step 1

Go to the Google homepage and click on the Google Apps icon on the upper right corner.Google homepage showing the Google Apps icon

The Google Apps drop-down menu will appear.Google homepage showing the Google Apps drop-down menu

Step 2

Click on the Contacts icon.Google Contacts icon in the Google Apps drop-down menu

Step 3

And voila! You’ll be in your Google Contacts page. Google Contacts interface

You can also access your contacts directly by heading to contacts.google.com or using the Contacts app for Android devices.

And that’s everything you need to know about accessing your Google contacts list!

How to Manage Your Google Contacts (Step-by-Step Guide)

Knowing how to open your Google Gmail contacts page isn’t enough, right? 

You also have to know how to manage your contacts to keep your contact list updated!

Don’t worry.

I’ll show you everything you need to know about managing your contact group in this section:

1. How Do You Add Contacts in Gmail?

There are two ways to add a new contact in Gmail, and in this section, I’ll cover both ways:

How Can You Add Contacts Through the Google Contacts Page?

Here’s how to add Gmail contacts through the Google Contacts page:

Step 1

Open the Google Contacts page (using the methods described earlier in this article).Google Contacts interface

Step 2

Click on the Create Contact button on the top left.Google Contacts interface showing the Create Contact button

Step 3

Once you click on Create Contact, you will get the option to choose between adding a single contact or multiple contacts.Google Contacts interface showing the Create Contacts options

Note: For this article, I’ll create a single contact. However, if you want to add multiple contacts, you can either add them by their names and email addresses or use a CSV file.

Step 4

An empty contact form will appear, as shown in the image below. You can fill in your new contact information accordingly. Google Contacts interface showing the Create new contact form

You can even add labels to the contact to categorize it into a specific Gmail group like School or Work. This is what a completed form looks like:Google Contacts interface showing a filled new contact form

Step 5

Once you’re done, just click on Save and the contact will be added to your list.Google Contacts interface showing the Save icon for a new contact

How Do You Add Contacts from an Email?

This method is an easy way to add a person to your contact list straight from your email inbox. Here’s how to do it:

Step 1

Go to your Gmail inbox and hover over an email until this dialog box showing the contact’s name and email address pops up.Gmail interface showing a sender's contact information

Step 2

Click on the Add to Contacts icon, and the person will be added to your Google contact list.Gmail interface showing the Add to Contacts icon

Note: If you’ve already added the person to your contacts list, you’ll see the option to edit their contact.Gmail interface showing the Edit Contact icon

And that’s how easy it is to add contacts from your Gmail inbox!

How Do You Create Labels in Gmail Contacts?

Categorizing contacts is essential to maintain an organized email list.

Gmail helps you create groups and label these contacts with a common contact group name to send an email message quickly to all your group members.

But that’s not all.

You can also add several labels to one contact and add them to multiple groups.

For example, if you have separate email groups for marketing and sales but only one manager overseeing both groups, you can add the manager to the marketing distribution list and the sales group email list.

Note: Adding a contact to a new group in Gmail is not the same as adding a contact to a Google Group. Google Groups is meant for discussions between people who share similar interests.

Here are the steps to label contacts in Gmail:

Step 1

Open the Google Contacts page.Google Contacts interface

Step 2

Select the contacts you want to label. You can do this by hovering over their contact and clicking on the checkbox that appears over the contact icon. Google Contacts interface showing selected contacts

Step 3

Click on the labels icon on the top to create a new label.Google Contacts interface showing the Labels icon

Step 4

From the drop-down menu that appears, select Create Label.Google Contacts interface showing the Create label option

Step 5

Type a label name and click Save.Google Contacts interface showing the Save button in the Create label dialog box

That’s all you have to do to label contacts!

You can access your labels from the Labels tab on the left sidebar.Google Contacts interface showing the Labels tab

3. How Do You Manage Duplicates in Your Contacts List?

Having duplicate contacts can be a headache as they clutter up your contact list.

Thankfully, Gmail can automatically clean out all the duplicates from your contact list.

All you have to do is ask Gmail to clean it up.

Let’s see how you can clear up duplicates in your Gmail contact list:

Step 1

Open the Google Contacts page.Google Contacts interface showing the Contact list

Step 2

Click on the Merge & fix icon on the left sidebar.Google Contacts interface showing the Merge & fix option

If there are any duplicate contacts, Gmail displays a number alongside it.

Here, I have 50 duplicates in my contacts list.

Step 3

In the Merge & fix page, Gmail will show you each duplicated entry.Google Contacts interface showing the Merge & fix page

You have the choice to Merge all, which fixes every duplicate entry.

Alternatively, you can choose to merge or dismiss duplicates individually. If you dismiss a duplicate, both entries will stay in your contact list.

4. How Do You Delete Contacts from Your Gmail Contact List?

Keeping old and outdated contact information only adds to the clutter of your contacts list.

Here’s how you can delete old contact information and keep your contacts page updated:

Step 1

Open Gmail Contacts.Gmail Contacts interface

Step 2

Hover over the contact you want to delete and click on the three dots that appear on the right.Google Contacts interface showing the three dots icon for a contact

Step 3

From the drop-down menu that appears, click on Delete.Google Contacts interface showing the delete option for an individual contact

When the confirmation window pops up, click on Delete again.Google Contacts interface showing the Delete icon in the Delete this contact dialog box

Note: If you want to delete multiple contacts at once, select contacts by clicking on their display pictures. Then, choose delete from the three dots on the top.Google Contacts interface showing the Delete option for multiple contacts

The Easiest Way to Send Individual, Personalized Mass Emails to Your Gmail Contacts

So you’ve got this Google contacts list… let’s reach out to it.

Let me give you a quick intro to GMass. (Since I’m guessing you got to this post by Googling for Gmail contacts and might not be one of the 300,000+ people currently using GMass.)

GMass is a Chrome extension that transforms Gmail into an email marketing and mail merge platform. It’s a pretty sweet tool.

GMass turns it into something else

It’s free and super easy to get started.

And it’s perfect for sending a mass email to your Google Contacts… but having everyone get their own individual, personalized message that they’ll never know is a mass email.

Here’s how.

Step 1: Set up GMass (it takes maybe 5 minutes)

You can set up GMass by downloading the Chrome extension and clicking a few buttons to give it the standard Chrome extension permissions. You won’t need to put in a credit card — or even fill out a form.

Step 2: Select all your Google Contacts and send them an email

On the Google Contacts screen, hit Control+A on Windows or Command (⌘)+A on Mac. That will select all of your Contacts.

(Note: You don’t have to send to all of your contacts. You can also manually pick and choose whichever ones you want. For this example I just went with all of them.)

Then click on the email icon to send them an email.

Send email to Gmail contacts

You can now type your message to your Gmail contacts.

Step 3: Use GMass’s automatic personalization features

GMass has advanced mail merge personalization features built in where you can personalize everything in emails from links to images to attachments. But most of that requires connecting a Google Sheet with data to your email campaigns.

Here, we’re working off Google Contacts.

But GMass is smart and can pick up the info from your contacts. So you can use personalization like {FirstName}.

And just in case there are contacts where you don’t have the first name entered, you can use a fallback value as well; so you can use {FirstName|there}

Step 4: Sending the messages

I can now send the campaign by hitting the GMass button rather than the regular blue Gmail send button.

Send with the GMass button

And you can see everyone’s getting their own individual, personalized message.


Personalized messages

There’s really no faster or easier way to send personalized mail merge campaigns than with GMass — you’re sending them from inside your Gmail account.

You can read even more about what makes GMass different and better — or download the Chrome extension to get started ASAP.

Google Contacts and Your Gmail Contact List: Next Steps

Google loves switching up their interface, so many people get confused about how to access their contacts. Fortunately, it’s not usually too difficult to find.

Just follow the steps I’ve covered here, and you can access and manage your contacts with ease. Besides managing contacts, there’s so much more you can do with Gmail and Google Contacts.

You can sync events with the Google Calendar app, export and import contacts using the CSV format or a Google Sheet, and more!

Check out this article to learn more about exporting your Google contacts.

And if you’re looking to get the most functionality out of Gmail and to send emails to your contacts and others, consider giving GMass a try today. It’s the best email campaign tool you could ask for, and it will help take your email experience to the next level.

See why GMass has 300k+ users and 7,500+ 5-star reviews


Email marketing. Cold email. Mail merge. Avoid the spam folder. Easy to learn and use. All inside Gmail.


TRY GMASS FOR FREE

Download Chrome extension - 30 second install!
No credit card required
Love what you're reading? Get the latest email strategy and tips & stay in touch.


We are now offering a free email verification service. You can verify your email addresses while sending, or separately from sending. If you verify your email addresses while sending, you can substantially minimize the bounces you get back to your Inbox since only email addresses that pass verification will receive your email campaign. We also provide a web-based email verifier to verify your addresses, and we can also update your Google Sheet with a “VERIFIED” column showing a PASS or FAIL status for each address. Finally, you can use our API to integrate our email validator into your own software.

So, if you’re used to using a third-party email verification service like NeverBounce or ZeroBounce, you can stop doing that because our tool is free, accurate, and much easier to use.

What is email verification?

Email verification tests whether an email address is a valid email address or not. We do that by running two algorithms on it:

  1. A syntax checking algorithm to make sure the email appears valid. For example, ajay@gmail would not pass this step, but [email protected] would pass this step.
  2. A mail server check to ensure that the receiving server for the address will accept email for that particular address. This is done by creating an SMTP session to the remote server and issuing a series of SMTP commands, specifically the RCPT TO command, to “ask” the server if the address is valid.

Who should verify before sending emails?

Not everyone needs to be concerned with email verification. If you’re sending an email newsletter to members of your tennis club, and you know each of them personally, you likely don’t need to verify. If, however, you’re a salesperson scraping LinkedIn for leads and building a cold email list, then verifying addresses will benefit you.

How do you use the free email verification service?

There are three ways to use the email verification service: the web-based email verifier and inside GMass.

If you’re not a GMass user or you just want to use the standalone email verification service, head over to the web-based email verifier. If you want to have GMass verify all of your email addresses before sending a campaign, then just check the Verify box in your settings. Finally, you can use our API to provide email verification services inside your own app.

Option 1: While using GMass

To verify your addresses at the time you send your campaign, all you have to do is check the Verify box:

Just check the “Verify” box and all of your email addresses will be verified before sending.

Checking this box will verify each address before a message is sent to that address. The address must NOT FAIL verification for GMass to send your email to it. This is different than requiring an address to PASS verification. By sending to all addresses that don’t fail verification, the verifier is erring on the side of caution to ensure that as many of your emails get sent. Otherwise, if the verifier required verification to PASS, there’s the risk of reducing the reach of your campaign because of false negatives.

If the address fails verification, GMass will skip sending to it, add it to your account’s Bounce list and will log it for your reports. Having verification ON substantially reduces the bounce-backs you get after your mailing since GMass is sending only to valid addresses. What counts as a verification fail? One of the conditions must be true for an address to fail verification:

  1. The address is malformed. For example, ajay@gmail is not a valid email address.
  2. There is no registered MX server for the domain, meaning the domain can’t receive email.
  3. The response from the mail server definitely indicates that the email address is invalid. For example, “User not found” is a definitive message from the mail server indicating that the address is bad.

Therefore, one of the above conditions must be met for GMass to skip sending to that address and add it to your bounce list.

If the mail server responds with a message indicating the mailbox is full, GMass will skip sending to it, but will not add the address to your Bounce list, since the address is still valid and the user might empty the mailbox at some point, therefore making it able to receive your future messages.

If any other condition is met, then GMass considers it a verification PASS and will send your message to that address.

Option 2: Web-based email verifier

You can also verify your addresses separately, outside of the sending process, using our free web-based email extractor and verifier. Just paste your addresses in any format and hit the Extract button, and then after the addresses are extracted, you can hit the next button to VERIFY them.

This tool currently has a limit of verifying 5,000 addresses per hour.

The verifier tests each address and lists the verification status as one of the following:

  • Valid
  • Invalid
  • Blocked
  • Mailbox Full
  • Unknown
  • NoMxRecord
  • ConnectionFail

After the verifier is finished processing your email list, you can click one of the gray “Copy list” buttons to copy the email list either into a Gmail Compose window, a spreadsheet, a text file, or anywhere you like. If you check the “Include only addresses I should send to” box, then only the addresses that are eligible to receive mail will be copied to your clipboard.

This includes addresses where the status is Valid, Blocked, or Unknown. It might seem counterintuitive that we include in your final send list an address that is BLOCKING email from us, but an address that is BLOCKING email from us is an indication that the address is good. Also, the address might be blocking email from our email verification server, which is hosted at Amazon Web Services (AWS), but that doesn’t mean that it will block email sent from your Gmail account or a third party system like SendGrid. That is why if the verifier detects a block, GMass will still attempt to send your email to that address.

Finally, an email address of “unknown” verification status is one that can’t be confirmed as good or bad, so we recommend sending to it to maximize your outreach potential through whatever email sending service you’re using, whether that’s GMass or something else.

Option 3: API

To use the API just make an HTTP POST or GET to https://verify.gmass.co/verify and add the email parameter and the key parameter, as shown below. A “key” is an API key that you must create inside your GMass account.

Here’s an example using a valid email address.

https://verify.gmass.co/[email protected]&key=52D5D6DD-CD2B-4E5A-A76A-1667AEA3A6FC

JSON result:

{"Success": true,"Email":"[email protected]","Valid":true,"Status":"Valid","StatusCode":250,"Transaction":"Connected to smtp://aspmx.l.google.com.:25/\r\nS: 220 mx.google.com ESMTP d12si3199843plr.335 - gsmtp\r\nC: EHLO ec2-34-221-150-107.us-west-2.compute.amazonaws.com\r\nS: 250-mx.google.com at your service, [34.221.150.107]\r\nS: 250-SIZE 157286400\r\nS: 250-8BITMIME\r\nS: 250-STARTTLS\r\nS: 250-ENHANCEDSTATUSCODES\r\nS: 250-PIPELINING\r\nS: 250-CHUNKING\r\nS: 250 SMTPUTF8\r\nC: MAIL FROM: \[email protected]\u003e\r\nS: 250 2.1.0 OK d12si3199843plr.335 - gsmtp\r\nC: RCPT TO: \[email protected]\u003e\r\nS: 250 2.1.5 OK d12si3199843plr.335 - gsmtp\r\nC: QUIT\r\nS: 221 2.0.0 closing connection d12si3199843plr.335 - gsmtp\r\n"}

Here’s an example using an invalid email address.

https://verify.gmass.co/[email protected]&key=52D5D6DD-CD2B-4E5A-A76A-1667AEA3A6FC

JSON result:

 {"Success": true,"Email":"[email protected]","Valid":false,"Status":"Invalid","StatusCode":550,"Transaction":"Connected to smtp://aspmx.l.google.com.:25/\r\nS: 220 mx.google.com ESMTP 2si3423625pgf.459 - gsmtp\r\nC: EHLO ec2-34-221-150-107.us-west-2.compute.amazonaws.com\r\nS: 250-mx.google.com at your service, [34.221.150.107]\r\nS: 250-SIZE 157286400\r\nS: 250-8BITMIME\r\nS: 250-STARTTLS\r\nS: 250-ENHANCEDSTATUSCODES\r\nS: 250-PIPELINING\r\nS: 250-CHUNKING\r\nS: 250 SMTPUTF8\r\nC: MAIL FROM: \[email protected]\u003e\r\nS: 250 2.1.0 OK 2si3423625pgf.459 - gsmtp\r\nC: RCPT TO: \[email protected]\u003e\r\nS: 550-5.1.1 The email account that you tried to reach does not exist. Please try\r\nS: 550-5.1.1 double-checking the recipient\u0027s email address for typos or\r\nS: 550-5.1.1 unnecessary spaces. Learn more at\r\nS: 550 5.1.1 https://support.google.com/mail/?p=NoSuchUser 2si3423625pgf.459 - gsmtp\r\nC: QUIT\r\nS: 221 2.0.0 closing connection 2si3423625pgf.459 - gsmtp\r\n"} 

Be sure to create your own API key! The test key shown above has low limits. Also, if you used the API in August 2020, you might have used the verify.gmass.co/check endpoint. That will still work for the time being, but please update your code to use the new verify.gmass.co/verify endpoint.

How to create an API key:

Log in to the GMass dashboard at gmass.co/dashboard. Then click Settings in the upper-right, and then click API Keys on the left.

How to create an API key

Here’s a direct link to the API Keys setting.

How to interpret the JSON result:

It’s imperative that you first examine the “Success” value. If it’s false, then look at the “Transaction” value for a reason for the error. The other parameters, like “Valid” and “StatusCode” will indicate a false success, in order to prevent systems from treating email addresses as invalid when they shouldn’t.

If “Success” is true, then next you can look at “Valid” which is a simple true/false as to whether we determined the address is good or bad.

Valid is a boolean true or false and that tells you whether we can confirm for sure that the email is good or bad. However, there are some cases where “Valid” will be false but you should still send an email to the address. A more detailed version of “Valid” is “Status”.

The possible values for Status are:

  • Unknown
  • Malformed
  • NoMxRecord
  • Invalid
  • Valid
  • ConnectionFail
  • Blocked
  • OverQuota

So “Valid” is ONLY true IF “Status” is also “Valid”.

If you’re validating addresses to decide which ones to send your campaign to and which ones to skip, you should consider still sending to email addresses where the “Status” is “Unknown” or “Blocked”. “Unknown” means we just couldn’t be sure based on the SMTP response, and “Blocked” means that our verification service was blocked, but that doesn’t mean that YOU will be blocked when you send an email.

Usage Limits

The following limits apply when using the verification service.

  1. When verifying while sending a GMass campaign with the “Verify” checkbox: No limits
  2. The web-based verifier: 5,000 verifications per hour
  3. The API: 5,000 verifications per user per hour

Updating a Google Sheet with email verification data

This option is only available if you’re using the email verification service as part of a GMass campaign.

If you have your email addresses in a Google Sheet, GMass can update your Sheet by adding a VERIFIED column and marking each address with a PASS or FAIL based on whether the address passes verification.

To run a Google Sheet of email addresses through verification:

  1. Set up your Google Sheet so that it is formatted properly, with column headings across the top.
  2. Use GMass to connect to the Sheet by clicking the Sheets icon, choosing the Sheet, and letting the Gmail Compose window launch. More information here.
  3. If you want to send an actual campaign to your list, then you can proceed just like you’re sending, but make sure to mark two boxes: a) The Update Sheet with reporting data box and b) the Verify box. The “Update Sheet with reporting data” checkbox is an option in the popup that launches where you specify your spreadsheet and worksheet. More information here.
  4. If you don’t want to send an actual campaign but just want GMass to update your Sheet with verification results, then type any Subject/Message and set “Just create DRAFTS” in the Settings box. This will allow GMass to process your Sheet and verify all of your email addresses without sending any actual emails. When you’re ready, hit the main GMass button. A bunch of DRAFTs will get created, but you can delete them later with the link that GMass sends you. More information here.

Frequently Asked Questions (FAQ)

Is it really free?

Anyone can use our web-based email extractor and verifier for free. You can verify up to 5,000 addresses per hour using this tool.

If you want to verify email more than 50 addresses inside Gmail using our Chrome extension, you’ll need a GMass subscription to do so. Since GMass only lets you process 50 emails per 24 hours on the free plan, if you want to verify more than 50 addresses in a Google Sheet, then sign up for any subscription plan, even the Minimal one, so that you can process more than 50 emails or DRAFTs per day.

Is there an API for the email verification service?

Yes, see above!

Will verifying email addresses improve my deliverability?

It’s generally accepted that the lower the bounce rate you have, the better your email deliverability will be. Why? Because if an email provider is seeing that you’re sending to a lot of invalid addresses on its server, it’s more likely to think you’re doing something sinister than if you’re sending only to valid addresses. By having your addresses verified prior to sending, you’re minimizing the number of invalid-address emails you even attempt to send.

What are the downsides to using verification while sending with GMass?

There are two downsides to using verification:

1) It slows down your sending, because each email address is verified immediately before sending. If you’re sending a cold email campaign to 100 people, each address is verified, and then if it doesn’t fail verification, the email is sent. In many cases this will be acceptable since cold emailers often like to space apart their individual emails anyway.

2)There’s a chance that our verifier might determine the address is invalid even when it’s actually valid, and that could reduce the number of people to whom your message is sent. This will be rare, but as explained in the question below about the difficulty in building a verification service, our service is not 100% accurate because of the variation in SMTP response codes.

Was it hard to build a service to verify emails?

It wasn’t easy. Compared to all the email tools we’ve built, this had a medium level of difficulty. That part that makes it difficult is analyzing all the possible SMTP bounce codes to determine what definitely means that an email address is invalid versus only possibly invalid. For example, a standard SMTP response code of 550 usually indicates that the email account doesn’t exist on the server. But some mail servers also respond with a 550 when they’re blocking your transaction because of a Spamhaus listing, for example.

We’ve also seen some cases where a mail server, in this case the server for rediffmail.com, a popular Indian email service, responds with:

550 A message that you sent could not be delivered to one or more of its recipients. This is a permanent error.

Only to respond with this a few hours later:

250 ok

In another case, we saw Mimecast respond with:

550 Invalid Recipient - https://community.mimecast.com/docs/DOC-1369#550 [krAti5jIOQW6F_z5KnAVbw.us456]

and then a few hours later, for the same address, it responded with:

250 Recipient OK [sLEl3_fPPVKzaLLYGZ-DyQ.us472]

These varying responses and the non-standardized use of numerical SMTP response codes is what makes this a somewhat difficult problem to solve. It’s also the reason why email verification is a whole industry on its own, separate from email sending tools. We, however, like to take on the challenge of building tools better than what the industry already offers. 🙂

How does the GMass email verifier compare to other services?

We think that our verifier is pretty good, but it’s likely not the most accurate in the industry. GMass is a company whose primary business is its Chrome extension and the verifier is a feature. We verify email addresses using solely SMTP. There are other companies whose primary service offering is email verification and they validate addresses using SMTP plus other methods. That said, if you want a pretty good service that will meet most people’s needs, then our verifier will pass muster. If, however, you need the most accurate email verification service possible, or you need to verify millions of email addresses, then we recommend a service that focuses 100% on email verification. Here are some options:

Bouncer: I’ve never used the service but I’ve recently befriended its CEO, Radek Kaczynski.

NeverBounce: Again, I’ve never used it, but I’ve become acquaintances with its founder.

Kickbox: Never used it, but I’m in a private email service provider group with the founders, and their service must be decent because they were acquired recently by J2.

Ready to transform Gmail into an email marketing/cold email/mail merge tool?


Only GMass packs every email app into one tool — and brings it all into Gmail for you. Better emails. Tons of power. Easy to use.


TRY GMASS FOR FREE

Download Chrome extension - 30 second install!
No credit card required
Love what you're reading? Get the latest email strategy and tips & stay in touch.


Want to learn how to schedule an email in Outlook?

The perfect time to send an email is when a recipient is just about to check their inbox. However, you may not always be online when your recipients usually check their emails.

That’s why most people schedule their emails in advance, to go at a specified time — to ensure that it’s always opened and gets a response.

In this article, I’ll show you how to schedule an email in Outlook and how you can set a standard delay for all of your outgoing emails. Additionally, I’ll discuss some limitations of the Outlook app and highlight a better email alternative.

This Article Contains:

(Click on the links below to jump to a section of your choice)

Let’s jump in.

How to Schedule an Email in Outlook (Step-by-Step Guide)

Knowing how to use the Outlook app to schedule emails for a later time can help you plan outgoing emails days in advance. It could also increase your response rate as your emails reach the recipient’s inbox just when they’re about to check their mail.

Let’s take a step-by-step look at how you can schedule an email message in the Outlook client.

Note: This guide is only meant for the Outlook desktop app as you can’t schedule emails in any of the mobile versions like the iOS and Android Outlook apps.

Step 1

Open Outlook and click on New Email.

Alternatively, you can press Ctrl + N to open a new email.

new email

Step 2

In the new email window, click on the Options tab.

new email - options tab

Then, select Delay Delivery.

delay delivery tab

Step 3

In the dialog box that opens, select the specific time and date you want to send the message. Then, click on the Close button.

select time-and-date

Step 4

Compose your new message in the message window, add the recipient’s email address and click the Send button.

click on send

That’s how you can schedule a single message in Microsoft Outlook.

You can always find your scheduled emails in your Outbox folder. If you want to reschedule your mail, click on the message, go to Delay Delivery, make the necessary changes to the delayed message, and click Close.

outbox-reschedule

Go back to contents

But what if you have a change of mind and want to send your email right away?
Don’t worry!

Just follow these simple steps to remove the email delay and send your message right away.

How to Remove the Email Delay and Send Emails Immediately

Sometimes you may not want to delay your email, but send it immediately.Here’s what you need to do to remove the delay in an email and send out your message in the Outlook desktop app:

Step 1

Open Outlook and go to your Outbox folder.

Then, click on one of the scheduled emails.

select email to reschedule

Step 2

When the new window opens, select the Options tab.

click on options

Then, click on Delay Delivery, which is in the More Options group.

delay delivery under more options

Step 3

Once the new window opens, uncheck the Do not deliver before check box to remove the scheduled time and click on the Close button to close the window.

click on do-not-deliver

Step 4

Click on the Send button to send out your message instantly.

click on send

You can check your Outbox to see if your email’s been sent. If the message is not in your Outbox, then it’s on the way to your recipient’s inbox.

recipients-box

Note: You can also schedule emails in the Outlook web app, but the mobile versions currently don’t support email scheduling.

Go back to contents

Now that I’ve covered how you can schedule a single email in Outlook let’s see how you can delay all outgoing emails.

How to Delay the Sending of All Emails in Outlook (Step-by-Step Guide)

Scheduling individual emails can help you easily plan your outgoing emails.

But what if you always want to send out delayed emails?

You may have a habit of noticing errors in your message after you press the send button (and then sending an apology-and-correction email), or you may have previously sent an email you regretted afterward.

In these cases, it’s safer to set up an Outlook delay delivery for all your emails.

Adding a delayed delivery option to all your emails can help you increase delivery time and avoid the embarrassment of sending a message with mistakes to a recipient’s inbox. Additionally, it gives you time to edit an e mail message you made the mistake of sending.

Let’s take a look at how to set up Outlook delay delivery for all outgoing emails:

Step 1

Open Outlook and click on the File tab.

click on file-tab

Step 2

In the Info section of the File tab, click Manage Rules & Alerts, which is next to the Rules and Alerts heading.

manage-rules-and-alerts

Step 3

In the dialog box that appears, select the Email Rules tab and then click on New Rule.

click on new-rule tab

Step 4

In the Rules Wizard that pops up, select Apply rule on messages I send under the Start from a blank rule section.

Then, click on Next.

select apply-rules-on-messages

Step 5

When you complete the Start from a blank rule section and click on Next, a new properties window will appear.

In the Select conditions list, click on the checkboxes you want to apply to outgoing emails. If you want to defer delivery of all your outgoing emails, clear all the checkboxes and select Next.

clear-all-the-checkboxes

If you didn’t select any of the checkboxes, you’d have to click Yes on the new window to apply the rule for each outgoing message.

click-yes

Step 6

In the Select action list, select the check box that says defer delivery by a number of minutes. Then, in the box at the bottom, click on a number of.

defer delivery

Step 7

In the dialog box that appears, choose the number of minutes you want your emails to be delayed. The maximum delay limit is 120 minutes.

Once you’re done setting the delay for the email delivery option, click OK.

select time

Then, click Next in the Rules Wizard.

click next

Step 8

Now, if you want to add any exceptions to the delayed message rule, select them. Then, click Next.

click-next again

Step 9

Give your email rule an appropriate name in the rule description box. Then, check the Turn on this rule check box if it isn’t already selected.

Once you’re done, click Finish.

click on finish

Step 10

Click on Apply, then select OK to close the wizard.

click on apply

Now, whenever you send an email, it will automatically be delayed for the number of minutes you chose. You can find those delayed emails in your Outbox, as I’d mentioned earlier.

Go back to contents

Now that I’ve covered how to schedule emails in Outlook let’s look at why another email client like Gmail would be a better alternative.

Why You Should Use Gmail Instead of Outlook

Sure, you can use the Outlook email client to schedule your emails to go at a particular time and even delay all of your outgoing email.

However, that hardly makes it the best email client available.
For starters, look at all those steps you have to go through to schedule an e mail message!

Here are two key reasons Gmail is a much better option than Outlook and even other mail clients like Apple Mail:

1. Gmail Offers a Streamlined Interface and Better Functionality

If Gmail is popular for one thing, it’s the clean interface it offers.

Outlook has tried to offer a clean interface with its recent updates, but just like its other competitors, such as Apple Mail, it doesn’t get anywhere near Gmail’s streamlined look and even lacks some handy features.

In addition to boasting a simple interface and providing great security for your emails, Gmail also uses AI to power useful features like smart compose. This isn’t something you can expect to find in Outlook.

2. With Gmail, You Get Access to Way More Extensions

Microsoft Outlook is a part of Microsoft’s Office 365 app suite, including other tools like Microsoft Teams (a video conferencing tool) and Microsoft Exchange Server (a mail server).

If you need any extra functionality, you’ll have to turn to an app in Office 365 or other paid email management tools like the MAPILab toolbox.

But even after using paid add-ons like the MAPILab toolbox, your options will be limited.

Gmail, on the other hand, was designed to exist as a standalone tool until Google Workspace was introduced. So it comes with tons of extensions that can help boost your email productivity and email engagement.

GMass is one such extension, and it’s perfect for anyone looking to schedule emails and send email campaigns from their Gmail account.

Wait, what is GMass?

gmass

GMass is a powerful email campaign tool used by employees of tech giants like Twitter, Uber, Google, and LinkedIn. As GMass works inside of Gmail, you won’t have to worry about learning a new interface.

SMBs, solopreneurs, institutions, and individuals can also use GMass to send bulk emails to a target audience.

With GMass, you can:

The best part?
Anyone can get started with GMass. All you have to do is download the Chrome extension, and you can dive right in!

Go back to contents

Now that we know what makes Gmail a better email client than the Outlook client let’s take a look at how you can schedule an email to send later in Gmail.

How to Schedule an Email in Gmail (Step-by-Step Guide)

Here are the steps to schedule an email in Gmail:

Step 1

Log in to Gmail and click on Compose.

click on compose

Step 2

Start composing your message in the message window, but once you’re done with the email body, do not click Send.
Instead, click on the downward-facing arrow icon next to it.

click-next-to-send

Then, click on Schedule send.

click on schedule-send

Step 3

Choose a specific time to send your email draft. You can choose from a list of scheduled time slots or click on Pick date & time, which leads you to a calendar to pick a send time.

schedule-date-and-time

That’s all you have to do to schedule a message in Gmail.

You can find all your scheduled emails in the Scheduled message folder in the left sidebar.

click on scheduled-tab

This is what an email looks like in the Scheduled message folder.

scheduled-folder

Looking for a more thorough guide to scheduling emails in Gmail?
Check out my 2021 guide to scheduling emails in Gmail.

Go back to contents

Now let’s take a look at how you can use GMass to schedule emails in Gmail better.

How to Schedule Email Campaigns Using GMass (Step-by-Step Guide)

GMass is an excellent extension to Gmail that functions as an email scheduler and marketing tool, helping you send personalized email campaigns to an extensive email list.

Here’s how you can use GMass’ scheduler feature to schedule email campaigns in Gmail:

Step 1

Make sure you have the latest Chrome browser version, along with the GMass extension, installed.
Then, log in to Gmail and click on Compose to type your new message.

compose

Step 2

Once you’ve typed your email, click on the downward arrow button next to the GMass button to open GMass settings.

click next to gmass icon

Step 3

When the dialog window opens, select the Schedule tab.

schedule tab

Step 4

Here, you can customize almost all the scheduling options of your email.

You can decide:

  • The specific time & date you want to send your email.
  • Set a limit on the number of emails sent per day.
  • The time interval between each message in cold email campaigns to ensure a high deliverability rate.
  • What to do with recurring emails — you can decide between a set number of hours, days, or months.
  • Whether to stop sending emails during the weekend.

personalize mail

This is what the Schedule tab looks like once you’re done with the scheduling settings.

after you're done with scheduling settings

Step 5

Once you’re done with scheduling emails, hit the GMass button, and your message will be scheduled for that specific time and date.

click on gmass

You can find your scheduled GMass campaigns in your Drafts folder.

drafts tab

FYI, this is what scheduled GMass emails in your Drafts folder look like.

draft folder

And that’s how easy it is to schedule email sending in GMass!

Go back to contents

Wrapping Up

Microsoft Outlook is a great tool to schedule marketing emails. You can choose to schedule a single outgoing message or set a delay on all your outgoing mails.

However, it struggles to keep up with what’s offered by an email client like Gmail.

Not only does Gmail allow you to schedule emails easily, but it also offers you great functionality and a cleaner interface.

And when it comes to Gmail extensions, there’s nothing as powerful as GMass. It offers a wide variety of features for all your email scheduling and mass email sending needs — even helping you manage recurring emails.

Why not give GMass a try today to skyrocket your email productivity?

Ready to transform Gmail into an email marketing/cold email/mail merge tool?


Only GMass packs every email app into one tool — and brings it all into Gmail for you. Better emails. Tons of power. Easy to use.


TRY GMASS FOR FREE

Download Chrome extension - 30 second install!
No credit card required
Love what you're reading? Get the latest email strategy and tips & stay in touch.


Searching for the Verizon server settings?

In 2017, Verizon retired its email provider for all customers and migrated to AOL Email.

However, if you switched to another mail client like Yahoo Mail or Verizon AOL Email before this, you can still access your verizon.net email address and use that Verizon account on another email client.

In this article, I’ll cover the Verizon Server SMTP, IMAP, and POP settings. Then, I’ll show you how to set up Verizon SMTP and IMAP/POP settings in third-party email clients like Gmail and Outlook.

Finally, I’ll answer some FAQs about the Verizon Email Service.

This Article Contains:

(Click on links to jump to specific sections)

Verizon Server SMTP, IMAP, and POP Settings

Here are the SMTP, IMAP, and POP settings for your verizon.net email account:

A. Verizon SMTP Settings (Outgoing Server Settings)

SMTP Server Name: smtp.verizon.net (for Verizon AOL) / outgoing.yahoo.verizon.net (for Verizon Yahoo)

SMTP Port Number: 465 (SSL) / 587 (TLS)

Encryption: SSL / TLS

SMTP Username: your full email address ([email protected])

SMTP Password: your email account password

B. Verizon IMAP Settings (Incoming Server Settings)

IMAP Server Name: imap.aol.com (for Verizon AOL) / incoming.yahoo.verizon.net (for Verizon Yahoo)

IMAP Port Number: 993

Encryption: SSL

C. Verizon POP Settings (Incoming Server Settings)

POP Server Name: pop.verizon.net (for Verizon AOL) / incoming.yahoo.verizon.net (for Verizon Yahoo)

POP Port Number: 995

Encryption: SSL

Go back to Contents

Now that we’ve covered Verizon Email’s incoming and outgoing server settings, I’ll show you how to set them up in different email clients:

How to Set Up SMTP Settings for Verizon Email

By adding the SMTP settings for your Verizon Email account inside an email client of your choice (for example, Gmail, Windows Live, AT&T Mail, etc.), you can use the email client to send emails from your Verizon account.

I’ll briefly go over how to add the Verizon Email’s outgoing server settings inside Gmail and Outlook.

A. Setting Up Verizon SMTP Settings in Gmail

Here’s how you can add the SMTP Settings for your Verizon Email account inside Gmail:

Step 1
Launch the Gmail web app and log in to your Gmail account. Then, click on the Settings gear icon on the top-right corner.

Settings icon

Step 2
Navigate to See all settings > Accounts and Import and click on Add another email address next to Send mail as.

Accounts and import

Step 3
Type in your Verizon Email address and click Next Step.

Next step

Step 4
Enter your Verizon username and password, select the SSL encryption, choose the 465 port, and type in the outgoing server name: smtp.verizon.net (for Verizon AOL) and outgoing.yahoo.verizon.net (for Verizon Yahoo).

Step 5
Click Add Account.

Gmail will now attempt authentication to verify your credentials. When the authentication is successful, you can start using Gmail to send emails from your Verizon account.

Read my guide on Gmail SMTP settings for more in-depth info.

Now, let’s see how to set up Verizon settings in MS Outlook.

B. Setting Up Verizon SMTP Settings in Outlook

Here’s how you can add the SMTP settings for your Verizon account inside Outlook:

Step 1
Launch the Outlook mail app on your computer. Then, go to File > Info > Add Account.

Add account

Step 2
Type in your Verizon Email address, enter your password, and click Connect.

Step 3
Once the connection between your Verizon Email account and Outlook has been established, navigate to File > Info > Manage Profiles > Email Accounts… and click on your Verizon account.

Step 4
Type in the outgoing mail server name: smtp.verizon.net (for Verizon AOL) and outgoing.yahoo.verizon.net (for Verizon Yahoo).

Step 5
Go to More Settings… > Advanced and check if the port number for the outgoing mail server is 465 and that TLS or SSL encryption is used.

Step 6
Click OK > Next, type in your Verizon password, and click OK.

Outlook will now send a test email from your Verizon Email account to ensure that everything is working as expected.

For more details, you can check out my detailed guide on Outlook SMTP settings.

Now that you’ve got your SMTP settings in place, you’re all set to send emails to other people with your Verizon mail address.

Go back to Contents

Next, I’ll talk about setting up the IMAP and POP settings for your Verizon account:

How to Set Up IMAP and POP Settings for Verizon Email

While the SMTP settings let you send out emails, you’ll need to set up POP or IMAP settings to access incoming emails to your Verizon account.

Let’s look at how to configure these settings inside Gmail and Outlook.

A. Setting Up Verizon POP Settings in Gmail

Note: With Gmail, you can only set up your Verizon Email account with POP and not IMAP. As a result, your emails will get downloaded but won’t be synced back to the server.

Step 1
Launch the Gmail web app and log in to your Gmail account. Then, click on the Settings gear icon and go to Sell all settings > Accounts and Import.

Settings icon

Step 2
Scroll down until you see the Check mail from other account: section and click on Add mail account.

Add a mail account

Step 3
Type in your Verizon Email address and hit Next.

Step 4
Click on the radio button next to Import emails from my other account (POP3) and click Next.

Step 5
Choose the 995 port number for the incoming mail server and enter the POP server name: pop.verizon.net (for Verizon AOL) and  incoming.yahoo.verizon.net (for Verizon Yahoo).

Step 6
Click Add Account.

You should now be able to receive emails to your Verizon Email account inside the Gmail app.

B. Setting Up Verizon IMAP/POP Settings in Outlook

Step 1
Launch the Outlook app on your computer and go to File > Info > Add Account.

Add account

Step 2
Tick the checkbox beside Let me set up my account manually and click Connect.

Tick checkbox

Step 3
Once the connection between your Verizon Email account and Outlook has been established, you can select the IMAP or POP account type and add the IMAP/POP settings.

For IMAP, the port number needs to be 993, SSL encryption must be in use, and the server name should be imap.aol.com (for Verizon AOL) and incoming.yahoo.verizon.net (for Verizon Yahoo).

For POP, the port number needs to be 995, SSL encryption must be in use, and the server name should be pop.verizon.net (for Verizon AOL) and incoming.yahoo.verizon.net (for Verizon Yahoo).

Your Verizon Email account should now be set up and ready to receive emails inside the Outlook mail app.

Similarly, you can also configure the SMTP settings and IMAP/POP settings inside other email clients (e.g., Mozilla Thunderbird) on your web browser. Additionally, you can add these settings to your iOS (e.g., iPhone) and Android (e.g., Samsung S21) devices.

But remember, the steps for configuring these settings will vary across different webmail clients.

Go back to Contents

The following section is for Verizon AOL users experiencing issues when using their Verizon email account in Outlook. If you don’t face such problems, feel free to skip ahead to the FAQs section.

Verizon Email Not Working inside Outlook: Easy Fix

If you encounter an error message while setting up your Verizon AOL account inside Outlook, it’s probably due to the security changes made by AOL in June 2021.

AOL no longer allows connections from certain third-party apps unless the user updates their password settings. As a result, when you try to add your Verizon account in the Outlook app (with the correct password), an error message saying “Something went wrong” appears.

Don’t worry.
Just follow the steps below to resolve the issue:

Step 1
Go to login.aol.com/account/security and log in with your Verizon Email account and password.

Step 2
Click Account Security > Generate app password.

Step 3
From the Select your app drop-down menu under the App passwords window, select Outlook Desktop, click Generate and copy the generated password.

Step 4
Launch the Outlook app, type in your Verizon Email address and password, and click Change Account Settings.

Step 5
In the IMAP Account Settings or POP Account Settings window that opens, ensure that your incoming and outgoing server settings for Verizon Email are accurate, and then click Next.

Step 6
Insert the generated password from AOL into the Password field and click Connect.

Your Verizon Email account should get successfully configured inside Outlook, and you wouldn’t have to do any more troubleshooting.

Go back to Contents

Next, I’ll answer some commonly asked questions related to the Verizon Email Service:

FAQs about the Verizon Email Service

Here are answers to five questions commonly asked regarding the Verizon Email Service:

1. Why Did Verizon Retire Its Email Service?

In 2017, Verizon decided to withdraw its email service permanently. You can no longer access your verizon.net mail account via Verizon’s email program.

Why?
The company stated that as there are “more capable email platforms available,” they’d instead focus on other ventures that bring more value to the Verizon customer base.

In contrast, the company’s other products have remained more or less unchanged, like:

  • Verizon Fios router (WiFi).
  • Wide bandwidth & low latency internet service provider (ISP) offerings.
  • HD voice calling and video calling (LTE) services.
  • Prepaid/postpaid mobile phone (iOS or Android phone) options.
  • Managed network services.
  • Connectivity solutions.

2. Can I Still Access My Verizon Email?

Yes, you can!

How?
Customers who migrated their email account and data to another email provider, like AOL or Yahoo, before December 5, 2017, can still use their Verizon Email account.

However, if you did not migrate your mail account and data to another email provider before this date, you can no longer access them.

All email data on the Verizon mail server was erased after December 5, 2017.

3. What Is SMTP?

Simple Mail Transfer Protocol, or SMTP in short, is a protocol that dictates the rules for sending emails online. It’s the standard protocol used by most email programs to send mail from an outgoing mail server.

4. What Is POP3?

POP3 refers to the third version of the Post Office Protocol or POP. This version is widely adopted across most devices and the mail application you use.

A POP account downloads all incoming mail to your device and stores these emails locally. This way, you can access your mail offline as well — you don’t need to go online to check your inbox.

5. What Is IMAP?

IMAP stands for Internet Message Access Protocol.

Like POP, the IMAP protocol is also used for receiving emails. However, there are a few key differences between these network settings.

Unlike POP, an IMAP email account stores all your emails on the mail server rather than downloading them to your device. This makes it easy for you to access your mail anywhere, as long as you have a reliable Internet connection.

Because the IMAP works as cloud storage on your incoming mail server, the IMAP protocol is much more efficient and faster than POP3.

Go back to Contents

Final Thoughts

Despite Verizon withdrawing its email service, Verizon users still have plenty of options to continue using their email addresses.

Follow the steps above to set up your Verizon mail settings on different email clients. And once you’ve set up the SMTP and POP/IMAP, you’re all set to begin sending and receiving emails using your Verizon account inside other mail apps.

See why GMass has 300k+ users and 7,500+ 5-star reviews


Email marketing. Cold email. Mail merge. Avoid the spam folder. Easy to learn and use. All inside Gmail.


TRY GMASS FOR FREE

Download Chrome extension - 30 second install!
No credit card required
Love what you're reading? Get the latest email strategy and tips & stay in touch.


Starting today, the open tracking pixel we insert into your emails to track opens will look different. They will now be non-parameterized, encrypted URLs that are very, very difficult for pixel-blockers to detect.

Examples of pixel tracking in emails

Ever since email marketers invented a way to track whether someone opens an email, counter measures have been trying to block the ability to tell whether an email has been opened. Open tracking works by inserting an image tag into the email, where the image URL is unique to each recipient. If that particular image is downloaded by the email client, then the marketer knows that that particular recipient opened the email. It’s a trick email marketers and cold emailers have used ever since emails were allowed to contain HTML.

Typically a GMass tracking pixel looks like this:

 <img height="0" width="0" src="http://ec2-52-26-194-35.us-west-2.compute.amazonaws.com/x/o?u=3D4836e6cc-0b4a-4d4b-8e75-39c04d139bf9&amp;c=2724793"> 

Starting today, it will be non-parameterized and encrypted:

 <img src="http://ec2-52-26-194-35.us-west-2.compute.amazonaws.com/OzqNT9U_4GWwWja0p6FyDFL3s1yl2LXMbKhKWmqIY3m2ZMlRqjIZtarzGOem8WXU6CiTUZUZLR6-f9QkENOu2cPbVfEdju_SSCo4x9Czk-rDQmi81_KcdchyrL6jFDCyhvcEop7GRYuvnD6DwSaFVwnEPNvGQVsPQp3hREWpqFuFZToXZWr"> 

If you look at other tracking pixels from popular email marketing services, they follow a similar format.

Tracking pixel from MailChimp:

 <img src="https://thinkific.us20.list-manage.com/track/open.php?u=9ce134924e20d07b0555e3ef3&amp;id=7bad33ad13&amp;e=c6fc19945a" height="1" width="1"> 

MailChimp uses a standard pixel, with specified 1×1 dimensions and an image URL with three query parameters.

Tracking pixel from Constant Contact:

 <img src="http://r20.rs6.net/on.jsp?ca=27edb7ff-a1da-440b-8e7c-e801ae93ae85&amp;a=1123722063060&amp;c=f76c377e-c2ba-11e9-8d07-d4ae52754007&amp;ch=f76d3bec-c2ba-11e9-8d07-d4ae52754007" / alt=""> 

Constant Contact uses a standard pixel, without setting the height and width but with an image URL with several query parameters.

Tracking pixel from Twilio SendGrid:

 <img src="https://u123847.ct.sendgrid.net/wf/open?upn=g0kn1nykOryF9fxxV-2BnyY4uXbKybbHq99YMco1LcmREUCWI6Peodkhk0W3kLkWZ9-2FRrgnOUd54RsBRa-2FNPrU081NM-2BK1BIHCBdb6CJNkvKemAAP3Rpjvz6ax5hdIc41G0isabMxwKW2YHfEjbqUW5Am6Uot2OsjUqBZ4DRBPEEKB6EJ74LiENRINjUi0vFHemTrDvS-2BAJmAKpYuOm2XiZOgbPhfMv-2FUrKZjAVDIMoT4-3D" alt="" width="1" height="1" border="0" style="height:1px !important;width:1px !important;border-width:0 !important;margin-top:0 !important;margin-bottom:0 !important;margin-right:0 !important;margin-left:0 !important;padding-top:0 !important;padding-bottom:0 !important;padding-right:0 !important;padding-left:0 !important;"/> 

Twilio SendGrid gets the award for the longest tracking pixel URL and the most inline CSS, but they are a tad smarter than the rest, by encrypting the main parameter in the image URL. Still though, they are setting a height and width and using a query string parameter.

Tracking pixel from Customer.io:

 <img src="http://email.domain.com/e/o/eyJlbWFpbF9pZCI6IlJOMjRCUU1BQVhNMFM5UjdzLXI3c1Z2RUdsVW1WQT09In0" style="height: 1px !important; max-height: 1px !important; max-width: 1px !important; width: 1px !important"/> 

Customer.io is the smartest of the bunch, using a non-parameterized image URL and without setting the traditional height/width attributes in the image tag. This is very similar to what GMass is now doing, except for one key difference. The length of the Customer.io image URL will always be the same, and this makes it easy for a pixel blocker to identify it.

How pixel blockers work

Given the above examples of the image tag that tracks opens, you might be able to determine how a pixel blocker works. There are several attributes of an open tracking pixel that separate it from a “normal” image in an email, and if a pixel blocker can identify those attributes, it’s easy to block just the tracking images. Of course, a pixel blocker has to be careful to block only the tracking image and not the other images, because if the other images are blocked, and this upsets the user, the user will want to uninstall the pixel blocker.

What are those common attributes?

  • Dimensions of 1×1 or 0x0
  • An <img> src value with query parameters
  • A discernible length for all tracking pixel URLs

A smart pixel blocker can identify all 1×1 or 0x0 pixels from the img “src” attributes and block them, figuring that even if they are part of the email design and not a tracking pixel, the effect on the rendering of the HTML email is likely minimal since a 1×1 pixel is so small, or in the case of a 0x0 pixel, invisible. Blocking all 1×1 pixels is more dangerous because there might also be a legitimate 1×1 pixel that’s part of the design of the HTML email.

Additionally, if the image URL has query parameters, that’s a dead giveaway that it’s likely a tracking pixel. It is exceedingly rare for an image that’s actually part of the email design, and not a tracking pixel, to contain query string parameters.

Lastly, whereas the image URL of “normal” images in an HTML email will vary in length (for example, logo.png is a different length than header-banner.jpg), if an email service provider’s image tracking URL is consistently the same length and always contains the same number of query string parameters, that makes it easily identifiable by a regular expression parser looking to block tracking pixels.

What are some common pixel blocking tools?

Back when I first launched GMass on Product Hunt, there was another product that launched around the same time called Ugly Email that was #1 for the day. It was a Chrome extension that blocked open tracking pixels. It was popular for a while, but it looks like the product has ceased development, as the last update on the Chrome store for Ugly Email is from July 2018.

Other more current pixel blockers include Chrome extensions like PixelBlock and Email Privacy Protector and most recently, a new consumer email service called HEY claims to block the tracking pixels of many email service providers, and they go so far as to publish a list of all the tracking pixels they block.

A list of email marketing tools whose tracking pixels are blocked by HEY.

Note that GMass isn’t on the list, likely because we haven’t come across their radar yet. I suspect that we eventually will, and this makes our new open tracking technology even more relevant.

HEY’s competitor is Superhuman, a fancy email client that’s popular among Silicon Valley types. Superhuman landed in hot water because it inserted a tracking pixel in all sent emails by default unless a user turned the feature off. To quell the uprising, they reversed course and had the feature turned OFF by default but still let users turn it on. Additionally, Superhuman blocks tracking pixels in received email by default, via this setting:

Superhuman pixel blocker settings
Superhuman lets users block tracking pixels, but for now, GMass will get around this

But I’ve tested our new encrypted open tracking mechanism, and it does indeed get past Superhuman’s blocker. Here’s a notification from my own Opens folder in Gmail:

bypassing Superhuman blocker
Here’s a sample open notification you’ll see when a Superhuman user opens an email sent by GMass.

Notice the User Agent…Superhuman!

How we’re getting around the pixel blockers

If you study our new format for the open tracking pixel, you’ll notice that it:

Does not set the height and width attributes
This makes it impossible to tell the size of the image before it’s downloaded. And once it’s downloaded, it will register as an open. So blockers can’t use its size to determine whether to block it from the user. The exception would be if a blocker had the infrastructure to download all images in all emails to “fool” the email tracking system, and then only present the non-1×1 and non-0x0 pixels to the email client, but I’ve never heard of this happening.

Does not have query parameters
We have removed the question mark (?) and the query parameters from our image URLs so that they look like “normal” images.

Has a varying length
Every time you send an email campaign with GMass, the open tracking URL will have a different length. That’s because we’re using an AES encryption algorithm that encrypts the parameters into a variable-length string.

Allowing the customer to set a tracking domain
You might notice that the host of the pixel is http://ec2-52-26-194-35.us-west-2.compute.amazonaws.com, which is our AWS server that handles tracking. A pixel blocker could identify this string and block it, but then a lot of other elements of an email would also be blocked. Still, it’s best to set a custom tracking domain like email.yourdomain.com to brand the image URLs and avoid this problem altogether.

I hope that you’ll find this innovative way of handling open tracking a reason to choose GMass over other email sending tools because nobody else has thought this problem through like we have.

More Reading

If you’re interested in learning more about email tracking, I recommend reading these articles:

Update – July 19, 2020

The company behind HEY discovered this blog post and has now implemented a method to block our new encrypted tracking pixel. Many people have been asking me what my next move is. For now, we’re laying low. We could alter our algorithms to circumvent their blocking again, but I don’t see the point of escalating the matter. The amount of email we we deliver to hey.com is minimal, and if it starts to climb, we’ll re-examine the issue.


See why 99% of users say they’ve had their best deliverability ever with GMass


Email marketing, cold email, and mail merge all in one tool — that works inside Gmail


TRY GMASS FOR FREE

Download Chrome extension - 30 second install!
No credit card required
Love what you're reading? Get the latest email strategy and tips & stay in touch.


As someone who knows the deep nuances of emailing I get asked a lot about how to create an email group in Outlook.

After all, creating an Outlook email group is quite useful if you find yourself sending emails regularly to the same group of people.

And with Outlook groups, you won’t have to manually add member email addresses each time you type out group emails anymore.

But how do you go about making one?

In this article, I’ll go over what an Outlook group is and how to create an email distribution group. I’ll also show you how to edit these groups and send emails to them.

And, since this is a very common request here at GMass, I’ll also show you how you can easily transcend what you can do with groups — and send personalized mail merge messages to your contacts using your Outlook email address.

Further reading

How to Create an Email Group in Outlook: Table of Contents

Let’s get started!

How to Create a Group in Outlook

The process of setting up an Outlook contact list varies slightly depending on whether you use Windows, Mac, or the Outlook online app.

Let’s take a look at how to set up a distribution group on each platform:

How to create Outlook groups for Windows

Here’s how you can easily create a distribution list in Outlook on Windows:

Step 1

To create a new group, first open Outlook. Then, go to the navigation pane and click on the People icon (the small icon to the bottom left of your screen).

People icon

Alternatively, you can also select New Items > More Items > Contact Group from the Home tab.

Step 2

Under My Contacts, select the folder in which you want to save the contact group. Most people tend to save the new contact group in the contacts folder.

Contacts

Note: For this article, I obtained several sample contacts from this website.

Step 3

Select New Contact Group by clicking the new contact group button from the Home tab in the top ribbon.

Create new item

Step 4

Set a group name for your contact group in the name field.

Select New Group

Step 5

Click add members and choose to add member emails “From Address Book,” “From Outlook Contacts,” or “make a new contact.”

Here’s what each of these means:

  • From Address Book – This usually contains the email IDs of every person in your Outlook address book (often everyone in your organization).
  • Outlook Contact List – This contains primarily a set of external contacts that you’ve stored in your Microsoft Outlook contacts folder.
  • Make a New Contact – This enables you to create a new contact to add to the list.

If the list of contact emails only contains a group of people from your company, you can also add multiple people through your firm’s global address list. (A global address list is an electronic address book that contains the contact information of everyone in an organization.)

Global address list

Note: If you need to add member emails again to your list of business or personal contacts, just select the list and click Add members to repeat the process.

Step 6

Once you’ve grabbed everyone from the select members dialog box and finished setting up your group, click Save & Close, and the Members box will disappear.

Once you click Save, you can test your group by sending a message to your group contact list.

Save and close

Note: If you want to add an Outlook distribution list to a folder of contacts on Outlook, you can do so using the folder pane. Likewise, if you want to edit your group emails or other settings, you can do so using the folder pane as well.

Back to contents

Now that I’ve covered how to create a list of contact emails for the Outlook application on Windows let’s look at the distribution list process for Mac systems.

Creating a group in Outlook for Mac

Follow these steps to create group in Outlook for Mac devices:

Step 1

Open Outlook, go to the navigation bar and click on People.

Click on people

Image source: support.microsoft.com 

Step 2

Then, select Home > New Contact List from the navigation bar using the new contact group button to create your group.

New contact list

Step 3

When the contact group window pops up, set a group name for your list of contact emails.

New group name

Step 4

Select Add just below the navigation bar and select members using each person’s email address to add a contact to the contact list.

Click on add

You can keep adding more folks through the members’ box.

Add multiple people

You can even add an existing list of contact emails to your new list.

Add existing list

Step 5

When you finish your contact list, click on Save & Close, and the members box will disappear. After you click save, you can test your contact group by sending an email to your list of contact emails.

Save n close

Back to contents

Now that I’ve covered how you can create an email group on Outlook for Mac, let’s look at setting up an email group on the new Outlook Web App.

Creating a group in Outlook online

Here’s how you can set up an email distribution list group on the Outlook app:

Step 1

Go to the Outlook desktop app and click on the Contacts icon on the left side.

Contacts icon

Step 2

Click on the small arrow next to the blue New contact button and select New group from the drop-down menu.

New group

Step 3

When the dialog box opens, type in the name of the contact group that you want to create. You can type in the group content in the description field, then click on Create.

Create

Step 4

Type in the email addresses or names of the contacts you want to add to the email group. Once you’ve selected contacts to add to the group, click on Add, and you’re done!

Click add

If you’re the group owner, you can easily find the groups you’ve created. Just click on the hamburger menu on the People page and then go to Groups > Owner.

Owner

Back to contents

I’ve covered how you can create an email group on Windows, Mac and the OWA. But if you’re the group owner, how do you send group messages to your Outlook distribution list?

How to Send an Email to a Contact Group in Outlook

Here’s how to send emails to an email group with multiple recipients you’ve created on Outlook:

Open a new email message and type in the body and subject. In the To field, instead of typing in mail addresses, start typing the group ID.

When the prompt appears, click on it and hit Send — your email will be on its way to members’ inboxes.

Send

That’s all you need to do to send group emails to a contact group on Outlook.

Back to contents

Now that we’ve seen how you can send group emails to everyone in your Outlook address book, let’s see how a group owner can edit group members or details.

How to Edit a Contact List in Outlook

What if you want to add a new email contact or change the group ID of an existing group?

It’s simple!

Just open the Outlook app (on any platform or the web) and type a new message. Then, type in the group ID in the To field. Now right-click on the list and select Edit Contact.

Edit contact

The contact group tab will then open, and you can add new members or remove members from the existing group easily!

Add new members

Note: This process remains largely unchanged irrespective of the platform you use with Outlook.

Back to contents 

Outlook Groups FAQ

There are two types of email contact groups in Microsoft Outlook:

1. Microsoft 365 group

This type of group is centered around one “group email address.”

An Office 365 group allows team members to access emails sent to one address from a shared mailbox. For example, a project team that shares a group email address is a Microsoft 365 group.

Also, Microsoft Teams can only be added to a Microsoft 365 group.

Anyone who sends an email to the team can send it to the shared mailbox of the Office 365 group. This way, they don’t have to send separate emails to each group member.

Since the whole group has access to a shared mailbox and group calendar, coordinating emails and group conversations is much easier!

2. Outlook contact group

This is the kind of group that we covered in this article.

A contact group (also known as a distribution list) is a collection of email addresses you can email together.

Members of a new contact group don’t share the same email address — and don’t even have to be part of the same organization. They can be pretty much anyone you want to send emails to as a group!

After setting up the group, you can send emails, calendar invitations, Microsoft Team meetings, and reminders to all your group members’ mailboxes with just one click. When you send an email to the group, it will get delivered to each recipient.

Note: Outlook email groups are not the same as a calendar group that lets you create shared calendars.

What about groups on my Microsoft Exchange server or Exchange Online?

Yes, if your organization uses Microsoft Exchange you can still create a Outlook groups to send to multiple recipients. You’ll do that in the Exchange admin center where you can add members, edit group settings, and more.

Back to contents

Using Mail Merge to Send Personalized, Individual Messages

While it’s convenient to create groups in Outlook to send individual messages to your frequent contacts, it’s not particularly easy to use mail merge in Outlook to personalize each email.

There’s no native function in the free online app… a merge on desktop requires constant back-and-forths between Outlook, Microsoft Word, and Microsoft Excel… and you’ll need add-ins to do seemingly basic things like personalized subject lines.

How to send easier mail merges from your Outlook email address with GMass

Here at GMass, we’re a full email marketing and mail merge platform that works directly in Gmail/Google Workspace.

GMass turns it into something else

But that doesn’t mean Outlook users are left out (after all, as one of the top two or three most popular mail merge solutions on planet, we couldn’t leave out out Microsoft friends).

More than 300,000 people use GMass — and have given it an amazing 4.8/5 star average after 7,500+ reviews!

And plenty of those folks are sending with their Outlook addresses.

With GMass, you can quickly set up your Outlook address as an alias in Gmail/Google Workspace.

From there, you can take advantage of everything GMass has to offer as you email the people from your group like…

Sending fully personalized emails — customize everything from paragraphs to images to attachments.

Getting full campaign reports to track and measure performance. Web based campaign report

Send automated follow-ups that can continue until a click, reply, or open. Also send triggered emails that go out immediately when a recipient opens or clicks.

And again, you can send it all using your Outlook email address.

Get started by installing the GMass extension from the Chrome Web Store — it’s free to get started with no credit card requires!

How to Create an Email Group in Outlook: Wrapping Up

It’s really easy to set up a contact group on email clients like Microsoft Outlook.

You can follow the steps I’ve mentioned in this article to create groups with multiple people on Windows and Mac versions of Microsoft Outlook as well as the OWA.

Or for even more personalized group messages, check out GMass — you’ll be sending individually-tailored messages in a matter of minutes.

See why 99% of users say they’ve had their best deliverability ever with GMass


Email marketing, cold email, and mail merge all in one tool — that works inside Gmail


TRY GMASS FOR FREE

Download Chrome extension - 30 second install!
No credit card required
Love what you're reading? Get the latest email strategy and tips & stay in touch.


Crafting an appropriate ending to your email can be tricky, but it’s an integral part of writing professional emails.

Your ending can impact how the recipient remembers your email and can determine whether they respond to it.

Fortunately, by learning how to end an email professionally, you can ensure that your professional correspondence leaves a positive impression on the recipients. This, in turn, boosts your chances of getting the right responses.

In this article, I’ll explain the importance of a good professional email closing and cover four sign-offs you could use and four you should avoid. I’ll also go over how to end a professional email and offer four tips on writing the perfect closing to your email.

Finally, I’ll discuss a powerful email companion you can use right now.

Further Reading:

This article contains:

(Click on a link below to jump to a specific section)

Let’s get started.

Why Is the Closing of a Professional Email Important?

Your email closing can determine whether or not the recipient responds to your email and can influence how they respond to it.

How?
This phenomenon can be explained using the ”peak-end rule”.

According to the peak-end rule, people judge and recall an experience based on how it ends. Going by that logic, what a recipient thinks about your email closing impacts how they remember and feel about your entire email.

For example, a sloppy, typo-ridden closing paragraph can leave recipients unmotivated to follow through or respond. On the other hand, a well-written, professional closing can leave them with a good impression, increasing the likelihood that they’ll reply to your email.

As a result, you must take the email closing seriously and do it the right way.

Go back to Contents

Now that you’ve seen the importance of proper email closings let’s check out some compelling email sign-offs and explore when to use them.

Four Email Sign-offs to Use

Here are some of the best email sign-offs to use in your professional email:

1. ”Best”

While some people simply end their email communication with the word ”Best”, you can also write it as ”Best wishes”, ”Best regards”, etc.

The closing example ”Best” is a safe bet for most emails, especially if it’s the first time you’re writing to someone. It’s a neutral sign-off that works well for both formal emails and personal emails.

2. ”Regards”

”Regards” is another common closing example that you’ll spot in business emails. Like ”Best”, this is a neutral and straightforward sign-off that presents you as a formal well-wisher.

You can also slightly modify this sign-off to sound more friendly — for example, ”Warm regards”, ”Kind regards”, or even ”Warmest regards”.

However, avoid using a shortened form like ”Rgds”.
Remember, it’s still business communication, not a personal text message.

3. ”Thanks/Thank you”

Thanking someone is one of the best ways to end your email. After all, it’s never a bad idea to express some gratitude, right?

Receiving gratitude makes your recipient feel valued and appreciated, making them more likely to respond positively. Additionally, by saying ”Thank you”, you create a subtle expectation for the person to reply or get back to you.

In fact, a 2017 study found thankful closings to be the most effective sign-offs for getting a reply.

The next time you’re wondering how to end a professional email or business letter, try adding a ”Thank you” in there — it’s one thought that can go a long way.

4. ”With appreciation/gratitude”

Like ”Thanks”, signing off ”With appreciation”, or ”With gratitude” is a great way to thank someone for a meeting, interview, business deal, or workplace collaboration but in a more formal style.

While this email sign-off does have a level of formality, it doesn’t come across as stuffy or old-fashioned, and it stands out more than just a ”Thanks” or ”Thank you”.

Additionally, ”With appreciation” or ”With gratitude” convey your level of appreciation more than a simple ”Thanks”.

But remember, you shouldn’t use this sign-off for every single email, only in circumstances when you want to emphasize your appreciation for something. Always consider the context of the email and its message before choosing this sign-off.

Go back to Contents

Now that you know the best email sign-offs for your professional emails, I’ll cover a few that you should steer clear of.

Four Email Sign-offs to Avoid

Here are the email closing phrases that you should avoid in your professional emails:

1. ”Sincerely”

Although ”Sincerely,” ”Sincerely yours,” or even ”Yours truly” are common and polite expressions, they’re old-fashioned terms giving off stiffly formal vibes. To many, such a closing example may sound like it belongs in a formal letter from the days of typewriters.

If you’re communicating with a regular client, a close friend, colleague, or generally anyone you’ve spoken to more than once, it’s best to avoid this closing salutation.

2. Abbreviations

You should avoid closing off your professional emails with abbreviations.

Why?
Unlike a social media or text message to a close friend, you must maintain a level of professionalism in business emails — whether you’re sending a cold email, forwarding a cover letter, or sharing a meeting invite.

Abbreviated sign-offs (for example, ”Thx”) have no place in professional correspondence because they give the impression that you’re careless, disrespectful, lazy, and unbothered.

3. ”Thanks in advance”

This closing example is one of the worst professional email endings you could use because it’s exceptionally presumptuous.

Avoid pre-empting a response in a professional closing because you don’t know yet whether the recipient will respond at all. Besides, this email sign-off can annoy the recipient, and they may decide to ignore your email altogether.

4. ”Love” or ”XOXO”

When it comes to professional emails, this is probably one of the most unprofessional closings.

There’s never an instance when you can use a personal closing statement like ”Love”, or worse, ”XOXO” in professional emails. These sign-offs may be fine when you’re messaging friends or family on social media, but it’s never appropriate for any formal business communication.

As a general rule, if you want your email recipient to take your message seriously, avoid using sign-offs that are too personal and informal for professional emails.

Go back to Contents

Now that I’ve highlighted some great sign-offs and identified the ones you should avoid, let’s take a look at how to end a professional email the right way:

How to End an Email Professionally in 3 Steps

Recall, your email ending can make a huge difference in how your recipient replies.

To ensure that you receive positive responses to your professional correspondence, just model your email closing based on these three steps:

1. Personalize Your Closing

You don’t end an informal letter or email addressed to a close friend the same way you end your formal emails, right?

It’s email etiquette 101.

Similarly, for each professional email, you should personalize the closing to suit your email recipient and the context of the formal email.

Note that personalization here doesn’t mean what it usually means in an email campaign context — such as adding the recipient’s name to the mail-merge field of an email template.

Here are some things to keep in mind while determining how you should personalize your closing line and sign-off:

A. The Message and Intent of Your Professional Email

If you’re a job seeker sending a cover letter to a recruiter or hiring manager, it’s a good idea to use a ”Thank you” in your cover letter closing to express gratitude.

And when delivering bad news, you should ensure that you’re using the right tone.

For example, say you’re delivering a bad performance review report, a light-hearted tone could come across as condescending. In contrast, a more formal style will appropriately convey the seriousness of the situation.

B. Your Relationship With the Recipient

If you’re communicating with a client, you need to maintain a certain level of formality in your business letter or email. In such cases, avoid casual email sign-offs such as ”Cheers”, ”See you soon” or ”Later”.

These are more suitable for personal emails.

On the other hand, if you’re emailing a colleague, coworker, or close friend, too much formality in your closing line may come across as cold or standoffish.

Additionally, you may sign off your emails with an email signature containing your contact information, or your company may have a customizable email signature template.

Whatever the case, it’s a good idea to include your email signature when emailing a client or prospect. However, you’ll probably want to leave this out when emailing a colleague.

C. The Tone of Previous Emails

When you’ve been emailing back and forth with someone for a while, their previous emails can help guide how formal or friendly your closing phrase should be.

Try to match the tone of their replies, or use a warmer closing salutation to build a sense of familiarity.

2. Use a Clear Call-to-action

Including a call-to-action in your closing statement lets your recipient know what to do once they’ve read your email.

For example, you may expect a reply from them by a certain time. Alternatively, your formal email could be requesting a client to sign off on a contract or send you a particular document.

A call-to-action in your closing remark should make this expectation clear. Instead of using a vague closing remark like ”Hope to hear from you soon’,’ try to write exactly what you need from the recipient.

When being direct about your expectations, make sure your tone remains cordial and follows basic email etiquette.

You can do this with a closing remark such as, ”If you could sign and return the contract by Thursday, I would greatly appreciate it,” or ”I’d love to hear from you before the weekend.”

Place this call-to-action right before your sign-off so that the required task remains fresh in your recipient’s mind. This reduces the chances of them forgetting to attend to it.

3. Include Your Full Name and Contact Information

The email signature is one of the most crucial parts of your email closing.

Your full name and contact information tell your recipient who you are and how they can get in touch with you. Without this, the rest of your formal email might as well be useless.

Ensure that you add your full name as well as alternative contact details in every email you send. This is particularly important in a cover letter closing, or if it’s the first time you’re emailing the person.

Moreover, even if you’ve been emailing someone for a while, signing off with your full name maintains a certain level of professionalism. It also helps avoid confusion if they happen to know others with the same first name as you.

Your contact details can include your:

  • Phone number.
  • Job title.
  • Alternative email address.
  • Any active social media profiles, such as your LinkedIn ID or Twitter handle.

Go back to Contents

Now that you know everything about ending your professional email, let’s explore ways to improve your email closings further.

4 Practical Tips to Perfect Your Professional Email Closing

Once you have everything essential in place for your professional email closing, here are some general tips to keep in mind while writing a formal closing.

1. Maintain a Professional Tone

While this may seem obvious, a small reminder never hurts!

Ensure that your professional email sounds, well, professional.

This is especially important for your closing sentence and sign-off — even if you’re going for a friendlier or warmer sign-off, remember to avoid unprofessional closings.

Words like ”dear” or ”hugs” in your closing phrase are best left for an informal letter. In professional emails, you should opt for a slightly more formal closing phrase instead. You could use a phrase like, ”Have a great day”, ”Have a nice day”, ”Warm wishes”, and so on.

Emoticons, if used at all, should be sparsely and appropriately placed. In addition to being unprofessional in many cases, research shows that recipients often interpret emoticons as signs of immaturity or insecurity.

Keep in mind that unprofessional closings can reduce the authority of your voice in professional communications.

2. Don’t Repeat the Same Sign-off in Every Email

It’s easy to settle with a default closing salutation and use it for every email you write.

However, this isn’t a great idea, especially when you’re emailing someone back and forth. Using the same sign-off repeatedly comes across as mechanical and detached.

This is why you should vary your closing salutation across emails, changing it to match the tone of your conversation and the email message.

For example, if you’re asking for a favor, use a quick ”Thanks”. Or, if your recipient is about to take on a particular feat, wish them luck.

3. Test Your Closings

To perfect your business email, try and find the closing paragraph that works best using A/B testing.

What does this mean?
A/B testing is a method of comparing two versions of something against each other to see which one works best. In this case, you can test different closings across your recipients to see which one gets the most replies or responses.

Not only will this make it easier for you to stop using the same closing by default, but it will also tell you which sign-off or closing line can get the best results from your recipients.

For example, you could start by ending half your emails with your regular sign-off and the other half with a new sign-off that’s considerably friendlier than your previous one.

Do this with multiple closings; see what works best!

4. Proofread

Even a single misplaced letter or grammatical error in your professional email can make you look unprofessional. This is true for your subject line, email body, and email closing.

Why?
It tells your email recipient that you didn’t take the time to double-check your message before sending it.

For example, say you’re a job seeker sending an email to a hiring manager as part of your job search, or you’re emailing a professional letter to a prospective business partner.

Errors and typos in your email will create an unfavorable impression in their minds — which isn’t the desired result when you’re reaching out to them.

Always proofread your emails

No matter how pointless it seems or how much time you’ve spent on each phrase, there’s always a chance of errors or improvements to make. That’s why it’s better to take five more minutes before sending your important email than to notice a glaring typo in your email five minutes after you’ve hit send.

Go back to Contents

Let’s face it — even when you perfect your email communication or closing phrase, you’ll only enjoy a fractional improvement in your engagement and response rates.

If you genuinely want to take your email outreach to the next level, you need a powerful email companion like GMass to improve your overall email performance!

The Ideal Email Companion You Can Use Today: GMass

Gmass

GMass is a powerful email outreach platform used by employees in huge companies like Uber, LinkedIn, Twitter, and Google. Its robust outreach capabilities allow you to send massive, personalized email campaigns right from your Gmail inbox.

This easy-to-use tool is also great for individuals and groups such as schools, organizations, and even churches to send regular emails to their respective audiences.

GMass helps you:

To start using GMass, all you need to do is download the GMass extension from the Chrome store and sign up for free with your Gmail account.

Go back to Contents

Final Thoughts

As tricky as writing the perfect email may be, it’s a fundamental part of business communication.

By utilizing the tips and examples I’ve mentioned, you’ll be able to craft outstanding email endings that adequately reflect you, your professionalism, and your attention to detail.

But to truly make the most of your email outreach, you need an email companion like GMass to accelerate your engagement and reply rates.

You don’t have to take my word for it — you can try it for yourself.
Simply install the GMass Chrome extension to skyrocket your email communications today!

Ready to send better emails and save a ton of time?


GMass is the only tool for marketing emails, cold emails, and mail merge — all inside Gmail. Tons of power but easy to learn and use.


TRY GMASS FOR FREE

Download Chrome extension - 30 second install!
No credit card required
Love what you're reading? Get the latest email strategy and tips & stay in touch.


Starting an email with a proper greeting and a compelling opening line is crucial to making an excellent first impression. (Note: In some regions, you may call the greeting a “salutation.” That term is generally too formal for the majority of this article’s readers, which is why I went with “greeting.”)

Your opening sets the tone for the rest of your message and increases your chances of receiving positive responses from the recipients.

In contrast, if you start on the wrong note, your email could be heading straight to the trash folder.

In this article, I’ll show you how to start an email, including the 16 best greetings and opening lines to use. I’ll also mention which ones to avoid.

Finally, I’ll cover the best way to test your openings to figure out what works best for your specific audience.

Further Reading:

How to Start an Email: Table of Contents:

(Click on the links to jump to a specific section)

Let’s dive in.

How to Start an Email

Your opening line isn’t the first thing your recipients see.

Your subject line is. But the subject line and opening line serve different roles.

The subject line plays a huge role in determining whether a recipient will open your email or not. For that reason, it needs to be eye-catching, provocative, intriguing, and compelling.

Your opening line is different. Now that you’ve caught someone’s attention, think of your opening line as the beginning of a one-on-one conversation.

You need an engaging start that also strikes the right professional tone. One that doesn’t contract your subject line — but also may not be quite as bold or flashy as the subject line. One that makes it clear you’re a real person hoping to build a real relationship.

8 Greetings to Use

The greeting or salutation is an integral part of any email.

Whether it’s a business email, marketing email, or a cover letter, the greeting you choose will set the tone for the rest of the message.

Here are some salutations you could use for a professional email:
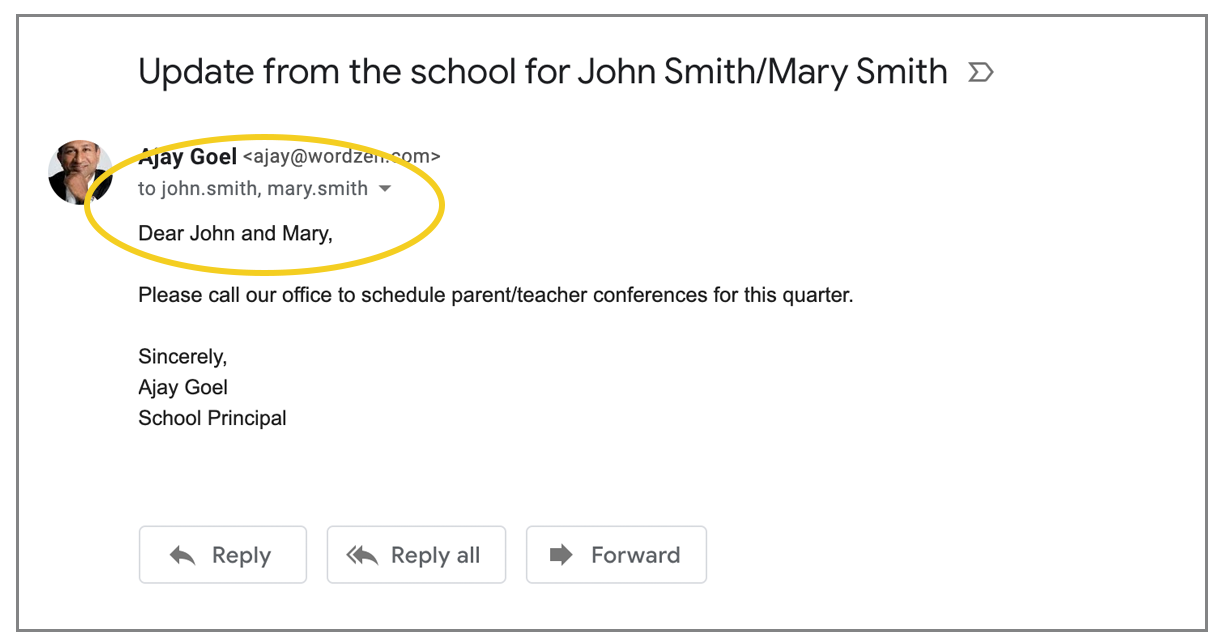
1. {FirstName}

Once upon a time, you would’ve written “Dear {FirstName}.”

Today, that feels a bit old-fashioned and overly formal. You can drop the “Dear” and just go with the person’s first name. (Using mail merge, of course.)

This greeting works when you’re corresponding with someone who’s on the same “level” as you — for example, if you’re sending a cold email to try to find clients, or even applying to a job at a more modern company.

If you’re writing a particularly formal email, or one to someone on a much higher “level” than you, that’s when you might want to use “Dear” and even a last name rather than a first name. For example, if you’re writing a cover letter, you can address the recipient using their last name, like “Dear Ms. {LastName}” or “Dear Mr. {LastName}.”

Another exception: Always use traditional honorifics that indicate professional status, like “Dr.” or “Professor.”

Overall, a first name is an acceptable generic greeting in countries where formality isn’t mandatory, like the U.S.

However, if your recipient is in a country where formality is common (such as India), you can use their full name.

2. Hi / Hi There

While you wouldn’t use these email salutations in a particularly formal business letter, they are perfectly acceptable for professional emails.

The most popular version among these is a simple “Hi {FirstName}”.

This greeting is usually appropriate for a personal or business email unless it’s a very formal email.

Although the greeting “Hi there” is often used in marketing campaign emails (to newsletter subscribers, for example), people are generally more likely to read an email when you mention their first name instead of a generic greeting.

(If you’re a GMass user, you can use our easy personalization features to add that first name — GMass can even automatically detect a contact’s first name by analyzing their email address.)
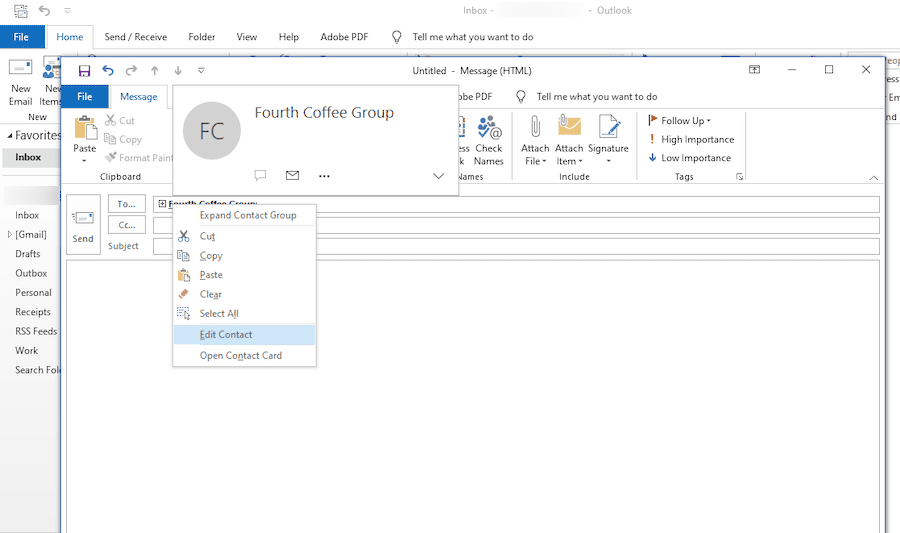
3. Hi everyone

When addressing a group, it would be way too awkward to list everyone’s name in the greeting. Instead, you can use a greeting like “Hi everyone”  if you’re emailing a group of people, like your work team.

“Hi everyone” is preferable to “Hi guys” because the latter has a gender connotation and has fallen out of favor.

On the flip side, if you’re emailing just two or three people, you could list their names, separated by commas. For example, “Hi Lee, Mary, and Ann”. These greetings are more appropriate than the abrupt “Hi all” greeting, which sounds like it’s part of some generic email template.

4. Greetings

This is a popular salutation you can use when sending an email to a large group of people or just one person.

Additionally, you can use “Greetings” when you’re sending a professional email to a business email account and don’t know the recipient’s name.

For example, “Greetings” is an appropriate opener when you’re sending business emails to an email address like support@(companyname).com.

Let’s look at a few more greetings that work well in professional email messages.

Additional Greetings

Here are a few other greetings you could use in your emails:

  • Hello {FirstName}: If you’ve emailed the recipient before, instead of using a greeting like “Hi,” you could make it a bit more personal and say “Hello {FirstName}.”
  • Hi team: If you’re writing to three or more recipients in the same team, you could use this greeting.
  • Good morning, Good afternoon, or Good evening: When you know the recipient’s time zone and the time of day they’ll be reading your email, you could use one of these greetings. Additionally, these greetings work well if you’re making an announcement.
  • Dear Job Title (for example, Recruitment Manager): If you don’t know the recipient’s name but know their designation, you could use this greeting. However, it’s always better to find a name.

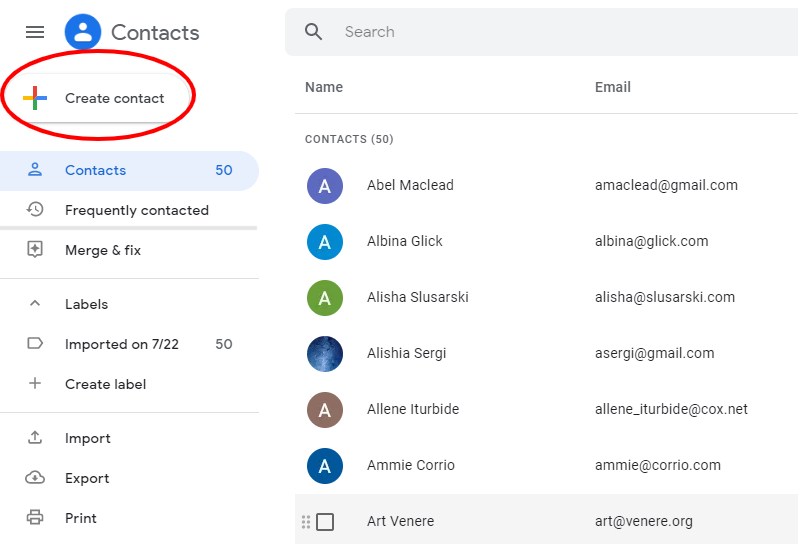
Important: Use Fallbacks When Including Names on Mail Merges

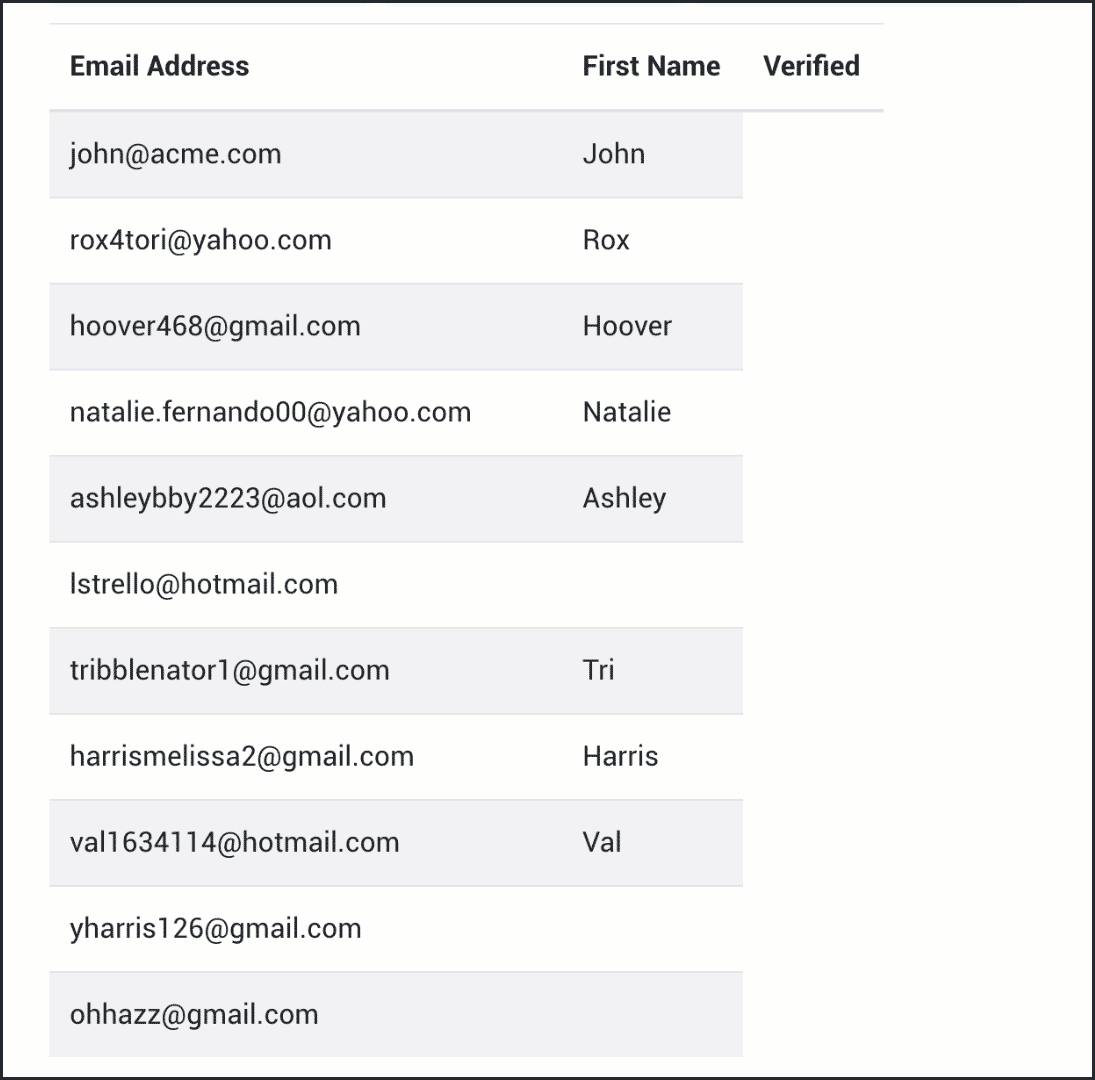
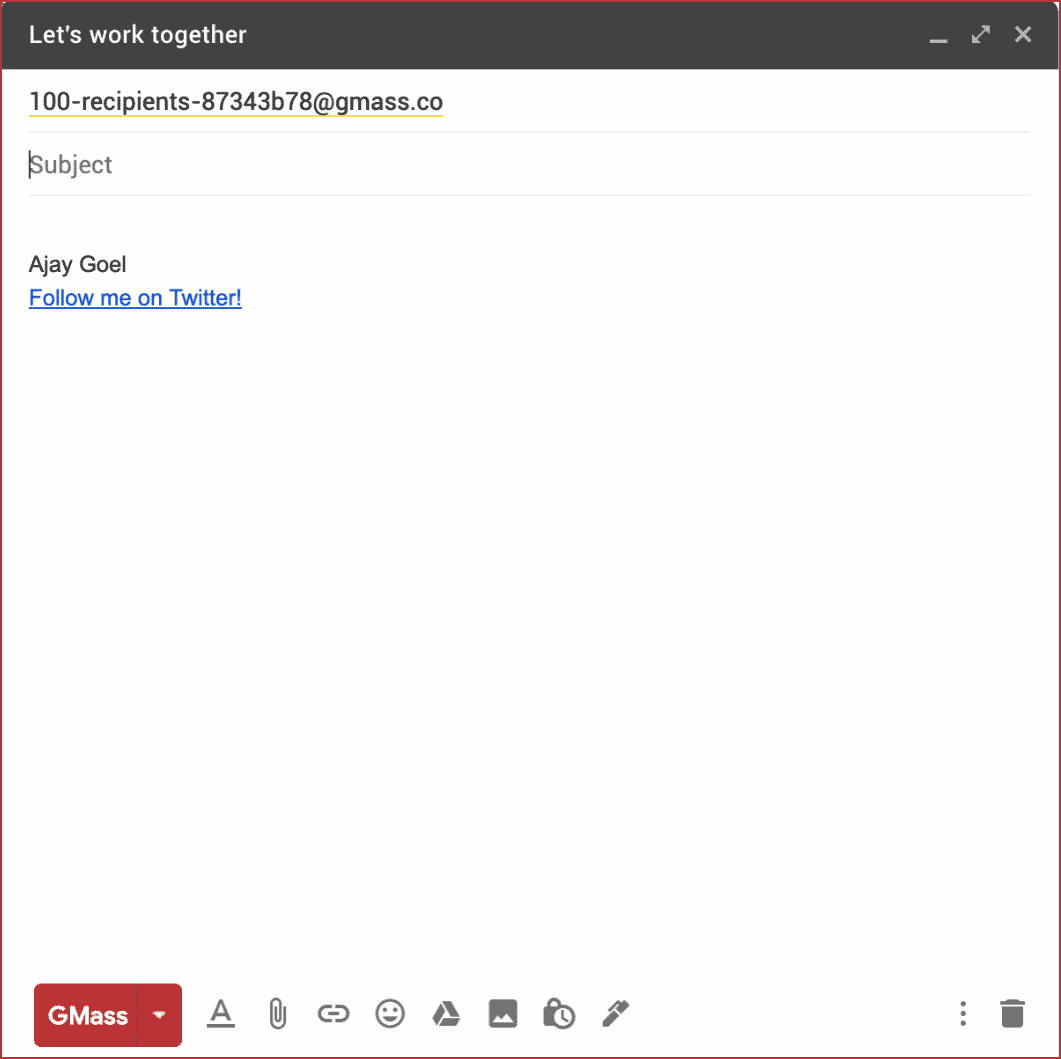
When you’re sending mass emails using a mail merge, you might not know everyone’s first name. So if you use a salutation like “Hello {FirstName}”, you need to cover your bases if you don’t know the contact’s name.

When you’re setting up your personalized mass emails with GMass, make sure to set a fallback value. So rather than only using Hello {FirstName} in your email, try Hello {FirstName|there} to automatically swap in “there” whenever you don’t have a listing for a contact’s name.

Go back to Contents

8 Opening Lines to Use

Once you’ve chosen the perfect way to greet your email recipient, you’ll need to add an intriguing opening line next. This will motivate the recipient to read the entire email.

No matter the type of professional email you’re writing, the best email opening lines meet one or more of these four requirements:

  • Offer value.
  • Start a conversation.
  • Ask a relevant question.
  • Boost the ego.

The key to choosing the right opening line is deciding which of these four you want to accomplish with your email. Once you do that, you can move on to picking the best opening line for your message.

Here are a few opening lines you could choose from:

1. Allow me to introduce myself

You wouldn’t walk into a business meeting and just start talking, especially if you’ve never met the other attendees before.

Then why do it in an email?

If you’ve never emailed or met the person you’re emailing, it’s polite to introduce yourself first before moving on to your message.

But remember, you should keep the introduction short — don’t use this as an opportunity to talk about yourself, your company, or your qualifications in great length. Just a quick introduction will do.

Note: I wouldn’t recommend this for cold email. You need to make sure a cold email is all about the recipient and, well, introducing yourself first doesn’t really do that. Give yourself a quick introduction (along with social proof of your qualifications) after you’ve hooked the prospect.

2. Jumping right into your offer or something compelling.

Short emails are more effective than long emails. So don’t waste time with generic platitudes (like “I hope you’re doing well”). Say something interesting, eye-catching, or related to your offer.

Your subject line compelled your recipient to open the email — now pay off their interest by continuing down the same theme as you used in your subject line.

3. I’m reaching out to you about

Chances are, the person you’re emailing receives tons of emails each day.

You can make it easier for them to decide your email’s importance by mentioning why you’re emailing them right at the start.

This opening line is effective because it gets straight to the point, which busy professionals will value. For example, you could use this opening line when applying for a job, emailing a prospective client, or requesting a phone call with a company representative.

4. Personalized flattery

Generic flattery is useless fluff. For instance, don’t tell the person you like their website — that looks like a generic mail merge. If you want to go the flattery route, tell them why you like their website. Or their latest article, recent interview, and so on.

No one is fooled by generic flattery anymore; everyone’s seen that in hundreds of mass emails at this point. Get truly personal and let the recipient know you’re actually interested in them specifically.

Additional Opening Lines

Here are some more opening lines you could use:

  • I’m eager to get your advice/thoughts on: This is a good opening line if you want to pique the interest of your email recipient. It also conveys the message that you value their input.
  • I’m a customer/user of: If you are a customer or user of their product, say that. They’ll be much more likely to be interested in what you have to say next.
  • Thanks for getting in touch: Whether you’re sending an email to a prospective employer or potential customer, this is a pleasant way to start a reply email.
  • Thanks for the quick response: This is a suitable opening for a reply email. Whatever the reason for the email, a little appreciation goes a long way toward showing how much their assistance means to you.

Go back to Contents

Now that you know the best ways to start an email, I’ll cover the salutations and opening lines you should avoid.

How You Should Not Start an Email

Have you ever received emails that began so awkwardly that you didn’t bother to go through the whole thing?

If you received an email starting with the following greetings or opening lines, you probably wouldn’t give it your attention, and neither will anyone you’re emailing.

4 Greetings to Avoid

An inappropriate or outdated greeting will set the wrong tone for your email right from the start. Here are some salutations you should stay away from:

1. To whom it may concern

This greeting is seen as too stiff and vague to be used in business emails. It gives the impression that you were too lazy to find out to whom the email should have been addressed.

As you would when writing a formal letter, try to find out the person’s name before you send your email. Alternatively, opt for a warmer opening sentence.

For example, let’s say you’re emailing company XYZ regarding their job application, and you can’t find the name of an HR team member. Instead of using “To whom it may concern”, you can use something like “To Team X” or “Dear Hiring Manager at Company XYZ”.

2. A misspelled name

A misspelled name is up there with the worst greeting you could write.

Always double-check your emails to see if you have the correct spelling of your recipient’s name. If the person’s name seems complicated, just copy and paste it from a good source.

However, if you’re not confident about the correct spelling of the name, remove it and stick with a greeting like “Hello”. This is somewhat rare but might happen at events where an attendee sent you a company or team email instead of handing you their business card.

Although using “Hello” might be considered an impersonal opening, it’s always better than a serious breach of email etiquette like misspelling a person’s name.

3. Dear sir (or madam)

Like “To whom it may concern”, “Dear sir or madam” is a stiff and often ceremonial salutation which in the past was reserved for formal letter writing. However, these days it can come across as slightly outdated for modern business writing.

Moreover, it shows you didn’t bother to check the recipient’s name.

This email greeting is still used in business letter writing in countries where men and women are called “sir” and “madam”. However, these types of formal salutations don’t suit an email.

Using a less formal way of greeting the recipient (like “Hello”) would be a better option.

4. An informal greeting

While several informal salutation options may be acceptable in certain formal greeting scenarios, a straight-out casual greeting is not encouraged in business emails.

This includes any informal greeting like:

  • Hey.
  • Hey buddy!
  • Hi guys.

Remember, correspondence through a professional email address is not the same as a message on social media platforms like Facebook or Twitter, where an informal salutation is expected.

Using a nickname, exclamation point, or any other informal salutation can make you seem unprofessional and should be reserved for informal emails and social media.

However, some offices encourage such a casual culture.

You may casually communicate with your work colleagues internally. But be mindful of any external business correspondence you send to clients, prospects, or anyone with a professional email address. They may not have the same work culture as you do.

As a result, it’s safer to stick with a simple and slightly formal greeting when you start your emails.

Bonus: A broken mail merge

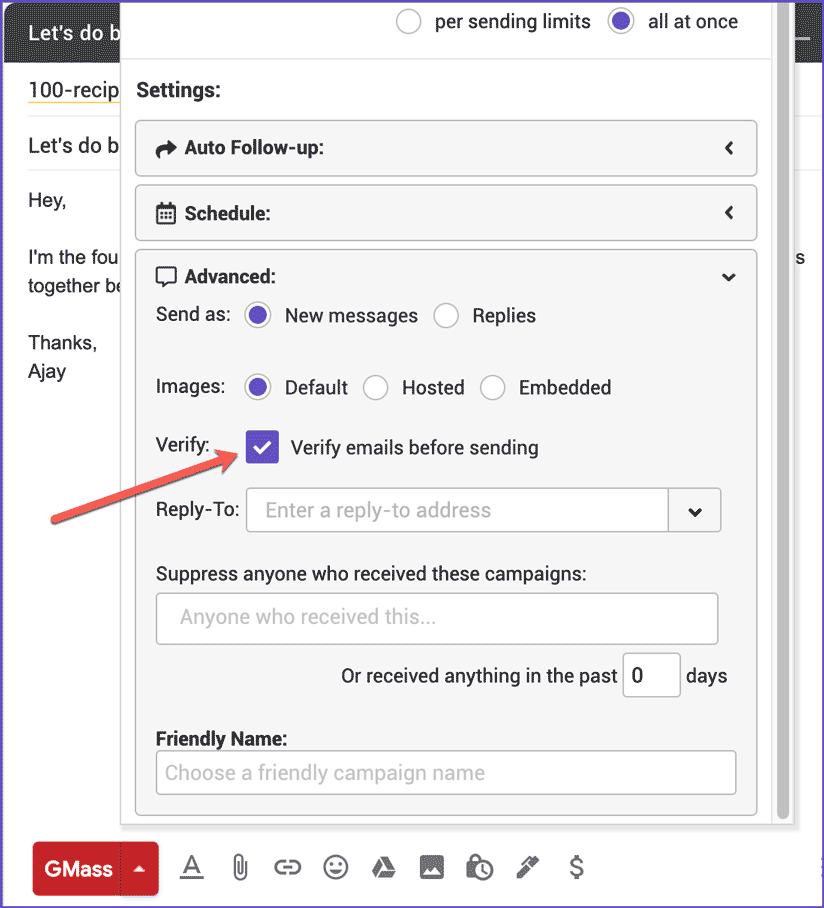
If you try to send an email using a mail merge on the salutation, but the merge fails, you’ll tank the email almost every time.

It’s hard to imagine anyone would be receptive to an email that starts Hello {LeadName — where you forgot to put the closing bracket so the mail merge didn’t work. Or even Hello , — where the space before the comma clearly indicates there was supposed to be a mail merge, it just wasn’t filled in.

At GMass, we’ve taken several steps to help you avoid mail merge disasters.

First, our mail merge tags pop up in the Gmail compose window as you type — so you don’t have to try to remember them or manually type them yourself.

Second, GMass has an easy-to-use fallback system for mail merges, so you don’t have to leave blank spaces before commas.

And third, with GMass you can save your emails as drafts before you send — which gives you a chance to look them over to make sure all merges worked properly.

Go back to Contents

Now that we know which greetings to avoid, let’s also look at some opening lines to stay away from.

5 Opening Lines to Avoid

It can be challenging to decide on the perfect opening lines that segue smoothly into your email messages. To make it a little easier, here are the opening lines you should steer clear of:

1. I hope you’re doing well.

No you aren’t.

This line is generic and no one believes it. It’s taking up space with no purpose.

2. I see you live in Topeka, Kansas, have you ever eaten at Joe’s Restaurant?

There’s a proliferation of AI line writers today which look up a contact’s social media profile, then create a “personalized” first line based on their findings.

These are more likely to get you laughed at than get you a response.

It’s a total misunderstanding of personalization. Personalization isn’t showing off that you know someone’s publicly-accessible biographical data. It’s showing you understand their needs and pressing problems, or their work and goals, and then applying that info in a relevant and compelling way.

3. I am sorry to bother you.

You may think you’re polite with this email. But it sounds insincere and immediately undermines your credibility. Because if you were actually focused on not bothering them, you wouldn’t have sent the email at all.

Instead of this opening line, it’s best to get straight to the point, mentioning why you’re emailing them — the recipient will appreciate your honesty.

4. I know you’re busy but

When you’re sending a professional email, this is an opening line you should avoid because it’s too presumptuous.

Whether you’re emailing a person within your organization or a perfect stranger, how do you know that they’re busy? 

This opening line is bad news for your engagement because it comes across as too familiar for business correspondence. As a result, it’s best to avoid it.

Instead, if you know the person you’re emailing is busy, choose an opening line that explains your reason for emailing them.

5. I want to ask a quick favor

Keep in mind that the fundamental purpose of every email is to establish and maintain a connection. To do that, you need mutual respect, which you probably won’t gain if your first time communicating with the recipient involves asking for a favor.

To increase the chances of your email being read, you need to make them feel like you’ll be doing them a favor and not the other way around.

Go back to Contents

Next, I’ll briefly explain why the start of a professional email is so important.

Why Does the Beginning of Your Email Matter?

Emails are generally considered a more formal way of communicating.

That’s why you must create an excellent first impression when you contact people through email, especially when reaching out to a potential client or a prospective partner.

A good email with a strong opening sentence helps create a professional impression that shows your message is worth the recipient’s valuable time. This way, there’s a far better chance your recipients will read the entire email and respond.

Go back to Contents

How to Test Your Greetings and Opening Lines to Figure Out What Works

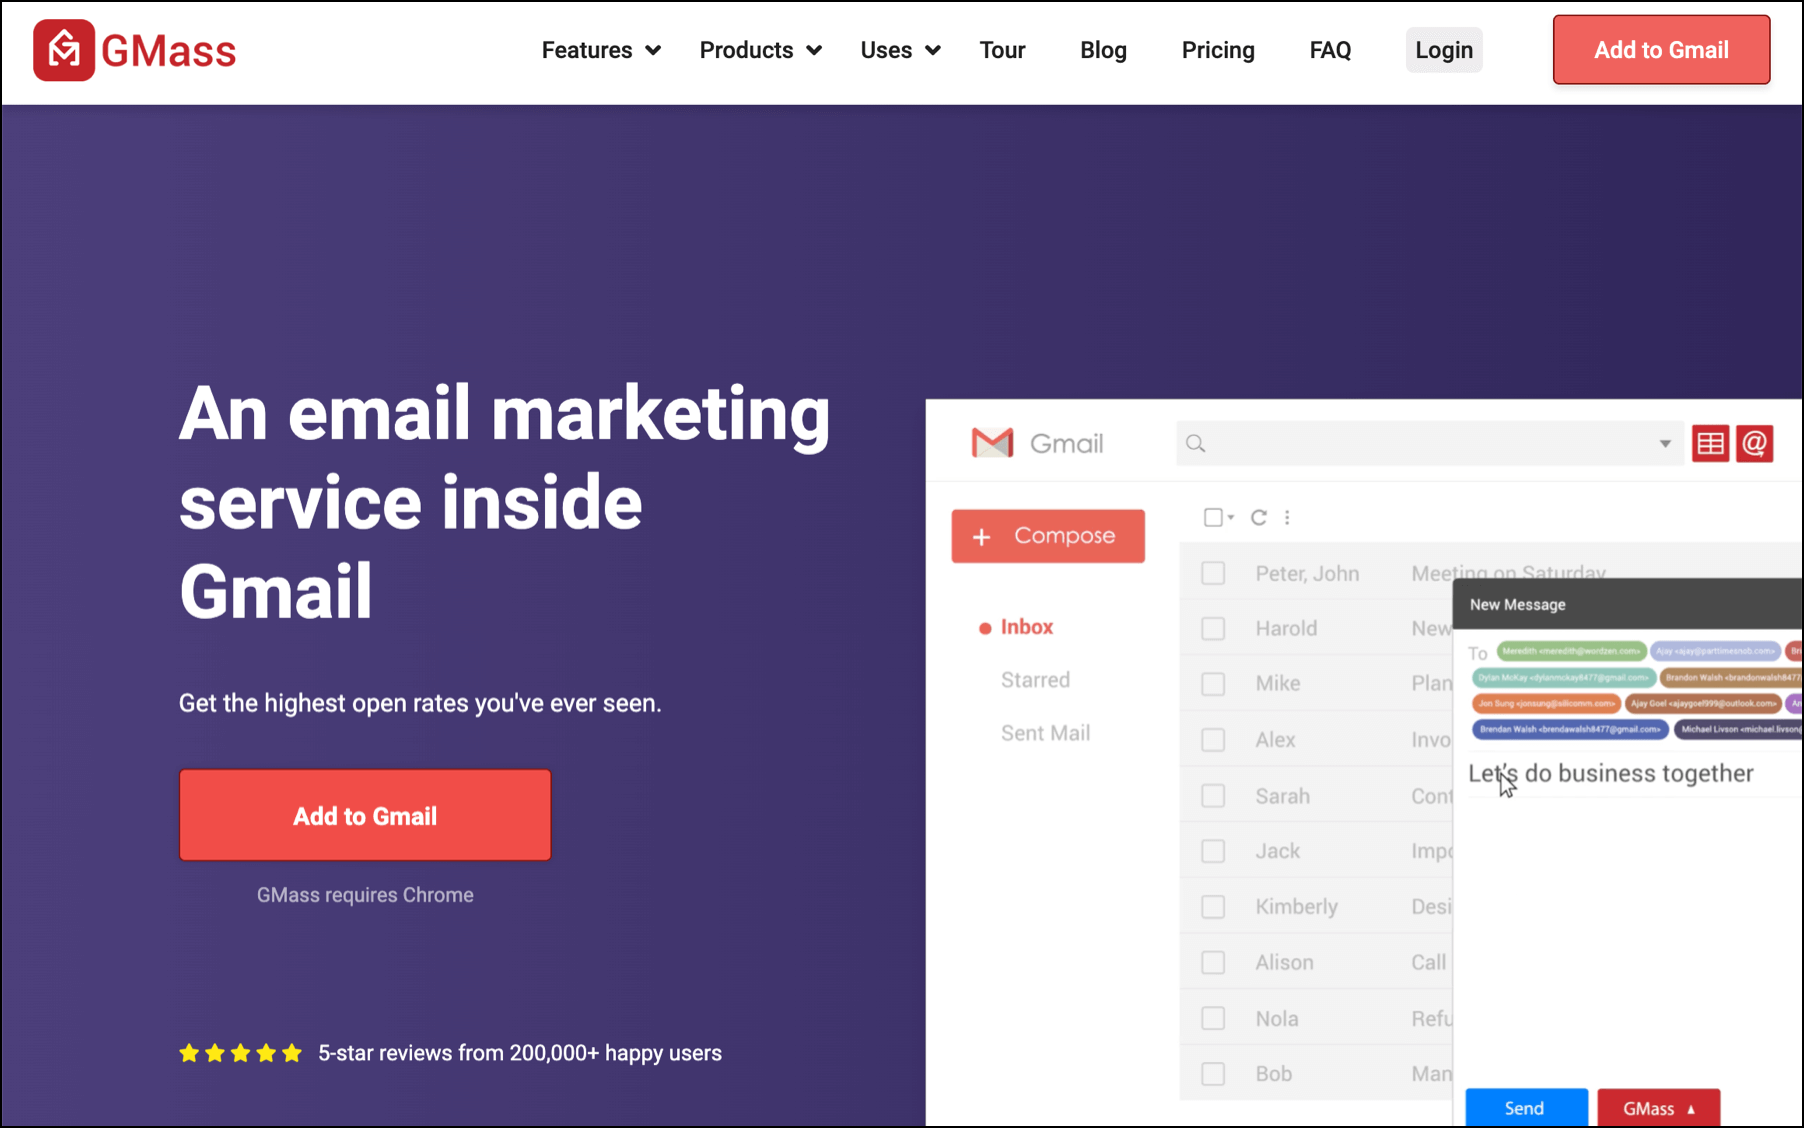
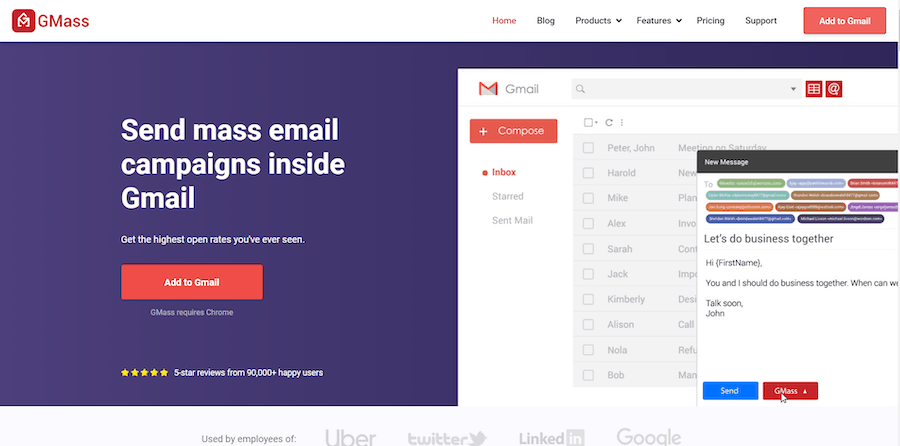
You’re reading this article on the GMass blog and, if you aren’t familiar with GMass, it’s a powerful email outreach and marketing tool that works inside of your Gmail or Google Workspace account.

GMass is a fantastic way to send personalized mass emails (our 300,000+ users and 7,500+ positive reviews give us the confidence to say that) — whether those are cold outreach emails, marketing newsletters, automations, or anything else.

But we’re not going to dig into all the features of GMass in this article (you can learn more about them through the GMass tour, or just by downloading the GMass Chrome extension to try GMass for free).

Here, we’re going to focus on a great feature for you — that is, someone who’s doing thorough research on email openings.

GMass’s A/B testing feature is one of the easiest to use in the entire email marketing industry — and the perfect way for you to test different salutations and opening lines to figure out which brings in the best results.

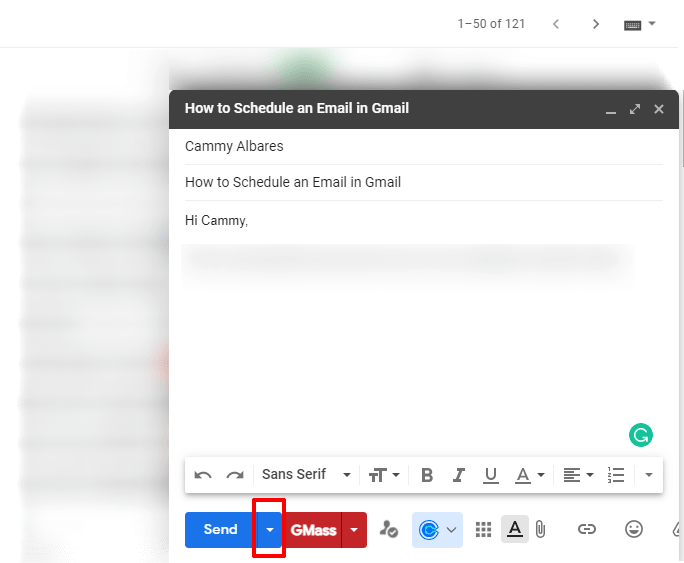
Testing step 1: Create your email featuring two (or more) variations

Using spintax for an A/B test

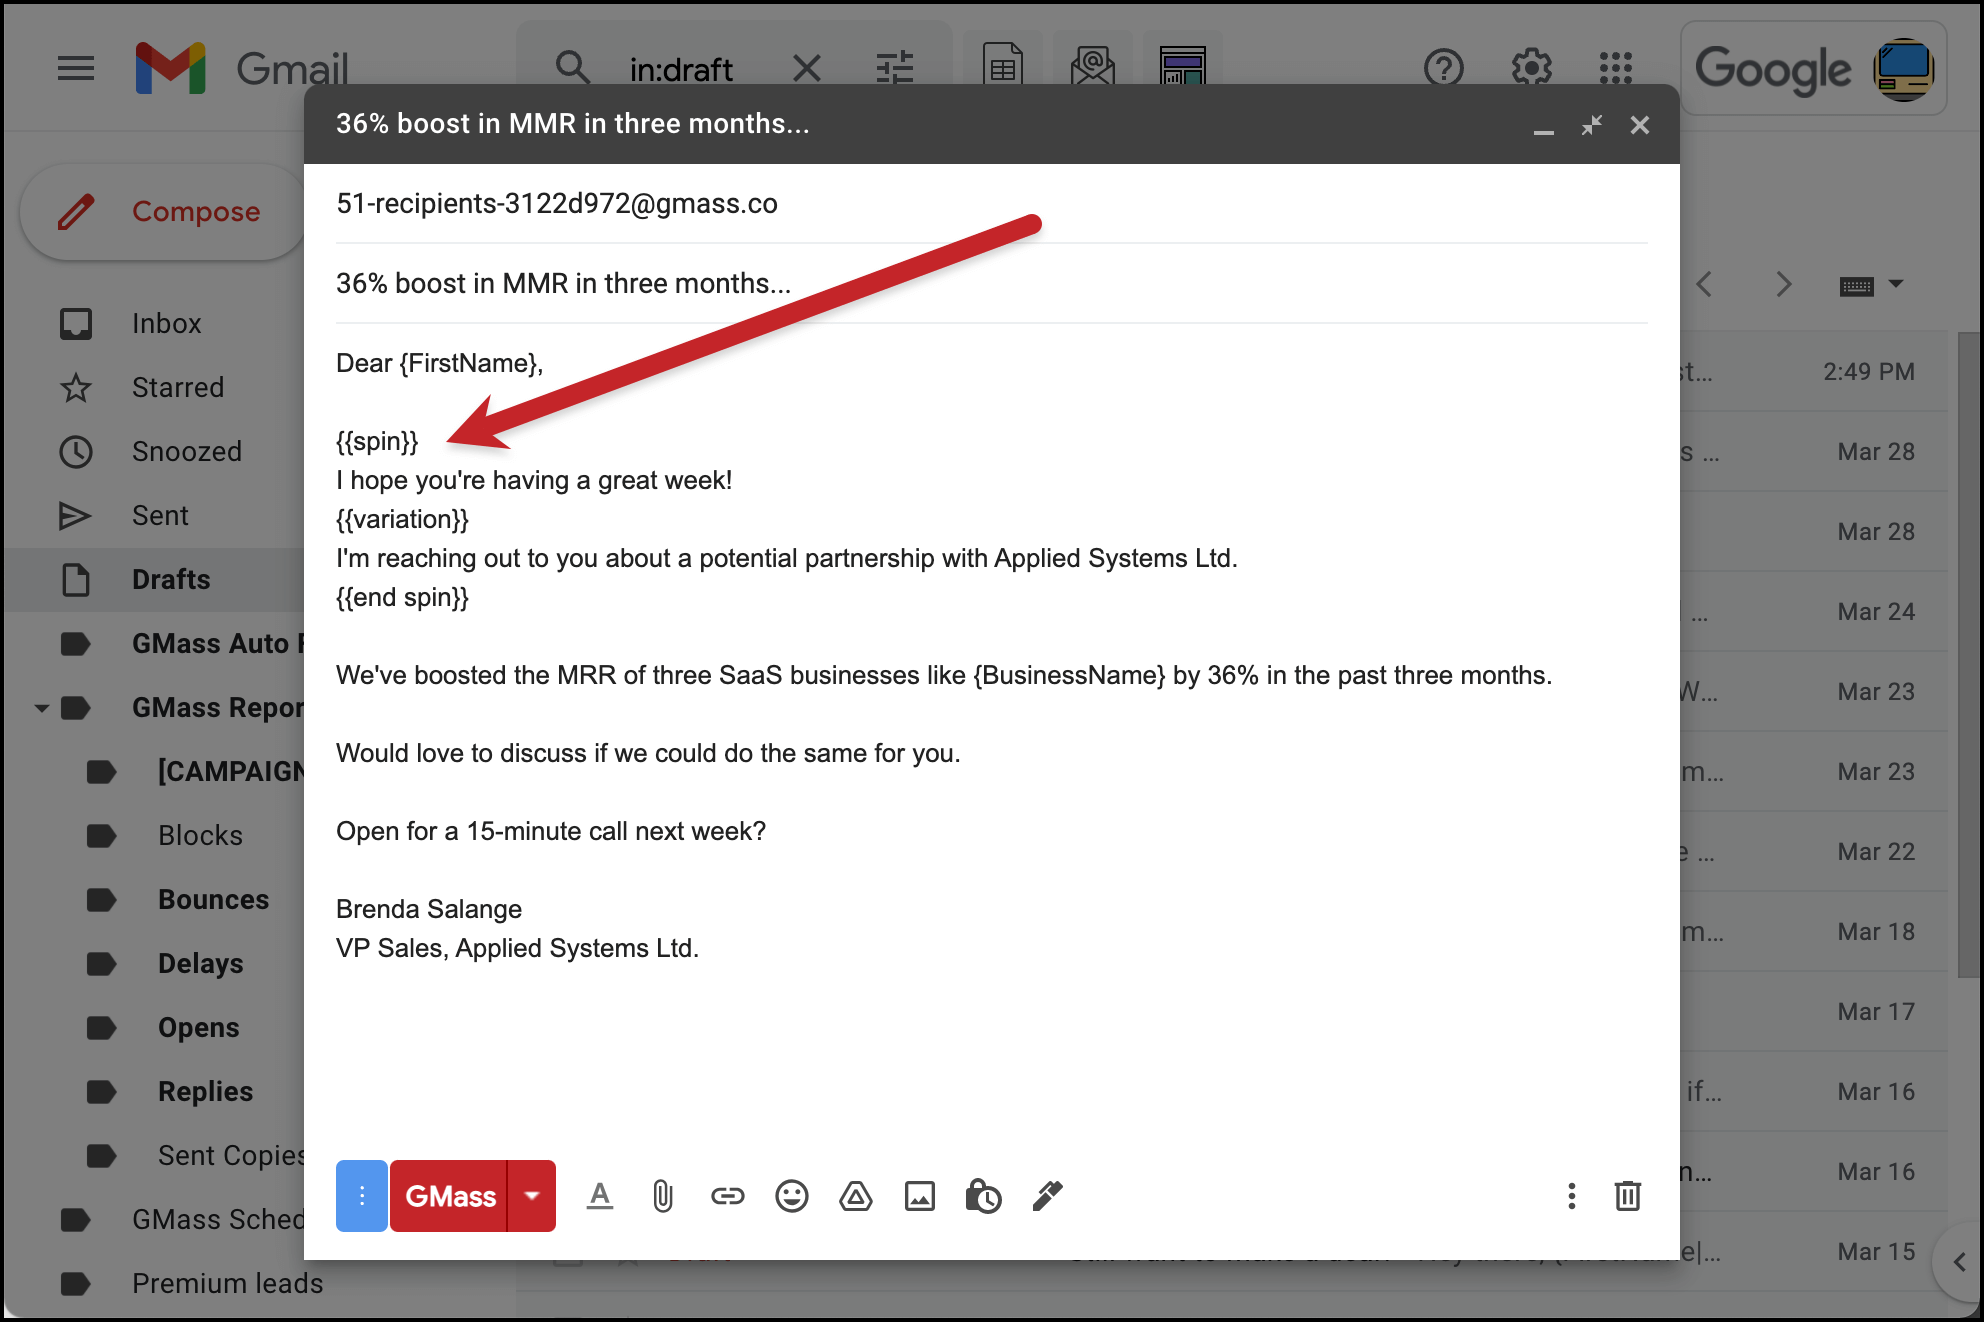
The first step in setting up an A/B test is figuring out what, exactly, you want to test. Ideally, you’d only test one variable at once (i.e., you’d only test salutations or you’d only test opening lines, not both) — that helps you better attribute performance differences to one and only one change.

GMass’s A/B testing system is set up to make it dead simple to compare two or more variations. With spintax commands, you write one email (including all the variations). Then GMass sends out different variations of your email to equal samples of your list.

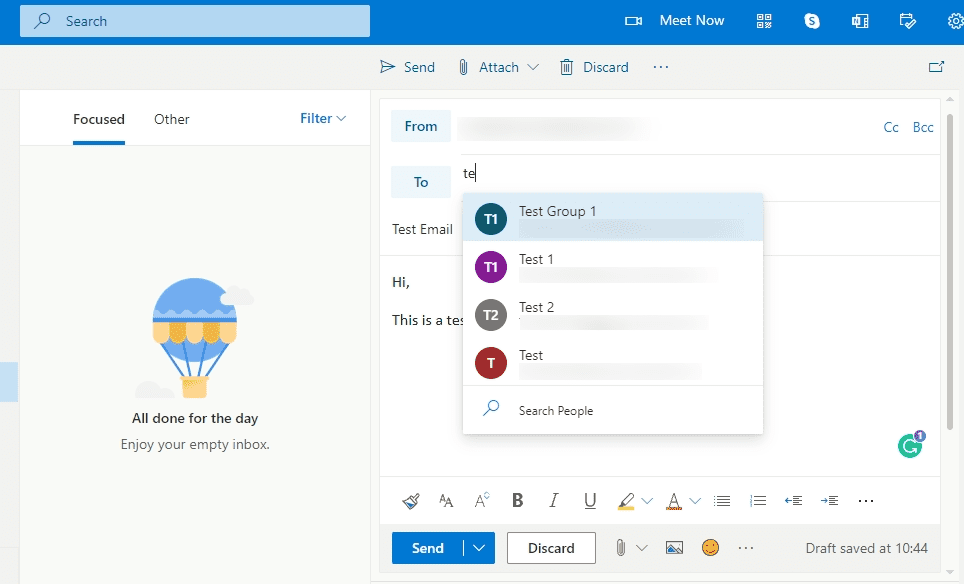
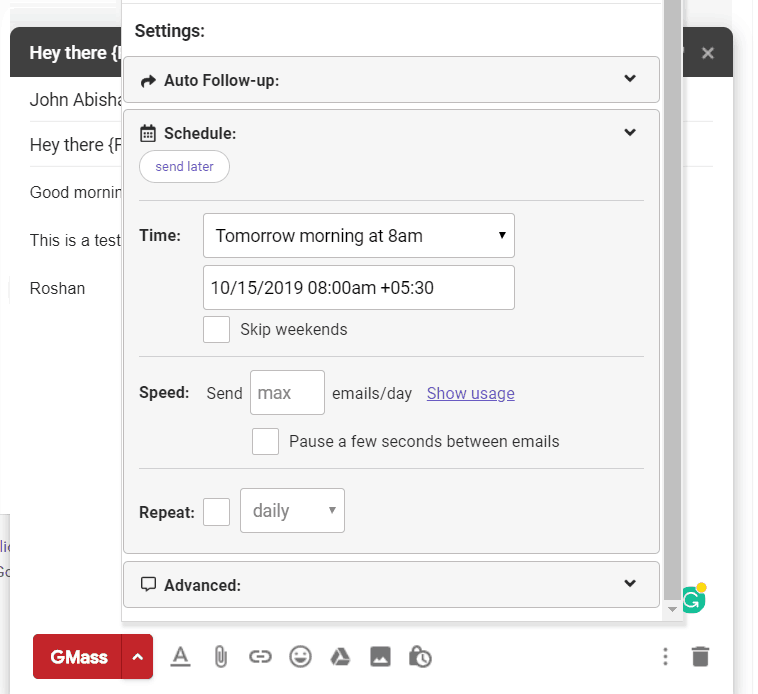
In the example above, I am testing a softer opening (“I hope you’re having a great week!”) versus a more direct one (“I’m reaching out to you about…”) You can see in the screenshot how I’ve included both opening lines in the same email, inside of the GMass spintax commands.

Testing step 2: Make a few key decisions about your test

Choosing A/B test settings

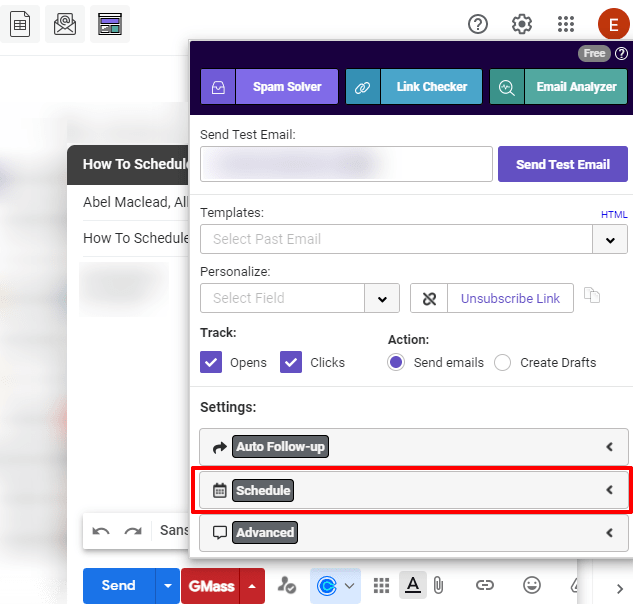
Once your email is ready, head to the GMass settings box (click the little arrow next to the GMass button in the Gmail compose window).

Go to the Advanced section of the settings, and check the box next to “A/B Test: Send different emails to see what works best.”

From here, you’ll choose the options for your A/B test.

  • Percentage of emails to send for the test. You can send the variations of your email to any percentage of your list. And after those emails go out, GMass can assess which variation “wins” and send to the remaining people on your list. (You can also choose to A/B test across your entire list by setting the percentage to 100%. You’ll have a much larger sample size, and can use your findings in the future.)
  • When to pick a winner. You want to give people time to receive, open, and click or reply to your emails. So give a little cushion for GMass to collect data about your email success rates.
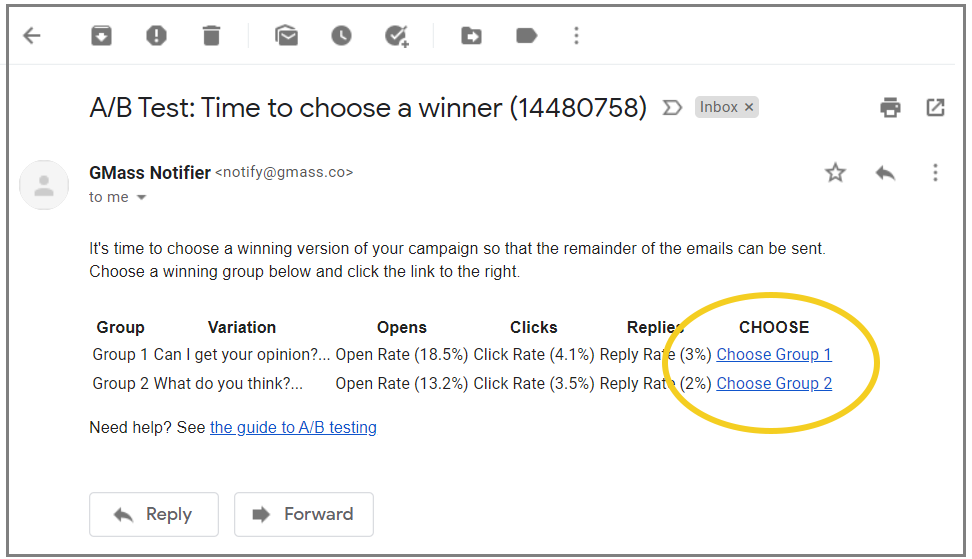
  • How to send the winner. If you pick “Automatic,” after the test emails have gone out to your designated percentage, GMass will automatically choose the winning variation and send that variation to the reminder of your list. If you pick “Manual,” you’ll get an email from GMass after the test with the results so you can pick a winner.
  • The deciding metric. If you go with “Automatic” sending, GMass needs to know what metric you’re using to judge success. Is it opens? Clicks? Replies? GMass will use your selection here to pick its winner.

Testing step 3: Evaluating, learning, and adapting

A/B notifier - time to choose a winner

GMass makes A/B testing very easy — since testing is built right into your natural email sending flow. We hope this encourages you to continue testing and learning.

Let’s say you found one opening line led to a significantly higher percentage of replies than another opening line. Now try testing a few salutations with the winning opening line. After that, keep refining — try new opening lines but use GMass’s mail merge features to personalize it.

Keep on testing and learning from your results. The better your opening lines, the more success you will have. And we want to provide the data to steer you toward that success.

Get started with GMass today for fast A/B testing inside your workflow — you can try for free and you’ll be up and running in mere minutes.

Go back to Contents

How to Start an Email: Final Thoughts

How you start an email plays a significant role in whether recipients will respond to your email or simply ignore it.

Use the tips I mentioned here to ace your email opening and craft the perfect email. And once you pair it with a powerful email tool like GMass, you can easily streamline your outreach efforts.

Ready to send better emails and save a ton of time?


GMass is the only tool for marketing emails, cold emails, and mail merge — all inside Gmail. Tons of power but easy to learn and use.


TRY GMASS FOR FREE

Download Chrome extension - 30 second install!
No credit card required
Love what you're reading? Get the latest email strategy and tips & stay in touch.


Looking for an email finder tool?

To make the most of your email outreach, you need to use the right email addresses. An email finder tool can help you search for prospect email addresses to reach out to the right person.

However, there are hundreds of email finding tools in the market!

So how do you go about identifying the email finder tool that fits your needs?

To help you choose the right email finder, this article highlights 5 of the best email finders. I’ll cover their key features, pros, cons, pricing, and customer ratings to help you make an informed decision.

This Article Contains:

(Click on the links below to jump to a specific section)

Let’s get started!

What Is an Email Finder?

An email finder tool helps you search for email addresses online. These tools use a specific domain name or company name to narrow down your results.

Most email finding tools also provide an “accuracy” estimate for their results or verify the email addresses they find.

Who uses an email finding tool?

Email finders can be used for several purposes, such as:

  • Email Marketing:  Build an email list with valid email addresses and contact information.
  • Recruitment: Shortlist and contact the best candidates to grow your business.
  • PR: Find verified email addresses and contact information of executives or reporters you need to reach.
  • Sales: Find valid email IDs of key decision-makers at a company to contact and follow up with them.
  • Business Development: Reach out to professionals in your industry to build relationships for your business.

The 5 Best Email Finding Tools in 2024

There are hundreds of available email finders in the market.

So how do you choose the right one?

When choosing the best email finder for your needs, think about several factors, such as:

  • Key features: How does this tool address and solve my business requirements?
  • Pricing: Is this tool affordable? Would my budget limit my email outreach?
  • Ratings: What do other customers have to say about this tool? Is it easy to use? How accurate are the results?

With these factors in mind, let’s take a closer look at five of the best email finding tools today:

1. Clearbit ConnectClearbit Connect homepage

Clearbit Connect is a Chrome extension that works as an email verifier and email finder widget within your Gmail sidebar. You can use it to find any professional email address and boost lead generation activities.

Key Features

  • Find all available email addresses by company domain name.
  • Search for individual contact by full name, role, or job title.
  • Provides prospect’s personal email and contact details like location, job title, and social media profiles.
  • Gmail extension works within your Gmail inbox.

Pros

  • Free to use.
  • Simple, user-friendly interface speeds up your email search.
  • Can search for new leads in Salesforce.

Cons

  • Email search is limited to 100 searches per month.
  • Doesn’t offer additional email management or tracking features.
  • Doesn’t support CSV uploads for bulk email verification or enrichment.

Pricing

Connect currently only offers a free plan which allows 100 look-ups per month. You can earn more look-ups using the invite functionality on the Connect app.

Customer Reviews

  • Capterra: N/A
  • G2 Crowd: 4.4/5 (400+ reviews)

2. HunterHunter homepage

Hunter (hunter.io) is a popular bulk email finder and company domain search tool used by companies like Google and Microsoft. This email hunter tool helps you find verified email addresses to boost your outreach easily.

Key Features

  • Search for email addresses in bulk.
  • Deliverability verification for each professional email address.
  • Chrome extension helps you find email addresses from web pages.
  • Google Sheet add-on helps find emails within your Google sheet interface.
  • Integrates with Zapier and popular CRMs like Salesforce and HubSpot.

Pros

  • Only bills you for searches that return results.
  • Feature-rich free plan is perfect for individuals.
  • Bulk email search makes it easy to build a prospect list quickly.

Cons

  • May not always recognize emails when they are listed on the website.
  • Doesn’t provide additional information such as phone numbers or other contact info.
  • Paid plans can be expensive for small businesses.

Pricing

Hunter provides five pricing options to suit various needs. Each paid plan has a certain number of “requests” that can be used for email search or verification.

  • Free plan: offers 50 requests/month.
  • Starter: $49/month – supports multiple Gmail account connections + priority support + bulk domain search + 1000 requests/month.
  • Growth: $99/month – includes “Starter” features + 5000 requests/month.
  • Pro: $199/month – includes “Starter” features + 20,000 requests/month.
  • Enterprise: $399/month – includes “Starter” features + 50,000 requests/month.

Customer Ratings

  • Capterra: 4.6/5 (300+ reviews)
  • G2 Crowd: 4.3/5 (200+ reviews)

3. AeroLeadsAeroleads homepage

AeroLeads is an email finder and lead generation tool. It has an easy-to-use Chrome extension and plugin for company domain searches.

Key Features

  • Find a prospect’s email address, phone number, and other B2B data.
  • Works with LinkedIn profile search, AngelList, and the Crunchbase search engine.
  • One-click data export to CSV files or CRM software such as Salesforce and Pipedrive.
  • Supports CSV upload for bulk email search and verification.

Pros

  • User-friendly interface.
  • Detailed search engine results help you build comprehensive profiles for each prospect’s email address.
  • Free version is perfect for light or infrequent usage.

Cons

  • Lacks email management and mail merge features.
  • Number of contacts processed depends entirely on your LinkedIn account type.
  • Can lag while adding your prospect’s email address through their LinkedIn profile.

Pricing

In Aeroleads, each credit can be redeemed for one record added. It offers four pricing plans:

  • Take Off: $49/month – supports 1 user + email and data search engine + CSV import and export + 1,000 credits/month.
  • Climb: $149/month – includes “Take Off” features + 5 users + integrations + 5,000 credits/month.
  • Cruise: $499/month – includes “Climb” features + unlimited users + 15,000 credits/month.
  • Enterprise: custom pricing – includes “Cruise” features + custom credit allowance based on your requirements.

Customer Ratings

  • Capterra: 4.7/5 (30+ reviews)
  • G2 Crowd: 4.1/5 (50+ reviews)

4. VoilaNorbertVoilaNorbert homepage

Norbert is a powerful email verifier and lead generation Chrome extension that helps you find verified email contacts. Some of the clients of this email finding tool are Twitter, Airbnb, and Facebook.

Features

  • Bulk email search to boost lead generation.
  • Real-time email verification to maintain email sender reputation.
  • Detailed results and contact info improves conversion rates.
  • Powerful integrations with CRMs and Zapier.
  • Gmail plugin supports basic email management features.

Pros

  • User-friendly interface makes navigation efficient.
  • Only bills valid email address searches.
  • Detailed paid plan makes sure you only pay for the features you use.

Cons

  • Can be slow while dealing with large queries.
  • Free trial only supports 50 leads.

Pricing

Norbert has three features, each with a different pricing system.

  • Prospecting (business email address search): You can either opt for a subscription plan or a prepaid model. Both support unlimited team members, bulk, and API usage.
    • Subscription Plans
      • Valet: $49/month – 1,000 leads/month.
      • Butler: $99/month –5,000 leads/month.
      • Advisor: $249/month – 15,000 leads/month.
      • Counselor: $499/month – 50,000 leads/month.
    • Prepaid Plans (credits don’t expire)
      • 10 credits cost $1.
      • Starts at 500 credits ($50).
  • Verify (email verification): Pay as you go model.
    • $0.003/email up to 500k emails.
    • $0.001/email after 500k emails.
    • Starts at $2 for 500 emails.
  • Enrich (additional data and contact information for each email contact): Pay as you go model.
    • $0.04/email up to 2000 contacts.
    • $0.02/email up to 50,000 contacts.
    • $0.15/email after 50,000 contacts.
    • Starts at $4 for 100 contacts.

Customer Ratings

  • Capterra: 4.8/5 (5+ reviews)
  • G2 Crowd: 4.8/5 (30+ reviews)

For maximum email deliverability, it’s essential to use email verification alongside your email finding tool.

5. ZeroBounceZeroBounce homepage

All the tools we mentioned so far will help you find emails.

But no tool is perfect. So be prepared to have at least 5% of your emails to be incorrect. Sometimes, the number might be as high as 20%.

Sending emails to those incorrect IDs can damage your sender score and affect the deliverability of all your emails over time.

That’s why it’s a good idea to verify email addresses before sending them — by using something like ZeroBounce.

ZeroBounce is an email verification tool that helps you sort verified email addresses and remove invalid email IDs from your email list.

Since ZeroBounce is just a verification tool, you will, of course, need to use one of the other tools mentioned in this list if you actually want to find emails.

Key Features

  • Removes invalid email addresses from your email list.
  • Provides data about each professional email address, such as their full name and gender.
  • Helps correct misspelled email addresses in your email list.
  • Integrates with several popular tools like Zapier and Slack.

Pros

  • Improves deliverability by identifying verified email addresses.
  • Protects your email sender and IP address reputation.
  • Enriches contacts with key information to help increase conversions.

Cons

  • Lacks email finding and domain search features.
  • Can’t track actual email opens and performance.
  • Does not provide social media leads, such as your contact’s LinkedIn profile.

Pricing

ZeroBounce features three pricing plans to suit a wide range of users.

  • Freemium: 100 validation and scoring credits + 18 validation tools + IP address geolocation.
  • Email Validation & Scoring: “Freemium” features + Credits don’t expire + Bulk pricing
    • Pay as you go: Starts at $16 for 2,000 credits.
    • Monthly paid plan: Starts at $15/month for 2,000 credits.
  • Deliverability Toolkit: Inbox Placement Tester + Email Server Tester.
    • Starts at $39/month for 50 inbox and 50 email server tests.

Customer Ratings

  • Capterra: 4.7/5 (300+ reviews)
  • G2 Crowd: 4.5/5 (50+ reviews)

How to Make the Most of Your Email Finder

Sure, you can use the tools we’ve reviewed above to find a prospect’s personal email address or social networks and build an email list for your outreach campaigns.

But now what?

How do you:

  • Personalize each email to maximize engagement and conversion?
  • Schedule your emails and follow-ups so that they reach your recipients’ inbox at the right time?
  • Send large campaigns to the business email IDs you’ve found while bypassing Gmail sending limits?

GMass is an email outreach platform that can help you with all of these needs!

But what’s GMass?GMass homepage

GMass is a powerful email outreach tool used by employees from huge companies like Twitter, Google, LinkedIn, and Uber. Its outreach capabilities help you send massive email campaigns right from your Gmail account.

But GMass isn’t just for tech giants or major social networks!

This tool is perfect for solopreneurs and groups like schools, clubs, and even churches to send emails to their audiences.

GMass helps you:

  • Personalize email outreach campaigns at scale.
  • Bypass Google sending limits to maximize outreach.
  • Schedule your emails and follow-ups easily.
  • Measure campaign performance with detailed reports and analytics.

It’s super easy to get started with GMass.

Just install its Chrome extension and try it out for yourself!

Let’s take a look at some GMass features that take your email outreach and engagement to the next level:

1. Automated Personalization to improve engagement

While sending mass email campaigns, it’s essential to personalize your emails to avoid looking like a generic spam emailer.

But you can’t manually personalize each email, right?

That would take ages!

Luckily, GMass supports automated personalization to help you compose emails tailored for each recipient.

GMass’ personalization features include:

2.  Follow-Up Automation

Recipients hardly ever respond to emails the first time around.

This is why you send follow-up emails.

But you can’t follow up on each email individually, right?

Don’t worry.

GMass lets you automate your follow-up emails in advance to boost your email engagement.

And the best part?

You can personalize these follow-up emails with several customization options, such as:

  • The trigger for sending a follow-up email.
    For example, a follow-up could be sent every time a recipient replies to your email or clicks on a link.
  • The time gap between each follow-up email.
  • The content included in your follow up.
  • The total number of follow-ups sent to each recipient.GMass interface showing follow-ups

3. Easy Scheduling

The best time to send someone an email is when they’re most likely to check their inbox.

But how do you ensure hundreds of recipients all get emails at the right time?

By scheduling them in advance.

Luckily, GMass makes it easy for you to schedule all your emails.

All you need to do is compose your draft and set the sending time.

GMass takes care of the rest.

But wait, what if there’s a change in plans?

No problem.

You can easily reschedule any unsent emails from your Drafts folder.GMass interface showing Scheduling window

4. Send powerful campaigns that surpass Gmail sending limits

Unlike most email outreach tools, such as MailChimp, GMass lets you send unlimited emails per day!

How?

GMass integrates with third-party SMTP providers like SendGrid that can bypass Gmail sending limits. This helps you maximize your email engagement without compromising on outreach.

Even the GMass team uses this feature to send over 400,000 emails at a time!

5. Detailed Analytics to measure email performance

While many email finding tools track email opens and link clicks for you, that isn’t enough.

You won’t know how many emails bounced, or how many recipients unsubscribed from your emails.

Luckily, GMass tracks all these metrics and more to help you analyze your email performance. It tracks several core statistics, including:

  • Total Recipients
  • Unique Opens
  • Unique Clicks
  • Replies
  • Unsubscribes
  • Bounces
  • Rejections because Gmail account over limit
  • Blocks

GMass automatically generates a Campaign Report for each email campaign you send. These reports help you track all those metrics from within your Gmail inbox!GMass interface showing Campaign Report

Conclusion

Using the right email finder can make prospecting and lead generation a piece of cake — but only if you have the right outreach tool to support it.

GMass’ powerful features help you make the most of the emails you find by boosting your email engagement and performance.

But don’t just take my word for it.

Install the GMass Chrome extension to improve your email outreach today!

Email marketing, cold email, and mail merge inside Gmail


Send incredible emails & automations and avoid the spam folder — all in one powerful but easy-to-learn tool


TRY GMASS FOR FREE

Download Chrome extension - 30 second install!
No credit card required
Love what you're reading? Get the latest email strategy and tips & stay in touch.


Want to set up Office 365 SMTP settings for your email account?

In this article, I’ll cover everything you need to know about your Office 365 SMTP settings.

But first, let me clear something up:
Since Office 365 is a suite of tools, you’ll use Microsoft Outlook — the email client in MS Office — to edit your account settings.

In addition to teaching you how to set up the SMTP server on Outlook.com, I’ll also tell you how you can set up POP and IMAP too. If you aren’t familiar with these protocols, I’ll also give you a quick overview of SMTP, IMAP, and POP.

This Article Contains:

(Click on the links below to jump to a section of your choice.)

Just want the SMTP setting to configure email in Microsoft Office without any of the additional details?
Here they are:

Office 365 SMTP Settings

These are the settings for the SMTP AUTH client submission method.

SMTP server: smtp.office365.com

Port Number: 587

Encryption method: STARTTLS

Username: Your Office 365 email address

Password: Your Office 365 password

Once you set up these SMTP server settings, you’ll be good to go.

For the rest of us, let’s get started!

How To Set Up SMTP in Microsoft Outlook

Let’s now see how you can set up the SMTP setting for the Microsoft Office 365 mail server.

First, you’ll need an Office 365 or Exchange Online plan.

Once that’s covered, there are several ways to configure your account settings to ensure your mail flow through your personal Office 365 mailbox or even a shared mailbox.

You can:

  • Use direct send: This method involves setting your MX endpoint as the server. You’ll have to find your MX record from the Admin Center.
  • Use SMTP client submission, aka SMTP AUTH or SMTP authentication (that’s what we’ll be covering)
  • Use a dedicated relay (SMTP connector) that’s configured with your public IP address to send emails through the Office 365 SMTP relay.

Note: If you’re confused about what SMTP is, feel free to skip ahead to the section where I’ve explained it. After you’ve got that background, you can come back here to set things up in your Outlook application.

Why Use The SMTP Client Method?

The SMTP client submission (authentication) method is the best to use with the Microsoft Outlook application.

Here are the problems with the other two methods:

  • While the Direct Send method has higher sending limits, it only supports internal email communication — you can’t use it for contacts outside your organization.
  • If you use a line-of-business (LOB application), it must feature a static IP address to authenticate Office365 through the relay server method.

Here’s why the SMTP AUTH client submission method is better:
Unlike Direct Send, the SMTP AUTH mail configuration allows you to send mail to people inside and outside your organization.

Additionally, by using the SMTP authentication method, your IP address doesn’t need to be static like it would with the relay server method — giving you a lot more functionality!

If you’re handling an organization’s email, you can even change the SMTP AUTH settings for individual mailboxes from the Exchange Admin Center. You can access the Admin Center from right inside Office 365.

How to Set Up Office 365 SMTP Settings Using the SMTP Client Submission Method

Once you log in to the Microsoft Outlook mail app, use the toolbar and navigate to File > Account Settings > Server Settings.

Then, click on Outgoing Mail to set up your SMTP Outgoing Server settings.

click-on-outgoing-mail

Office 365 SMTP Settings

SMTP server address: smtp.office365.com

Port Number: 587

Encryption method: STARTTLS

Username: Your Office 365 email address

Password: Your Office 365 app password

Remember not to use a custom IP address as the mail server as they aren’t supported by Office 365; stick with the given DNS name.

If your SMTP client doesn’t connect to the given DNS, you might get an error about the Exchange Online Server.
If you run into this problem, ensure your server name is set as smtp.office365.com and not a regional Exchange Online Server server like smtp-apacnorth.outlook.com.

And if Port 587 isn’t available, you can also use Port 25 — but ensure that your ISP or firewall hasn’t blocked the port you’re planning to use.

Back to Contents

How To Set Up POP & IMAP in Microsoft Outlook

Just setting up your SMTP mail settings isn’t enough to receive incoming emails in your mail client.

Why?
Your SMTP settings only deal with outgoing mail flow — not the emails you receive!
(more on this later in the article)

To receive an email, your IT admin needs to set up your POP or IMAP server settings.

But if you don’t want to ask your network admin to set up POP or IMAP server settings, here’s what you need to do in MS Office:

Open the Microsoft Office Outlook App and from the toolbar, go to  File > Account Settings > Server Settings.
Then, set up POP and IMAP settings. Don’t forget to set up SSL or TLS encryption.

Here are the mail settings you need:

1. IMAP Server Settings

server-settings

Server name: outlook.office365.com

Port Number: 993

Encryption: SSL/TLS

2. POP Server Settings

Server name: outlook.office365.com

Port Number: 995

Encryption: SSL/TLS

That’s all you need to do to set up your POP Settings and IMAP settings!

Back to Contents

SMTP, POP, IMAP Basics

Now that we’ve gone over how to set up Office365 SMTP, POP and IMAP settings, let’s explore more about these email protocols.

Wait… what’s a protocol?
A protocol is a method of exchanging communication/information between email accounts.

Here’s a quick overview of SMTP, POP, and IMAP:

1. What is SMTP?

A Simple Mail Transfer Protocol (SMTP) is used to send emails from one server (like the Office 365 SMTP server) to another. Most email providers use an outgoing mail server with SMTP to send emails over the internet.

SMTP works with a Mail Transfer Agent (SMTP relay) to send your emails to the right mailbox and computer. An SMTP relay guarantees that an email you send arrives in the recipient’s mailbox.

Think of it this way:
SMTP is like the postal service. It’s what you use to send your messages to every external recipient.

Only this time, you won’t have to worry about finding envelopes or stamps!

2. How Does SMTP Work?

SMTP uses a set of codes and commands that simplify the process of sending emails among email servers.

When you send out an email through an SMTP email system, it’s transferred through several SMTP relay systems and computers before it reaches its destination (a recipient’s mailbox).

It’s basically like your mail getting sorted through multiple post offices and postal workers before it finally ends up in the hands of your recipient!

However, as SMTP only transmits text, you can’t use it to send attachments.

To overcome this, Multipurpose Internet Mail Extensions (MIME) encode all non-text data into a text format before sending them through an SMTP relay server.

Tons of email services like SMTP.com and Mailjet offer their own SMTP service to customers — these help people send emails without having to set up an SMTP server manually.

3. What are POP and IMAP?

When it comes to configuring emails, you need more than SMTP systems alone.
Remember, your Office 365 SMTP server is only used to send emails.

POP3 and IMAP are two incoming server protocols used to receive emails.

Here’s how the IMAP protocol and POP3 protocol work:

A. POP3

Post Office Protocol 3 (POP3) is an email protocol that is widely used to receive email.

In POP3, your emails are downloaded from the server and stored locally on your device.
This way, you can access your emails even if you’re offline — you only need to be online to download them!

B. IMAP

Internet Message Access Protocol (IMAP) is the most commonly used protocol for receiving email. The IMAP protocol saves all emails onto its servers instead of downloading them to your local storage.

Whenever you want to check your email, your mail client contacts the server and loads the email regardless of the device’s IP address. With IMAP, you can check your emails from anywhere, with any device, on any IP address.

The difference between the  IMAP protocol and POP3 is that POP3 downloads your emails from the server for permanent local storage. IMAP, however, simply leaves them in the server and just caches them locally — sort of like cloud storage.

As there’s no permanent downloading and local storage involved, IMAP is faster and more efficient than POP3.

C. POP and IMAP vs. SMTP

POP, IMAP, SMTP — all this sounds super confusing!

But it’s very simple: SMTP is used as a protocol to send outgoing emails, while IMAP and POP are both protocols used to fetch incoming mail.

Back to Contents

Wrapping Up

Setting up SMTP settings in Outlook is an essential process that’ll help you send out emails to internal and external recipients.

And the easiest way to do it is through the client SMTP submission method.

You can follow the steps I covered above to easily set up SMTP as well as POP and IMAP settings to send and receive emails from your business domain.

Email marketing, cold email, and mail merge inside Gmail


Send incredible emails & automations and avoid the spam folder — all in one powerful but easy-to-learn tool


TRY GMASS FOR FREE

Download Chrome extension - 30 second install!
No credit card required
Love what you're reading? Get the latest email strategy and tips & stay in touch.


Microsoft Outlook’s SMTP settings let you configure the email client of your choice (Gmail, Yahoo, Thunderbird, etc.) to send emails from your Outlook address.

Alternatively, you can configure your Outlook account’s SMTP and POP or IMAP settings to send and receive emails using a non-Outlook email address.

In this article, I’ll go over the SMTP settings for Outlook and walk you through the process of setting up your Outlook SMTP as well as IMAP and POP server settings.

Finally, I’ll mention the disadvantages of using a Microsoft Outlook SMTP server and highlight a better alternative to Microsoft Outlook to streamline your email sending activities.

This Article Contains:

(Click on links to jump to specific sections)

Let’s get started.

Outlook SMTP Settings

When you need to add your Outlook.com account (or Microsoft account / Hotmail account / Live.com account / MSN account) to another mail app (like Gmail), you’ll need to use the following SMTP settings:

  • SMTP Server Name: smtp.office365.com
  • SMTP Port Number: 587
  • SMTP Encryption Method: STARTTLS

Once you add these SMTP settings, you should be able to use another mail app to send emails from your Outlook account.

But how do you receive incoming emails?
To receive incoming emails, you’ll need to configure the IMAP settings or POP settings of the mail app you’ll be using.

Here are the IMAP settings for Outlook:

  • IMAP Server Name: outlook.office365.com
  • IMAP Port: 993
  • IMAP Encryption Method: TLS

And here are the POP settings for Outlook:

  • POP Server Name: outlook.office365.com
  • POP Port: 995
  • POP Encryption Method: TLS

However, to use POP, you’ll need to enable its access in Outlook.

How to Enable POP Access in Outlook

1. Launch the Outlook mail app (web version), and sign in with your account credentials.

2. Click on the Settings icon on the top of your toolbar in the Inbox window.

click-on-settings

3. From the dropdown menu, click on View all Outlook Settings.

view-all-outlook-settings

4. In the Settings window, click on Mail and then Sync Mail.

sync-email

5. Choose the Yes radio button under POP options, and then click Save.

yes-pop-options

Note: Ensure your internet service provider hasn’t blocked the SMTP, IMAP, and POP port numbers.

Go back to Contents

Now that you know how to configure another mail app to send emails from your Outlook address, I’ll show you how to send emails from another mail app account using Outlook:

How to Set Up SMTP Server Settings in Microsoft Outlook

Generally, there are three ways to set up email settings in your Outlook account:

  • Using direct send.
  • Using the SMTP authentication method (this is what I’ll talk about).
  • Using a dedicated relay to send your emails through the Outlook SMTP relay.

Note: If you want to know what SMTP is first, click here to jump down to that section. After you’ve understood what it is, you can come back here to learn how to set it up.

Why Should You Use the SMTP Client Method?

Because it’s the best method to use!

Here’s why you shouldn’t use the direct send method or dedicated relay method: 

  • Direct send only supports communication within your organization. As a result, you can’t use it to communicate with people outside your business.
  • If your company uses a line-of-business (LOB) tool, you need a static IP address to authenticate the Outlook mail app with the relay server method.

And here’s why you should use the SMTP client submission method: 

Unlike direct send, the SMTP authentication (SMTP AUTH) submission method lets you email anyone with a full email address inside or outside your organization.

Besides, you don’t need to worry about having a static IP address for your LOB app with SMTP authentication

How to Set Up the SMTP Server in Outlook

1. Launch the Outlook desktop mail app, and sign in with your username and app password.

launch-outlook

2. Click on the File menu, then select Info and click on Account Settings.

click-on-file

3. From the Account Settings dropdown menu, select Manage Profiles, and a Mail Setup window will appear.

manage-profiles

4. Next, click on the Email Accounts button within the Mail Setup window.

email-settings

5. Select your e mail account and click Change.

change

6. In the Change Account window that appears, click on More Settings.

more-settings

Note: I’m using a Gmail account here. That’s why the “Incoming mail Server” says imap.gmail.com and the “Outgoing mail Server” says smtp.gmail.com.

7. From the Internet Email Settings window, select the Outgoing Server tab.

more-settings

8. Under the Outgoing Server tab, tick the checkbox that says “My outgoing server (SMTP) requires authentication” and click the Log on using radio button.

Insert the username (the email address from which you send the email) and password into their respective fields. Moreover, ensure that the “Require Secure Password Authentication” box is unchecked.

internet-email-settings

Note: Outlook.com doesn’t require Secure Password Authentication (SPA). SPA is a proprietary Microsoft protocol used to authenticate Microsoft mail clients with servers. But don’t worry, since you’re using Outlook, it won’t be an issue for you!

9. Next, click on the Advanced tab.

advance-tab

In the Advanced tab, choose the SSL/TSL encrypted connection from under the “Use the following type of encrypted connection” dropdown list and click OK.

That’s it — you’ve completed the configuration of your SMTP settings to send emails from a non-Outlook account through Outlook!

Go back to Contents

Now, let’s go over managing the configuration of your IMAP and POP server settings:

How to Set Up IMAP and POP Server Settings in Microsoft Outlook

You can set up your SMTP settings to send outgoing emails, but that isn’t enough to fetch incoming emails.

To do that, you need to set up an incoming mail server using:

Let’s jump right into it.

A. How to Set Up the Incoming Server Settings with IMAP

1. Launch the Outlook mail app on your desktop.

2. Click on the File menu, then select Info, and click on Add Account.

add-account

3. In the Outlook login window that opens, tick the checkbox that says “Let me set up my account manually” and click Connect.

connect

4. From the Advanced setup window that appears, choose the IMAP account type.

office-365-imap

Your account will get added to Microsoft Outlook.

account-added

B.  How to Set Up the Incoming Server Settings with POP

1. Launch Outlook on your desktop.

2. Click the File menu, select Info, and click on Add Account.

3. In the Outlook login window that opens, tick the checkbox that says “Let me set up my account manually” and click Connect.

4. From the Advanced setup window that appears, choose the POP account type.

office-365-pop

5. Type in the credentials in the Internet Email window that opens, and click OK.

click-ok

6. In the POP Account Settings window that appears, verify that the POP port number is 995 and the encryption method used is SSL/TLS.

Once you’ve verified these server information fields, click Next.

pop-settings

Note: I’m using a Gmail account here. That’s why the “Incoming mail Server” says pop.gmail.com, and the “Outgoing mail Server” says smtp.gmail.com.

Your account should be set up and ready to use.

Note: Keep in mind that you may need to be assigned permissions before performing some of the abovementioned steps. To know what permissions you may need, check out the entries under “POP3 Settings” and “IMAP4 Settings” in mobile devices and clients permissions.

Go back to Contents

Now that you know how to set up a mail server using SMTP, POP, and IMAP, I’ll answer some FAQs related to the SMTP, IMAP, and POP email protocols:

5 Email Setting FAQs

Here are answers to five commonly asked questions about the SMTP, IMAP, and POP protocols:

1. What Is SMTP?

The Simple Mail Transfer Protocol (SMTP) is used to send emails from one email server to another. SMTP is used by most e mail account servers to exchange email messages.

SMTP uses a “store and forward” process that helps you move emails from one mail server to another.

It works with a Mail Transfer Agent (MTA) — also known as an SMTP relay — to send your outgoing mail to the right inbox. Using an SMTP relay guarantees that your mail is delivered to the recipients’ inbox.

It’s a lot like the postal service using their postal networks to deliver your mail to the right person.

2. How Does SMTP Handle Email?

SMTP utilizes codes and commands to simplify sending emails across servers. SMTP relay servers transfer outgoing mail across several computer systems before it reaches a recipient’s inbox.

This is similar to a letter going through multiple post offices and agents before getting delivered.

However, SMTP can’t send attachments. It can only transmit text.

You can overcome this through Multipurpose Internet Mail Extensions (MIME), which encodes all non-text data in an internet e-mail to text before sending it through SMTP.

Want to learn more about SMTP?
Read my ultimate guide to SMTP for everything you need to know.

3. What Is POP?

Post Office Protocol (POP) is a protocol widely used to receive incoming mail. There have been several versions of POP, the latest being the POP3 server. This protocol downloads email onto a local device whenever you want to check email.

This way, granting POP access to your mail client lets you check your mail even when you’re offline!

4. What Is IMAP?

The Internet Message Access Protocol (IMAP) is the most commonly used protocol for receiving incoming mail.

Unlike a POP3 server, where you have to download an email to your local storage, IMAP saves all emails on its email servers. And so whenever you need to check email, your mail client contacts the server and lets you check your email.

This makes the IMAP protocol quicker and more efficient than using the POP3 protocol.

5. How Is POP/IMAP Different from SMTP?

Are all these protocols confusing you?
Don’t worry — it’s all very simple.

The POP protocol and IMAP protocol help you set up an incoming mail server to receive incoming emails. On the flip side, SMTP is a protocol that allows you to send outgoing emails.

Go back to Contents

Now that we’ve gone over the basics of SMTP, IMAP, and POP, I’ll explain why you should choose an alternative email client to Outlook:

Why Outlook Isn’t the Best Email Client + A Great Alternative

While you can set up your SMTP settings to use Outlook as your email provider, it’s not the best mail client out there.

Here’s why Gmail is a much better mail client than Outlook:

1. Gmail Offers More Functionality and a Cleaner Interface

Gmail is renowned for its user-friendly interface.

While Outlook tries to offer a similar interface, it’s far from the streamlined look of Google Gmail and even lacks some useful features.

While Gmail provides a secure connection for your emails, it also has tons of AI-powered features like smart compose — something you won’t find in Outlook.

2. Gmail Offers a Ton of Powerful Extensions

Microsoft Outlook works best when paired with the other Office 365 applications. This means that if you need extra features from Outlook, you’ll have to turn to one of the Office 365 apps. And while some of those are helpful, it’s still a very limited selection!

However, Gmail features a ton of functional extensions to increase your email productivity.

One such extension is GMass.

It’s the perfect email extension for anyone looking to send bulk emails from their Gmail account.

What Is GMass?

gmass

GMass is a powerful bulk email tool and email marketing automation platform used by employees in tech giants like Twitter, Google, Uber, and LinkedIn. It’s also used by solopreneurs, small business owners, sales professionals, casual email senders, and so on.

Essentially, anyone can use GMass!

And the best part?
GMass works right inside Gmail, which means you don’t have to familiarize yourself with yet another tool.

To get started with GMass, just download the Chrome extension, and sign up for free with your Gmail account.

With GMass in your toolkit, you can:

  • Automatically personalize your outgoing emails at scale, including their subject lines, paragraphs, attachments, images, and more.
  • A/B test your email outreach campaigns to see which campaign will get you the most positive responses.
  • Set up workflows to keep sending automatic follow-up emails till your recipient opens, replies, or clicks on a link inside your Gmail. Additionally, you can adjust the frequency and number of follow-ups to send.
  • Send behavior-based email campaigns that are automatically customized to how a recipient responded to your previous emails.
  • Use the Email List Builder feature to create a mailing list effortlessly from your inbox.
  • Analyze how your email deliverability and engagement metrics through detailed analytics reports to identify any opportunities for improvement.
  • Schedule your bulk emails to go out at optimal times so that they reach the recipient’s inbox when there’s the highest chance of engagement.
  • Create and send drip campaigns to your recipients to improve your engagement rates.
  • Access powerful bulk emailing and automation features on your Android device (smartphone, tab, etc.) using the GMass add-on for the Gmail app.

Go back to Contents

I’ll now explain the steps involved in the configuration of SMTP settings in GMass:

How to configure your SMTP Settings in GMass

You can always use Gmail’s SMTP servers for your emails.

But why do that when you can set up your own SMTP outgoing mail server on GMass?
This will even let you send unlimited mass emails to recipients!

Here’s how you can set it up:

1. Choosing How to Set Up the SMTP Server

You can set up SMTP settings in GMass using three different methods:

A. Use the GMass SMTP Server

If the emails you send are either:

  • Non-commercial.
  • Completely organically developed.

You can easily set up SMTP through GMass’s own SendGrid account. You can contact the GMass team to request this service.

B. Set Up Your Own SMTP Account

If you feel like you need your own SMTP account, or if your emails don’t fit the criteria above — don’t worry!

You can easily set up your own SMTP account with third-party providers like SendGrid. Then, just tweak the account setting to your liking and set it up with GMass.

Read my reviews of popular SMTP services:

C. Set Up a Private SMTP Outgoing Mail Server

If you have the technical knowledge, you can set up custom SMTP server settings for your business. However, setting up your own server can be time-consuming and requires advanced technical knowledge.

If you’re an expert-level developer, you’ll want to read my technical review of popular SMTP services.

2. Setting Up Your SMTP Account

Here’s how GMass connects to SMTP servers:

Step 1

GMass connects to your server without TLS/SSL. You can decide on the port number — most SMTP service providers will allow you to connect to port number 25 or 2525.

Note: Ensure your internet service provider hasn’t blocked the port number.

Step 2

Ensure the “track email opens and clicks” option is turned off. This is required because GMass does all the email tracking for you.

Ensure that the outgoing mail server (SMTP) doesn’t alter the emails in any way but just lets them pass through.

Step 3

Look for any email send quota restrictions in your SMTP account setup. If there are any, ensure that you remove them or that they don’t limit your general or cold email campaigns.

Step 4

In this step, you’ll have to check which RETURN-PATH address your server is using. This address is also called a MAIL-FROM address or an Envelope Form.

Depending on your SMTP provider, you’ll have to verify your domain name — because the same domain name is used in the MAIL-FROM address and the “from” address.

This may require you to alter your DMARC, DKIM, and SPF records.

Step 5

Make sure you turn on Bounce notifications. Don’t forget to set your bounce notifications to go to the “From” address.

This helps GMass to process the email bounces and show them to you when required.

3. Setting Up GMass to Send Emails through the SMTP Server

This is the last stage in configuring GMass with an external server.

Here’s how you can do it:

Step 1

Reload Gmail to make sure you have the latest GMass version. Install the Chrome extension if you don’t have GMass already. Then, click on the Compose window.

Step 2

Insert [email protected] as the “To” field of the new email message.

Step 3

Insert the word “set” as the subject and wait for this form to load in the message area.

Step 4

Enter the relevant details after the colons. If your SMTP server requires no authentication, set the User name to “noauth” and leave the password field blank.

Step 5

Click the GMass button.

After you complete these steps, GMass will try to send a test message to your inbox. If the email is successful, the SMTP email message server will be set for your Gmail account.

Then, you’re ready to send out emails on GMass through your external SMTP server!

Go back to Contents

Final Thoughts

Configuring your Outlook SMTP settings doesn’t have to be complicated.

Just follow the instructions I have outlined above, and you’ll have your Outlook mail server settings up and running in no time!

But remember, Outlook may not be the ideal email client for you — it lacks some functionality, supports limited extensions, and boxes you into the Microsoft 365 Suite.

Instead of using a limited mail app like Microsoft Outlook, you can easily handle your emails through Gmail and GMass instead.

With GMass, you can automatically personalize your emails, automate your email follow-ups, perform A/B testing, access powerful email capabilities on your Android device, and do so much more.

Why not try GMass today and take your email performance to the next level?

Ready to transform Gmail into an email marketing/cold email/mail merge tool?


Only GMass packs every email app into one tool — and brings it all into Gmail for you. Better emails. Tons of power. Easy to use.


TRY GMASS FOR FREE

Download Chrome extension - 30 second install!
No credit card required
Love what you're reading? Get the latest email strategy and tips & stay in touch.


What 99% of users need to do is send a personalized email to a few hundred people where each of those few hundred people get their own email, using only their email address in the To line and having the message addressed to them by their first name (e.g., “Dear John,”).

There are certain situations, however, where you may want each of your emails to go to two people instead of one, such as when a school is emailing both parents of a child. The school might want to send one email to both parents rather than two individual emails. I recently worked with a cold emailer who was emailing the athletic departments at schools and who wanted each email to go to both the Head Coach and the Athletic Director of each school. The goal behind sending one email to two people, rather than two emails to two people, is so that each of the two people know that you’ve also emailed the other person, and so that a Reply All by either of the two would go to all three parties.

Two addresses on one mass email

This can be easily accomplished by having one person’s address in the To line and the other person’s address in the Cc line.

To send a mail merge like this, you’ll need:

  • A Google Sheet containing your email list
  • Your Gmail account
  • GMass installed and ready to go

Format your Google Sheet

Your spreadsheet should have at least two columns containing email addresses, since each email will go to two people, and you can think of each row of your spreadsheet as one email that will go out. The primary column, the address that will go in the To line can be named anything you like, such as “email,” “emailaddress,” or whatever you like. The second column, however, should be named “cc” or “Cc” (it’s case insensitive). That is a special keyword for a column that will instruct GMass to include the address in that column in the Cc line of every sent email.

Here’s an example spreadsheet:

Google Sheet for Two Email Addresses Per Mass Email

Now just merge as normal

Now send your mail merge just like you normally would. Click the “spreadsheet” icon button, choose your Sheet, wait for the Compose to launch, and then type your Subject/Message. We know your spreadsheet has two columns, one for each of the two email addresses each email will be sent to; but if it also has two other columns for both people’s names, you can begin each email with “Dear {Parent1First} and {Parent2First},” for example.

Personalize recipient 1 and recipient 2

If you’ve never done a Gmail mail merge with GMass, watch this 45-second video.

Need to send each email to 3+ people instead of two?

Just like you’re using the Cc line for the second email, you can use the Bcc line for the third email. Of course, by doing this, the recipients in the To and Cc won’t see that a third person is receiving the email, since that’s the nature of Bcc, but you can address that in your message as well.

Here’s what your spreadsheet should look like, with a column for the primary recipient named anything you like, a column named Cc for the second recipient, and a Bcc column for the third recipient.

Google Sheet for Three Email Addresses Per Mass Email

Now when composing your mail merge, you’ll do exactly what you did when you sent to two people per row. The only difference this time is that your spreadsheet contains a “Bcc” column.

Each sent email will then have the primary address in the To line, the “Cc” column in your spreadsheet will be in the Cc line of the email, and the “Bcc” column in your spreadsheet will be in the Bcc line of the email. So now, you’ve sent a personalized mail merge, where each email has been sent to THREE people.

You can also use this technique to send emails to four people, five people, or more. Just put multiple addresses in the Cc and/or Bcc columns, separated by commas or any other non-email character. Here’s how your spreadsheet might look:

Prepare your Google Sheet with CC and BCC fields

But why can’t all two, three, or more addresses be in the To line?

Because GMass was designed around having one single address in the To line. The Cc and Bcc techniques are “tricks” that allow you to accomplish sending to two or three people per email. It’s possible that someday we’ll change this and allow you to truly merge with multiple addresses in the To line, but that presents complexities, like, how do we track an email “open” rates? (What if everyone opens it? What if only one person opens it?) Using the Cc/Bcc technique, there is one open tracking pixel for the whole email, so if any of the three recipients open it, the email will be counted as “opened” and be attributed to the primary recipient in the To line.

Conclusion

That’s all there is to it. This technique has actually been possible since 2016, when we launched the Cc/Bcc merge feature, but more and more users have been asking how to send a merge to 2+ at once, so now, you have a complete guide!

See why GMass has 300k+ users and 7,500+ 5-star reviews


Email marketing. Cold email. Mail merge. Avoid the spam folder. Easy to learn and use. All inside Gmail.


TRY GMASS FOR FREE

Download Chrome extension - 30 second install!
No credit card required
Love what you're reading? Get the latest email strategy and tips & stay in touch.


GMass