With GMass, you can break Gmail’s daily sending limits to send unlimited emails in Gmail — and the most popular way is by using a SMTP server to send the overage.
(The other way is with GMass MultiSend, which distributes campaigns across multiple inboxes.)
And as of November 2024, you can now add multiple SMTP servers to your GMass account and choose which one to use as you send campaigns.
This is great if you want to change which SMTP server you use for different campaigns based on each server’s deliverability and reputation, desired volume, or use case. (For instance, you might have one SMTP server to use on cold campaigns and another for opt-in newsletters.)
Adding multiple SMTP servers to your account also saves you the time of having to delete, add, and re-add your SMTP servers.
Bottom line: This gives you more versatility and flexibility in your sending.
How to Add Multiple SMTP Servers to Your Account (3 Quick Steps)
All of the SMTP server management you’ll do happens in the GMass dashboard.
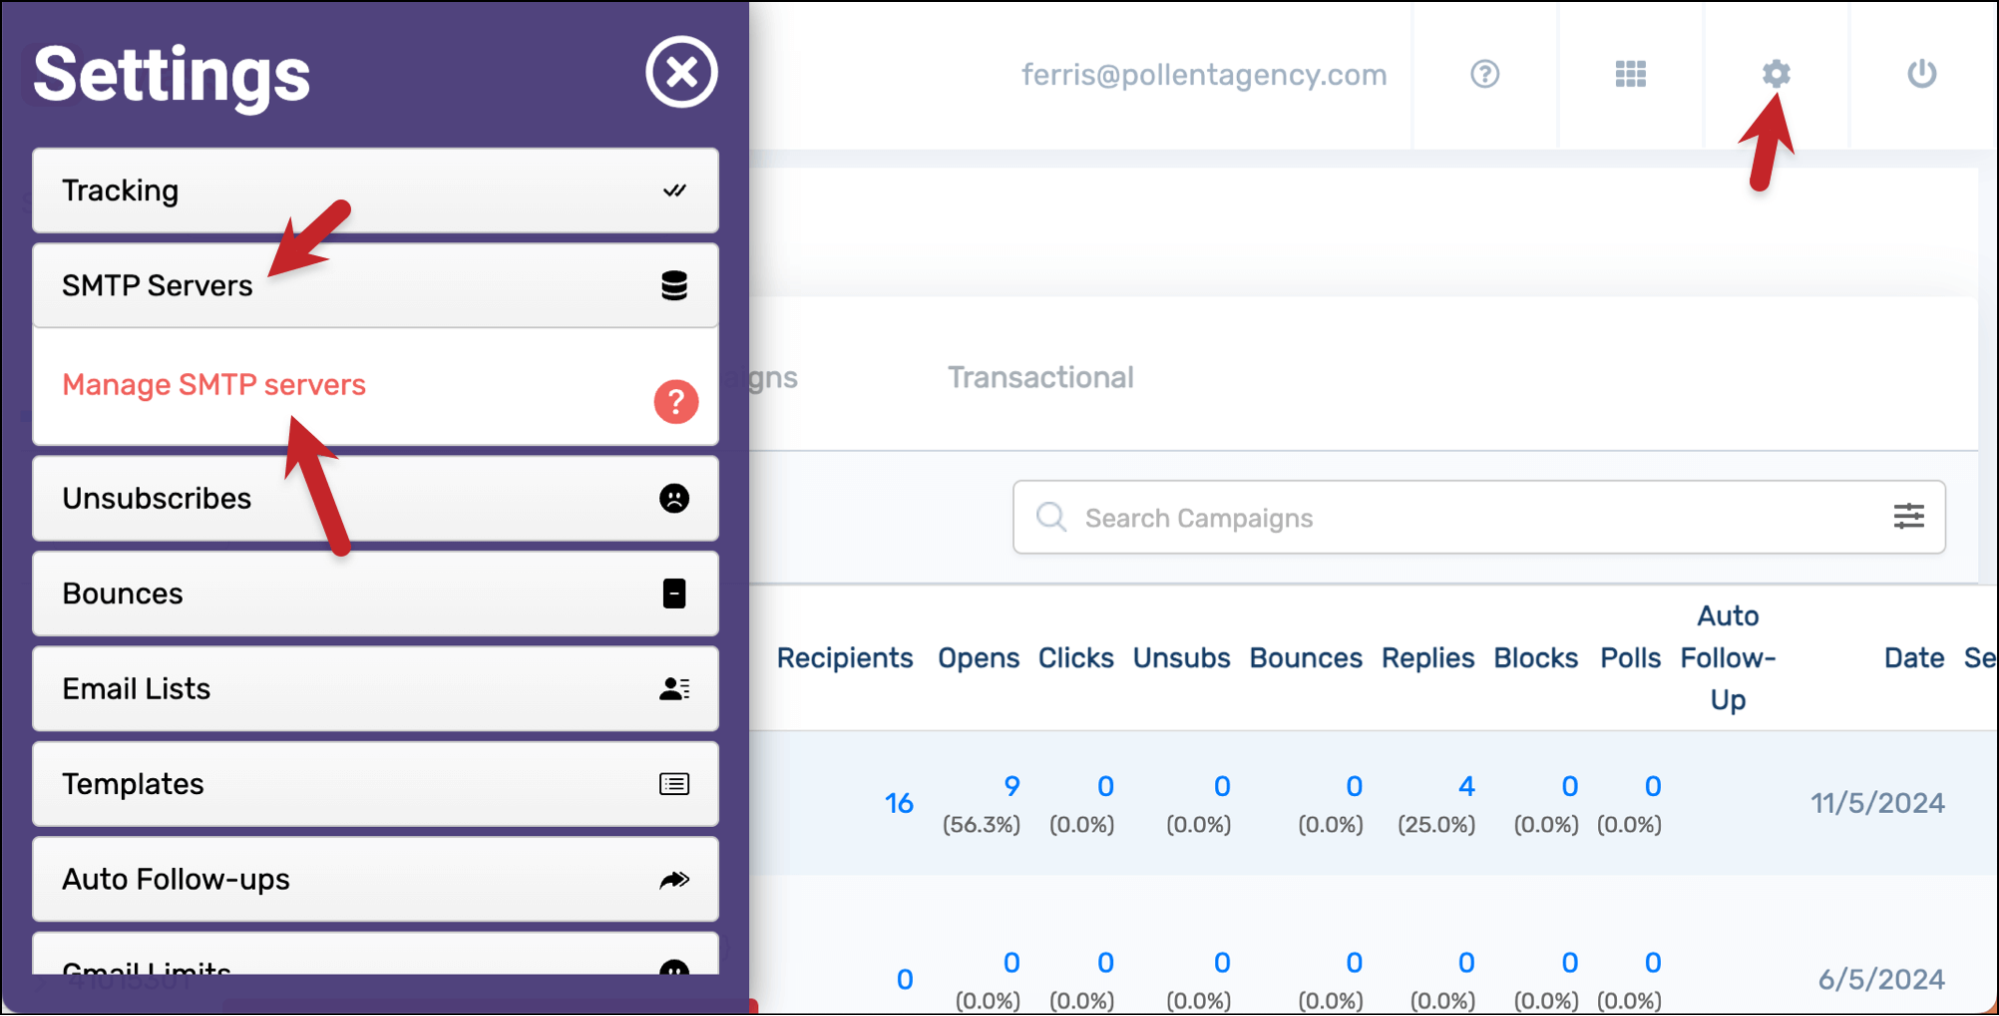
To get started, go to the GMass dashboard, open the settings (the gear icon), then click into the SMTP Servers section.
Go to the SMTP server management section of the GMass dashboard
In the SMTP Servers section, click on Manage SMTP servers.
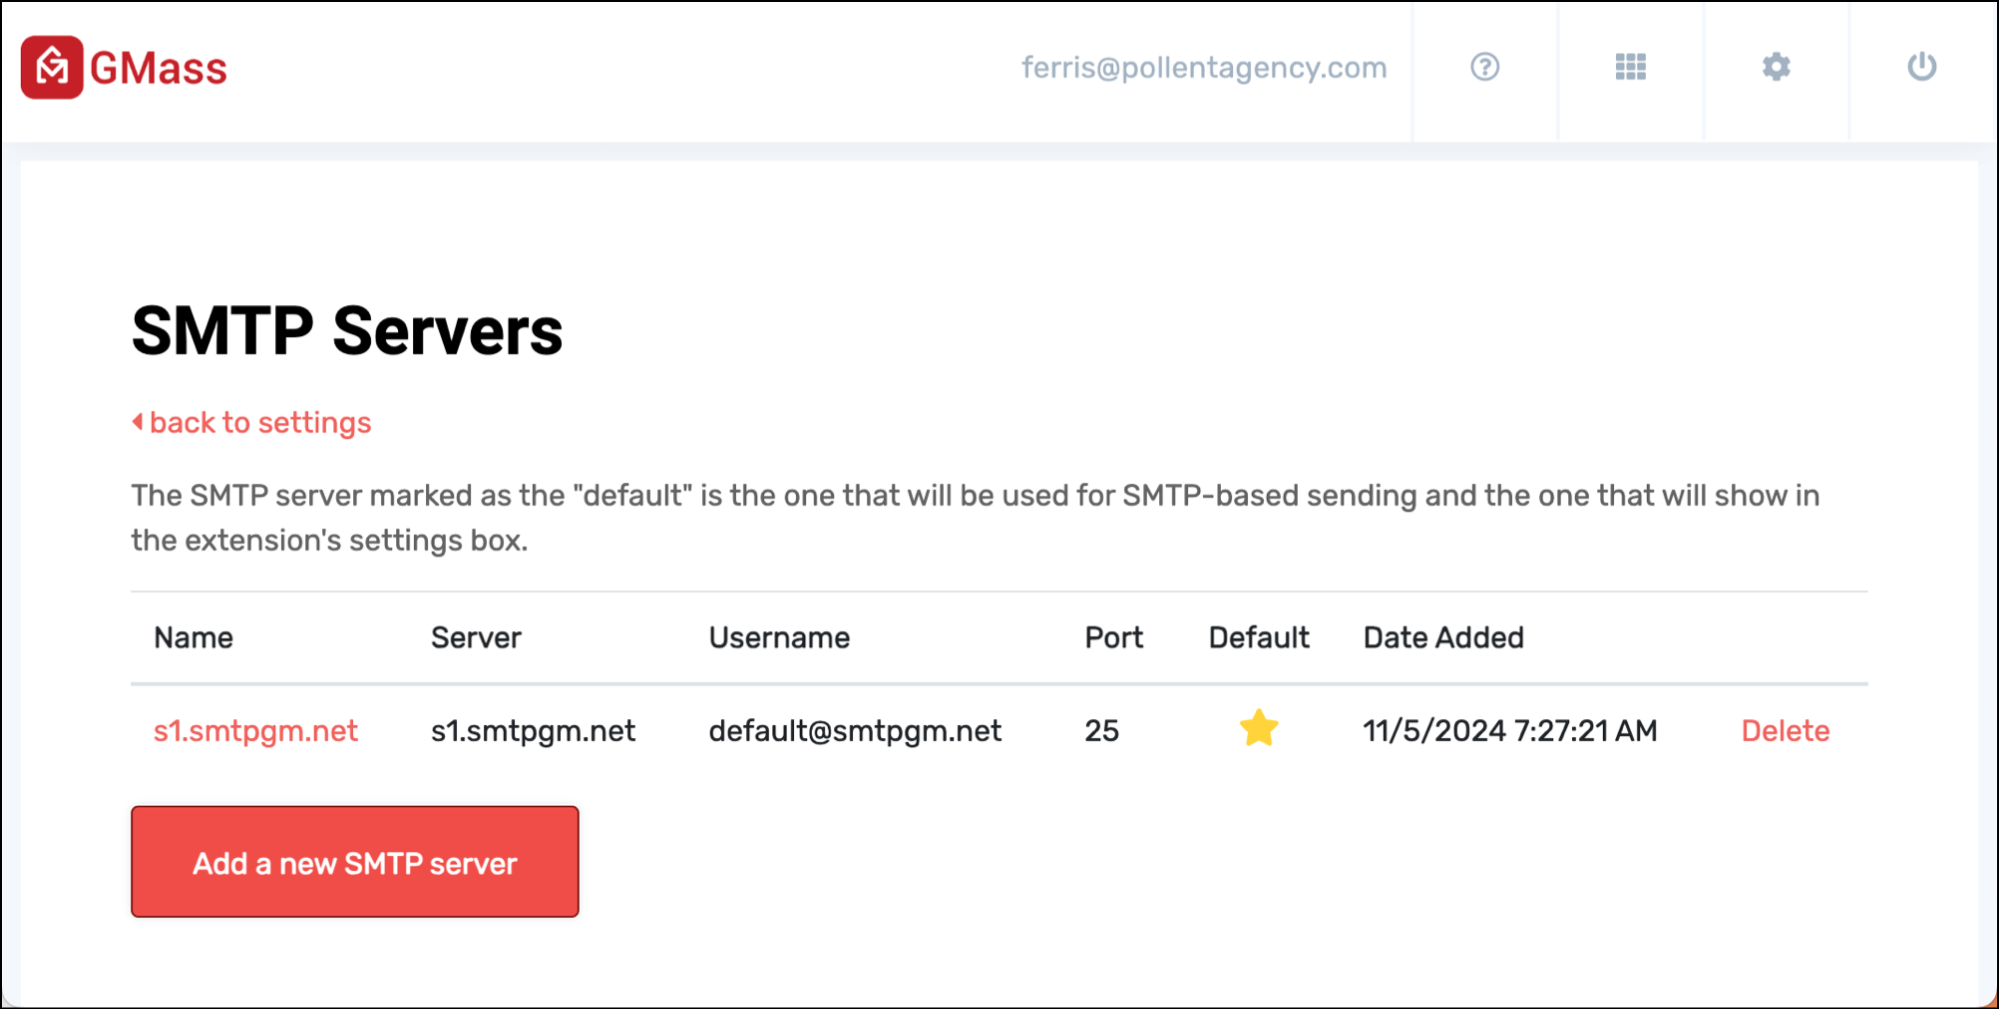
Here you’ll see all the SMTP servers you’ve connected to your account (if any).
As you can see here, I have one SMTP server connected. (It’s one of GMass’s in-house SMTP servers. Want to use that yourself? If you’re sending opt-in emails, see if you’re eligible. We also have a cold email sending server if you’re sending high-volume cold email campaigns.)
Add a new SMTP server
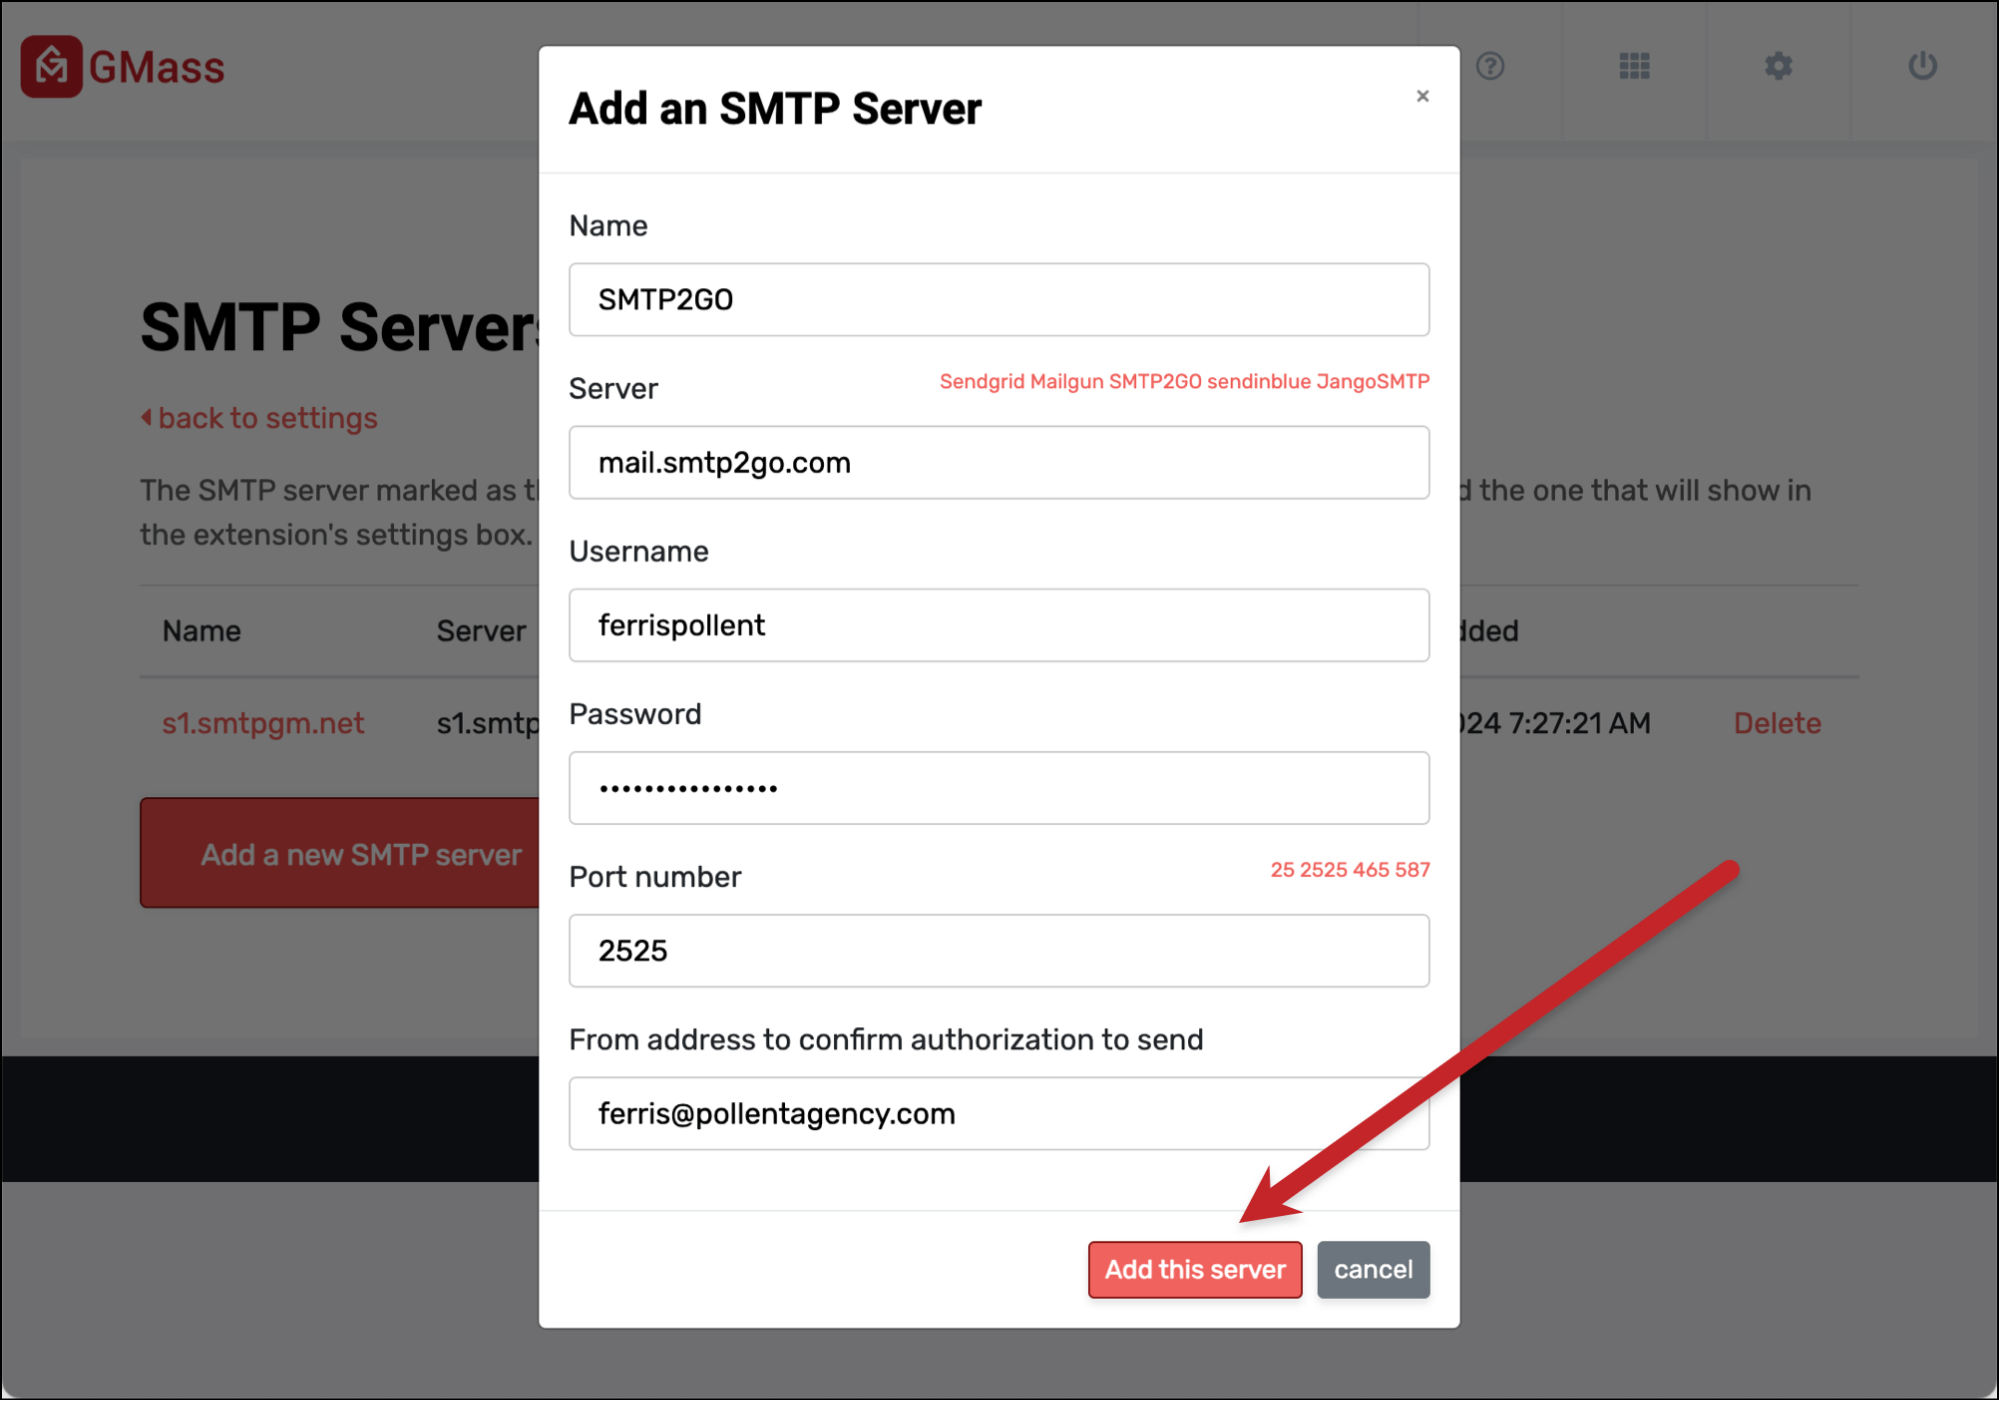
Click on the red Add a new SMTP server button to add another (or the first) SMTP server to your account.
You’ll need to fill in the credentials you received from the service.
In my example below, I’m adding my username and password from my SMTP2GO account.
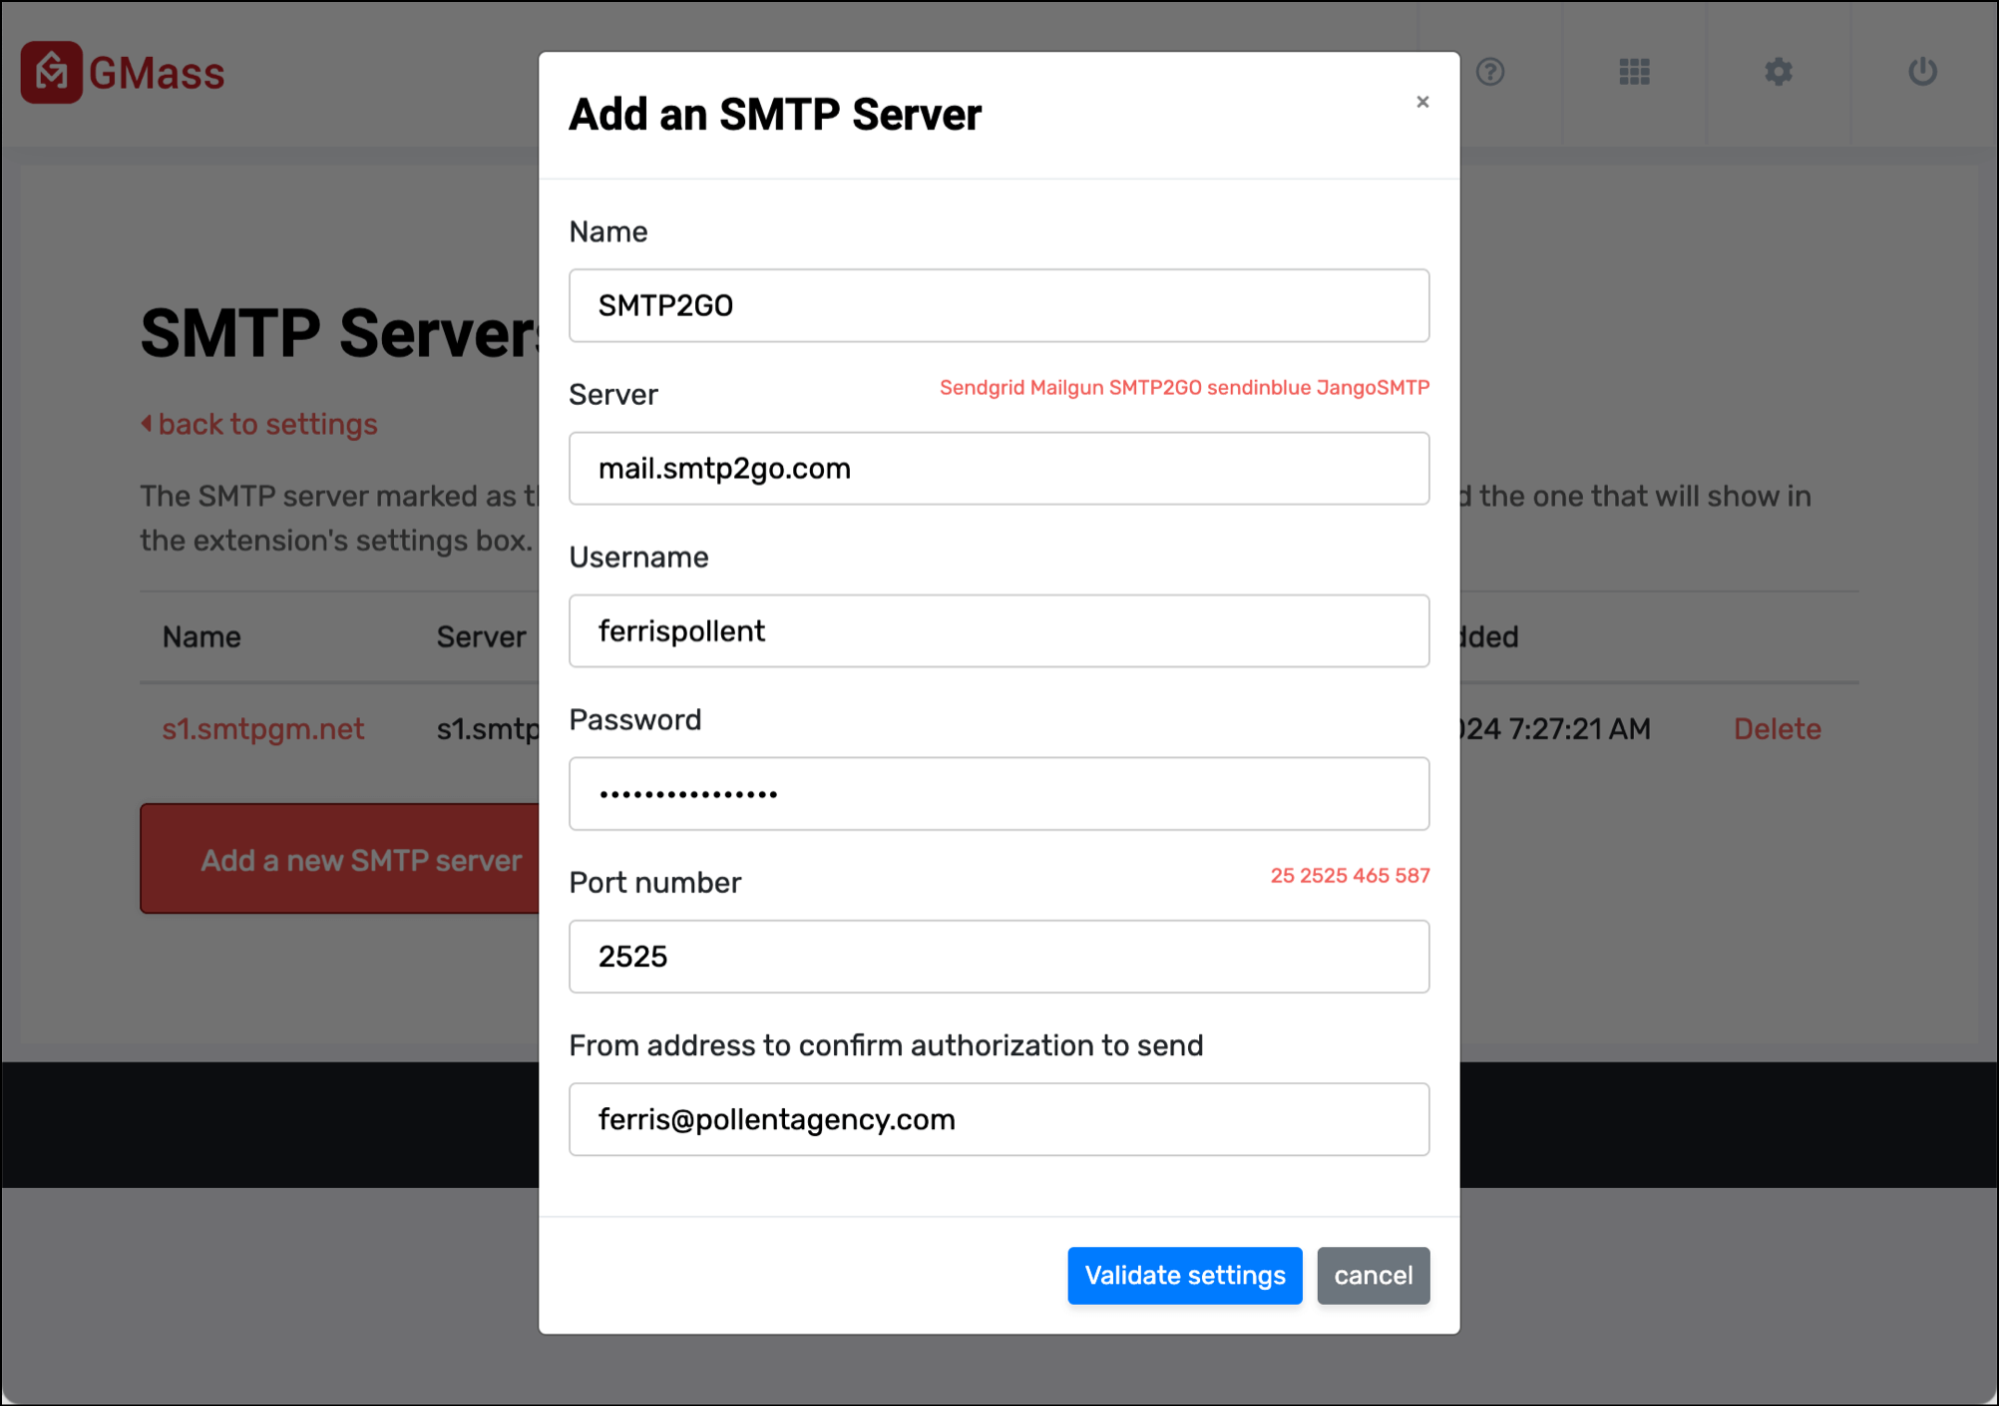
Click the Validate settings button once everything is entered.
GMass will check your credentials and, assuming everything checks out, you can click the (now visible) Add this server button.
Setting your default server
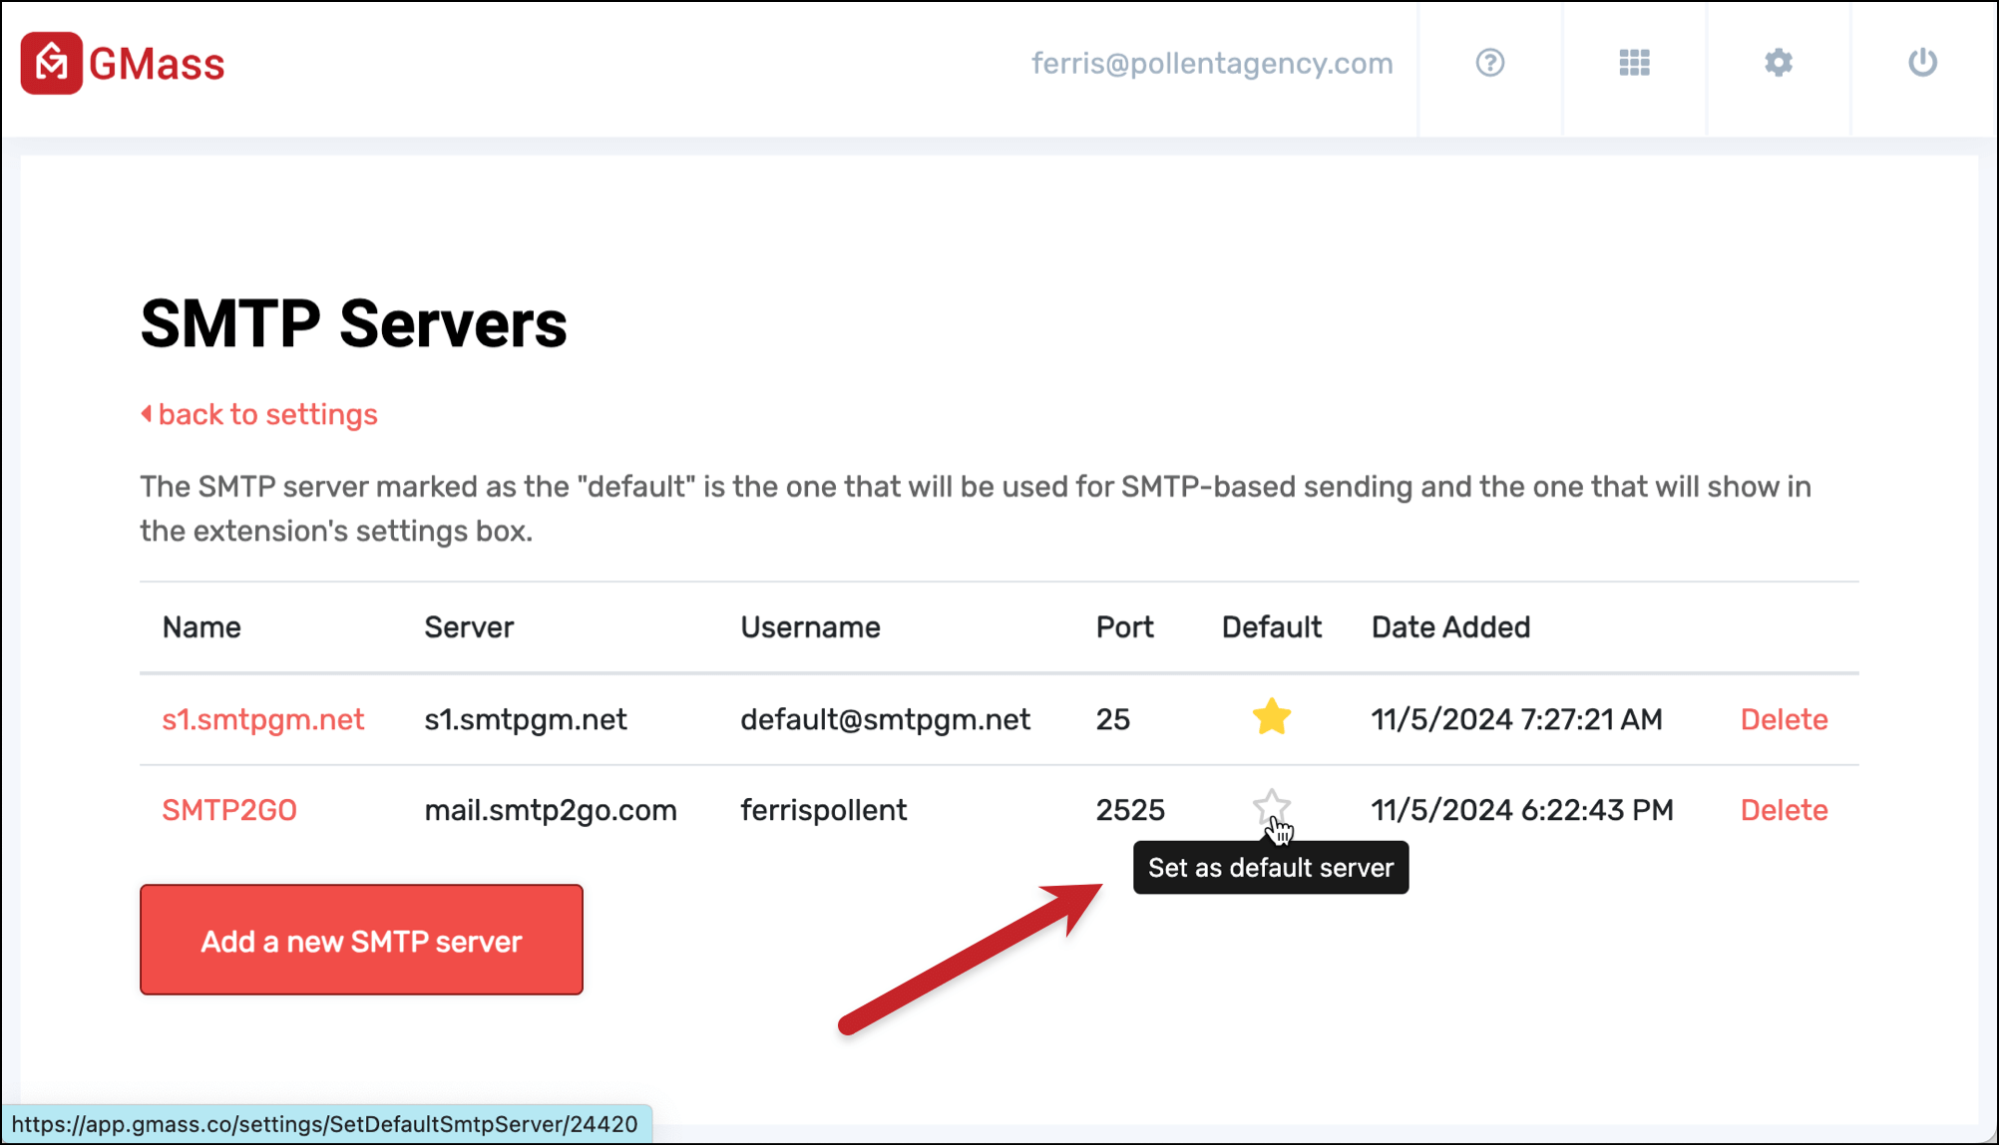
Now that you have multiple servers, you have to pick which one you want GMass to use as the default. (Or GMass will just use the first one as the default.)
This is the server that’s used to send your campaign once you hit Gmail’s daily sending limit.
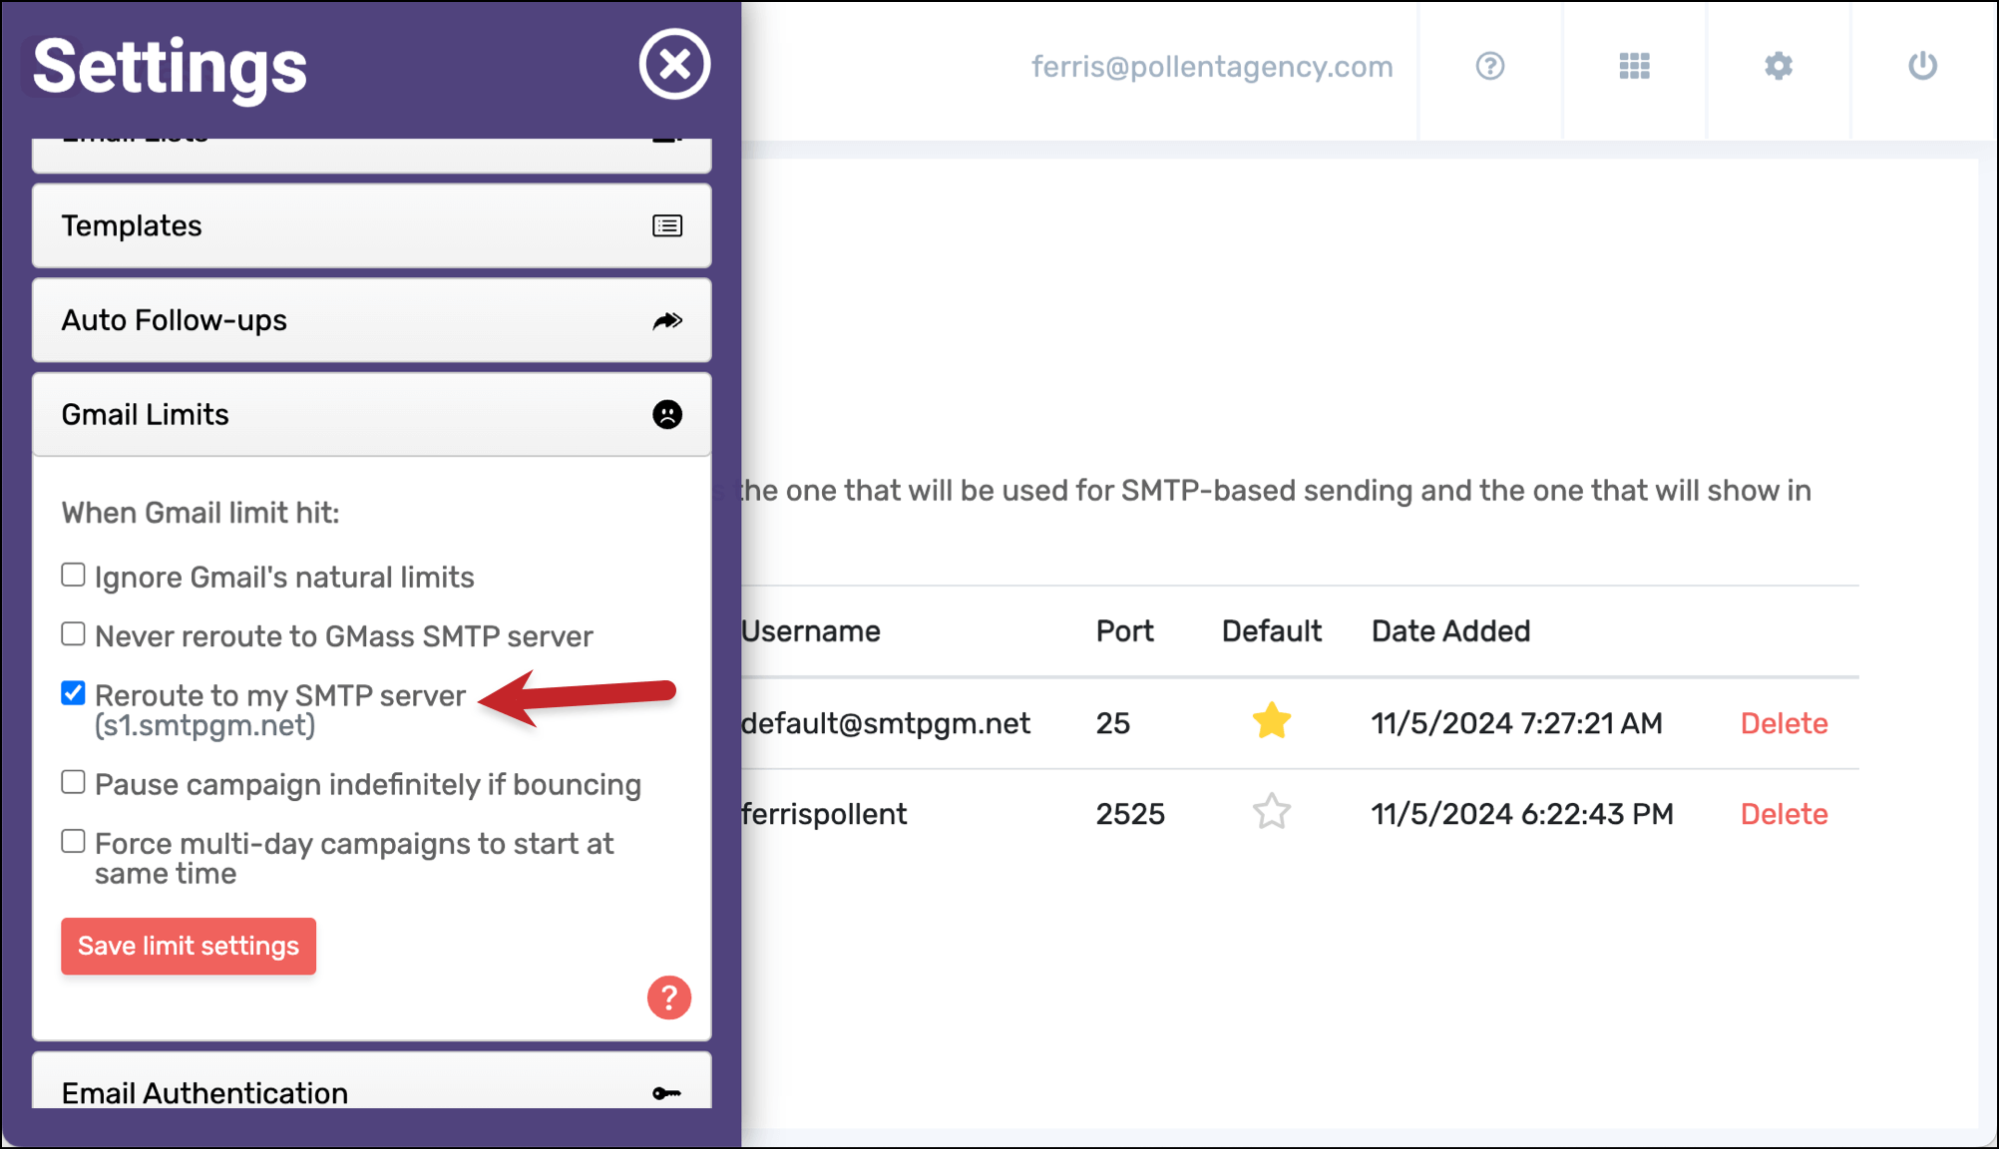
To set your default SMTP server, click the star in the Default column.
Choosing your sending server for a campaign
You can choose which server you want to use to send each campaign in that campaign’s settings box.
When you’re in the Gmail draft for your campaign, open the GMass settings box.
Then, in the Action section, if you’ve selected Send emails (as opposed to Create Drafts), you’ll see a dropdown menu giving you the choice of which server to use to send the campaign.
As you can see, your options are to send the campaign through Gmail or any of the sending servers connected to your account.
Deleting a server
You can also remove SMTP servers from your account in this part of the dashboard.
Just click the Delete link next to the server to remove it.
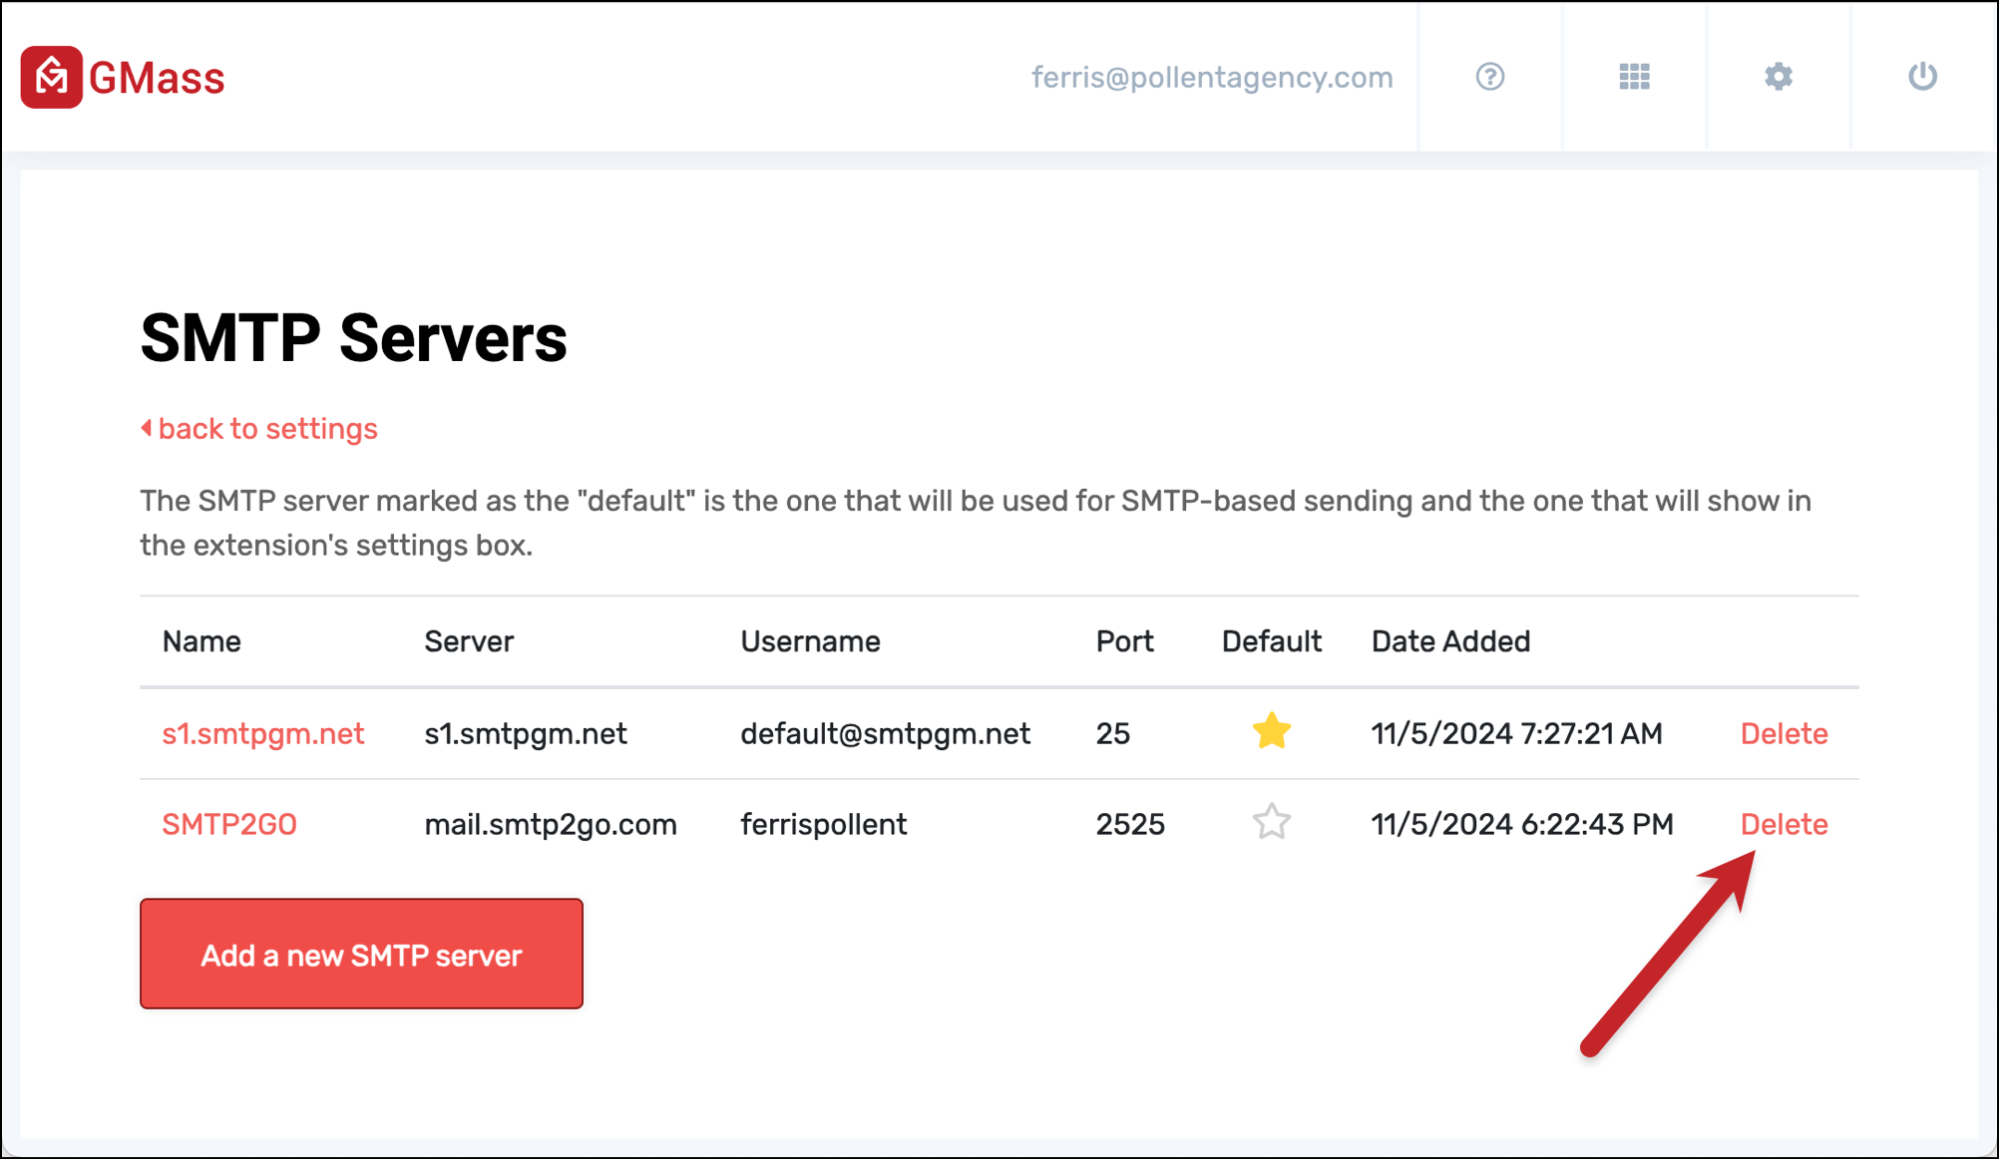
You’ll get a confirmation message to make sure you actually want to delete the server from your account before it’s removed.
Getting Started with GMass
The ability to add multiple SMTP servers to your account is just one of the many, many ways that GMass makes it easy, simple, and smooth to send high-volume campaigns in Gmail.
Our SMTP integrations that enable you to break Gmail’s limits are just one of the many, many reasons why 300,000+ people love using GMass — and why we have an average of 4.8/5 stars across 10,000+ reviews.
If you aren’t a GMass user yet, you can get started by downloading the Chrome extension.
You’ll be up and running with a free trial in a matter of minutes.
And once you subscribe to a plan, you’ll be able to connect as many SMTP servers as you want to send virtually unlimited emails.
Email marketing. Cold email. Mail merge. Avoid the spam folder. Easy to learn and use. All inside Gmail.
TRY GMASS FOR FREE
Download Chrome extension - 30 second install!
No credit card required

